ENGLISH - 6 7 - ENGLISH
The product may lose its properties after heavy impacts or
impacts that result in damages to the product. In such cases, the
product must be replaced. SCOTT shall not be liable for damages
relating to the use of products which should have been replaced.
• VI. INSTRUCTIONS FOR SIZING, FIT
Please bear in mind that a trial of the product before purchase is
the best way to find the correct size, which should be chosen from
the manufacturer’s size chart. SCOTT Sports SA shall not accept
any complaints arising from the use of an incorrectly fitted product.
Your ski-binding-boot system must be imperatively assembled,
adjusted, inspected, maintained, and repaired in accordance with
the standards in force within the ski industry. The best way to
ensure this, is by referring to an authorized dealer before the start
of every season and every 15/20 ski days.
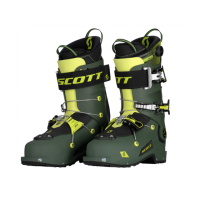
A. CHOOSING THE CORRECT SIZE
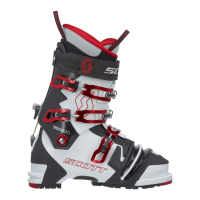
SCOTT boots are offered in a variety of sizes, making it easy for
you to find the one that fits just right. If possible, try on different
sizes and choose the size that feels most comfortable on your feet.
If you cannot adjust your boot so that it fits properly, then please
choose another size or another model. Your SCOTT dealer will
gladly help you.
B. ENTRY/EXIT
According to the shape of your foot, you will probably have a pref
-
erence between one of two ways to enter/exit the SCOTT boots:
• FOR BOOT ENTRY OR EXIT WITH THE LINER IN THE SHELL, it’s easy
with the cuff in “walk” mode. Once all buckles and cables are
opened, these automatically hinge out of the way allowing a
wide opening of the tongue for an easy entry. With the liner in
the shell, and the cuff in “walk” position (mechanism up), hinge
the tongue forward and step into the boot. For inner liners with
laces or BOA system : before you step into the boot, be sure that
the laces or BOA system is loose.
• FOR BOOT ENTRY WITH THE LINER ON YOUR FOOT, first open the
laces or BOA system (if available) and put on the liner. Open all
buckles, place the cuff in “walk” mode, and hinge the tongue
forward. Toe first, step into the shell.
• NOTE : before closing the buckles, always check that the tongue
is positioned under the front flaps of the cuff.
C. ADDITIONAL ADJUSTMENTS
All SCOTT boots buckles have a threaded micro-adjustment, as
well as a larger adjustment afforded by its toothed buckle catch.
D. ADJUSTING THE BUCKLES FOR DOWNHILL SKIING
• FOOT ADJUSTMENT : Make sure that the foot is all the way back
in the boot and the heel securely in the heel pocket. Using the
lower shell buckles, choose a tooth that snugs the boot com
-
fortably around the foot. Turn the buckles clockwise (tighten) or
counter-clockwise (loosen) for fine adjustment.
• CUFF ADJUSTMENT : Tighten the buckles and / or the strap / buck-
le system. Flex your leg back and forth a few times to see if fur-
ther adjustments are needed.
• NOTE : Some skiers prefer to first snug down the strap/buckle
system, then adjust the buckles. By tightening the strap/buckle
system first, it results easier to close the buckles.
Please ensure your boots’ buckles are sufficiently closed before
skiing.
E. ADJUSTING THE BUCKLES FOR WALKING
Open completely the cuff buckle(s) and/or the strap / buckle sys
-
tem using the lever locking system. Move the levers forward until
you hear a locking “click”.
F. ADJUSTING WALKING/SKIING MODES
SCOTT boots have a locked forward lean position for downhill ski
-
ing and a hinge freely position for walking and climbing.
• FOR WALKING, pull up the mechanism and open the cuff buckles
and loosen the power strap as described above.
• FOR DOWNHILL SKIING, move the mechanism to the ski position
(mechanism down), close the buckles and the strap/buckle sys
-
tem as described above.
• NOTE : Please ensure the boots are changed from “walk” mode
to “ski” mode before skiing.
G. CHANGING SOLES (SCOTT FREEGUIDE CARBON | SB1901 only)
To change your sole set, SCOTT recommends you contact a
trained ski shop technician. A #3 pozidriv screwdriver will be
needed. First remove the sole’s fixing bolts, then remove the sole
by lifting the toe first. Once your soles are off the shells, insert the
new sole set, starting from back (hill). Holding firmly the front
 Loading...