MK 11 rev 1.1 2006 2 / 2
MAINTENANCE PROCEDURE FOR MK 11 1
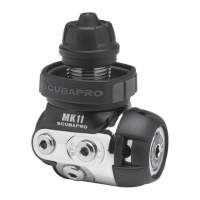
ST
STAGE
WARNING: this maintenance procedure is only for appointed Scubapro technicians
that followed a complete course on equipment repair and in no case can replace a
technical repair course delivered by an appointed SCUBAPRO/ UWATEC appointed
staff.
Tools needed:
1. universal tool P/N 43.040.000
2. socket P/N 43.191.107
3. socket extension P/N 43.300.009
4. field handle tool P/N 43.300.127
5. o-ring extractor P/N 43.300.107
6. filter retainer mounting tool P/N 43.026.101
7. balance chamber tool P/N 43.300.240
8. torque wrench P/N 43.300.988
9. 2
nd
stage adjustment tool P/N 41.043.000
10. 1
st
stage chamber tool P/N 43.300.999
11. Scubapro blow gun P/N 40.978.000
12. interstage pressure gauge
13. 4 mm Allen key
14. 6 mm Allen key
15. screwdriver
16. work bench with vice
DISASSEMBLY
1. Unscrew all hoses from the 1
st
stage with the universal tool being careful not to dam-
age the chrome plating. Remove all the plugs from the 1
st
stage with the 4 mm Allen
key or with the universal tool. Remove the o rings from the plugs with the o ring ex-
tractor tool and inspect.
2. Remove the inlet protector.
3. Remove carefully the 2 rubber bumpers with the screwdriver.
4. Take the field handle tool and use preferably for strength the bigger 7/16" thread and
screw it in one of the HP ports.
For the INT version: Remove the yoke screw, then firmly hold the field handle tool
fixed to the body of the 1
st
stage in the vice and use the socket and socket extension
to carefully remove the yoke retainer. Remove the yoke and saddle. Remove the fil-
ter retainer with the screwdriver, the filter and the o ring with the o ring remover. Put
aside the o ring (01.050.138) for inspection.