Do you have a question about the Sea Eagle Boats SE-8 and is the answer not in the manual?
Simple, reliable, compact Sea Eagle pipe valves. Insert cone-shaped pump nozzle to inflate.
Used on larger chambers for easier inflation. Outer cap must be fastened firmly. Ensure threads are not crossed and free of sand.
Included in startup packages for SE 6, 8, 9. Uses two-piece nozzle adapters for pipe or one-way valves.
Included in Fisherman's Dream/Daytrip packages. Uses three-piece adapters for pipe or one-way valves.
Works with a cigarette lighter plug. Star shaped valve set and deflation cap are not needed for Sea Eagle boats.
Moderate working pressure of 0.75 psi. Push thumb about 3/4" into hull. PolyKrylar hull is thick and resistant.
Inflate floor chambers first, then chamber 1, then 2, then 3. Use inflation monitor to gauge correct pressure.
Inflate floor chambers 1 & 3 to 60-75% of maximum pressure before inserting floorboards.
Place overlapping boards flat over floor, lift both, and insert into aluminum H-bar connector in an inverted V.
Put aluminum side struts into place. They should slide neatly. May need to let air out of chamber #3 for access.
If no motormount, inflate chamber 1, then 2 & 3. If motormount installed, proceed to next section before reinflating.
Boat should be about 75% inflated. Insert closure caps into tubular rod ends. MM-3 rods are bent inward, MM-2 are J-shaped.
Insert longer end of rods through top stern section grommets, shorter ends through bottom grommets.
For SE 6, use clevis pins and retainer rings. SE 8 & 9 have pop-up buttons. Attach wood block and clamps.
Comply with safety regulations. Have swimming ability. Never boat alone. Always wear PFDs (flotation cushions or life jackets).
Enroll in water safety courses offered by Power Squadron or Coast Guard Auxiliary for comprehensive safety knowledge.
Sit in the bow on the blue SED seat for a low rowing position. Place oars through oarlocks and row in unison.
Boats perform well with small outboard motors. Be aware of wind/water conditions. Avoid fighting strong currents with small engines.
Wipe down boat to prevent mildew. Remove motormount knurled nuts and brackets. Store motormount block and hardware.
Unscrew deluxe one-way valves on chambers 1, 2, & 3. Remove motormount by depressing push buttons. Pull tubes out of grommets.
Remove side struts from floorboards, then lift the boards out of the hull.
After opening valves, allow boat to deflate for a minute or two. Flip boat over, fold left side, then right side over left.
Store boat inflated or deflated in a cool, dry spot. Protect from elements if stored outside.
Avoid using below 30°F (-1°C) as PVC can become brittle. No harm if stored in cold, but avoid impact.
Use 3M Vinyl Cleaner for stains and 303 Protectorant for UV resistance to maintain hull material.
Check for temperature variations first. If none, use visual inspection, listening, or soapy water to find leaks.
Inspect for crossed threads, sand in diaphragm/threads/O-ring, or overtightening causing valve base depression.
Apply glue to small punctures (<1/8"), let dry 12 hours. Inflate compartment 3/4 full for temporary repair.
Use a patch overlapping area by 1/2". Apply adhesive, let tacky, press firmly. Allow 12 hours for drying.
Call office for assistance with large/difficult repairs. Minimum charge applies plus freight costs.
| Brand | Sea Eagle Boats |
|---|---|
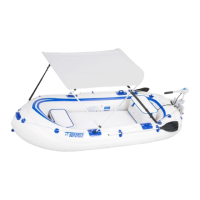
| Model | SE-8 |
| Category | Boat |
| Language | English |