INSTALLATION
MANUAL
Product: Document #: Rev: Page:
SEAKEEPER 6 90402 1 20 of 20
Section 1: MECHANICAL INSTALLATION
9) Repeat above step for remaining 7 sides of the saddles.
10) When gaps have been completely filled, clean off excess adhesive, remove plugs, and remove
masking tape.
11) Allow adhesive to cure per manufacturer’s recommendations. Follow adhesive guidelines for
curing time versus temperature prior to removing the fixture.
12) Bonding of Seakeeper saddles onto the hull is now complete. Remove installation fixture.
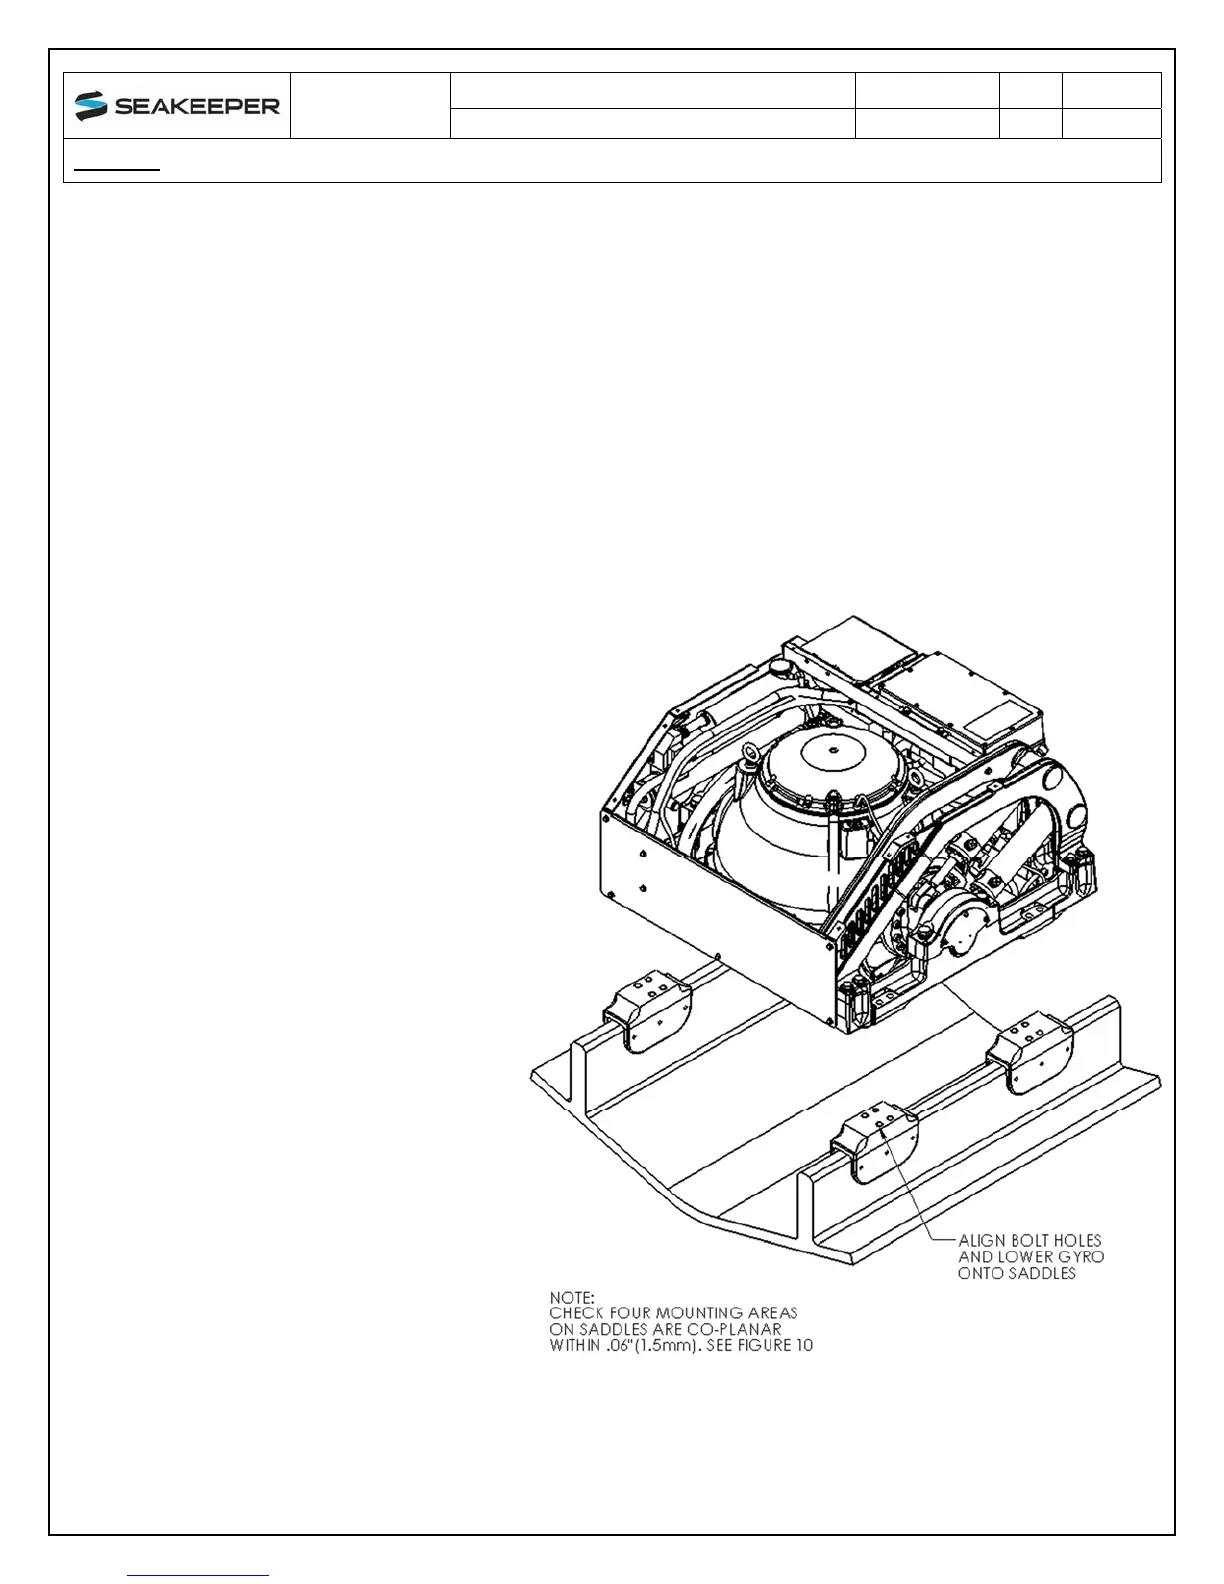
1.6.5 Installation of Seakeeper
1) The four areas where the feet of
the Seakeeper will rest should
be coplanar to within .06”
(1.5mm). See Figure 10.
2) Rig Seakeeper for lifting and
lower into position onto top
surface of four saddles.
3) Apply a small bead
(approximately 4mm wide) of
sealant or caulk to the mating
surfaces between the saddles
and the Seakeeper foundation.
Adjust position of Seakeeper until
alignment is achieved for the 16
fasteners that will attach
Seakeeper foundation frame to
saddles.
4) Install Seakeeper supplied
M12X1.75 – 70mmfasteners–
apply a moderate coat of
removable thread locker to the
threads of each bolt and include a
small bead of sealant under each
washer before installation.
5) Torque all fasteners to 65 ft-lbs (88 N-m).
6) Proceed to electrical and cooling portion of the installation.
 Loading...
