1 Introduction
1.1 Seal One
®
USB
Thank you for choosing Seal One
®
USB. In order to familiarise
yourself with the device, please read this user manual carefully
before using Seal One
®
USB.
1.2 Signing transactions with Seal One
®
USB
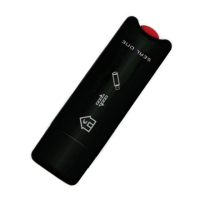
Seal One
®
USB combines maximum security with ease of use. Designed
to digitally sign transactions based on digital signatures (e.g., as part of
internet online banking), the device can simply be plugged in a USB port
of your computer. Transactions, which need to be signed, are displayed
on the Seal One
®
USB.
For your own safety, please verify the transaction shown on the
Seal One® USB display before you sign it by pressing the button.
Seal One
®
USB is ready with out of the box feature (without any
DGGLWLRQDOFRQÛJXUDWLRQRUVRIWZDUHLQVWDOODWLRQ,WSURYLGHVFRPSUH-
hensive protection against any trojan, virus and phishing attack when
signing transactions.
Seal One
®
USB is compatible with all major operating systems, including
numerous Microsoft
®
Windows, macOS
®
and Linux versions.
A full list of supported operating systems can be found at:
www.seal-one.com/OS.
1.3 Seal One
®
USB functionality
Seal One
®
USB is easy to use, convenient and secure. After activation
with an acceptance partner, the process is completed in 3 simple steps:
1. Connect: Enter your transaction data in the partner application as
usual and connect the Seal One
®
USB to a USB port of your laptop/
PC.
2. Verify: Verify transaction data on the Seal One
®
USB.
3. Approve: Approve the transaction by pushing the button.
 Loading...