7. ASSEMBLY
GSS150819SL Issue: 1 - 30/08/12
7.1 ASSEMBLE THE REAR WALL PANELS
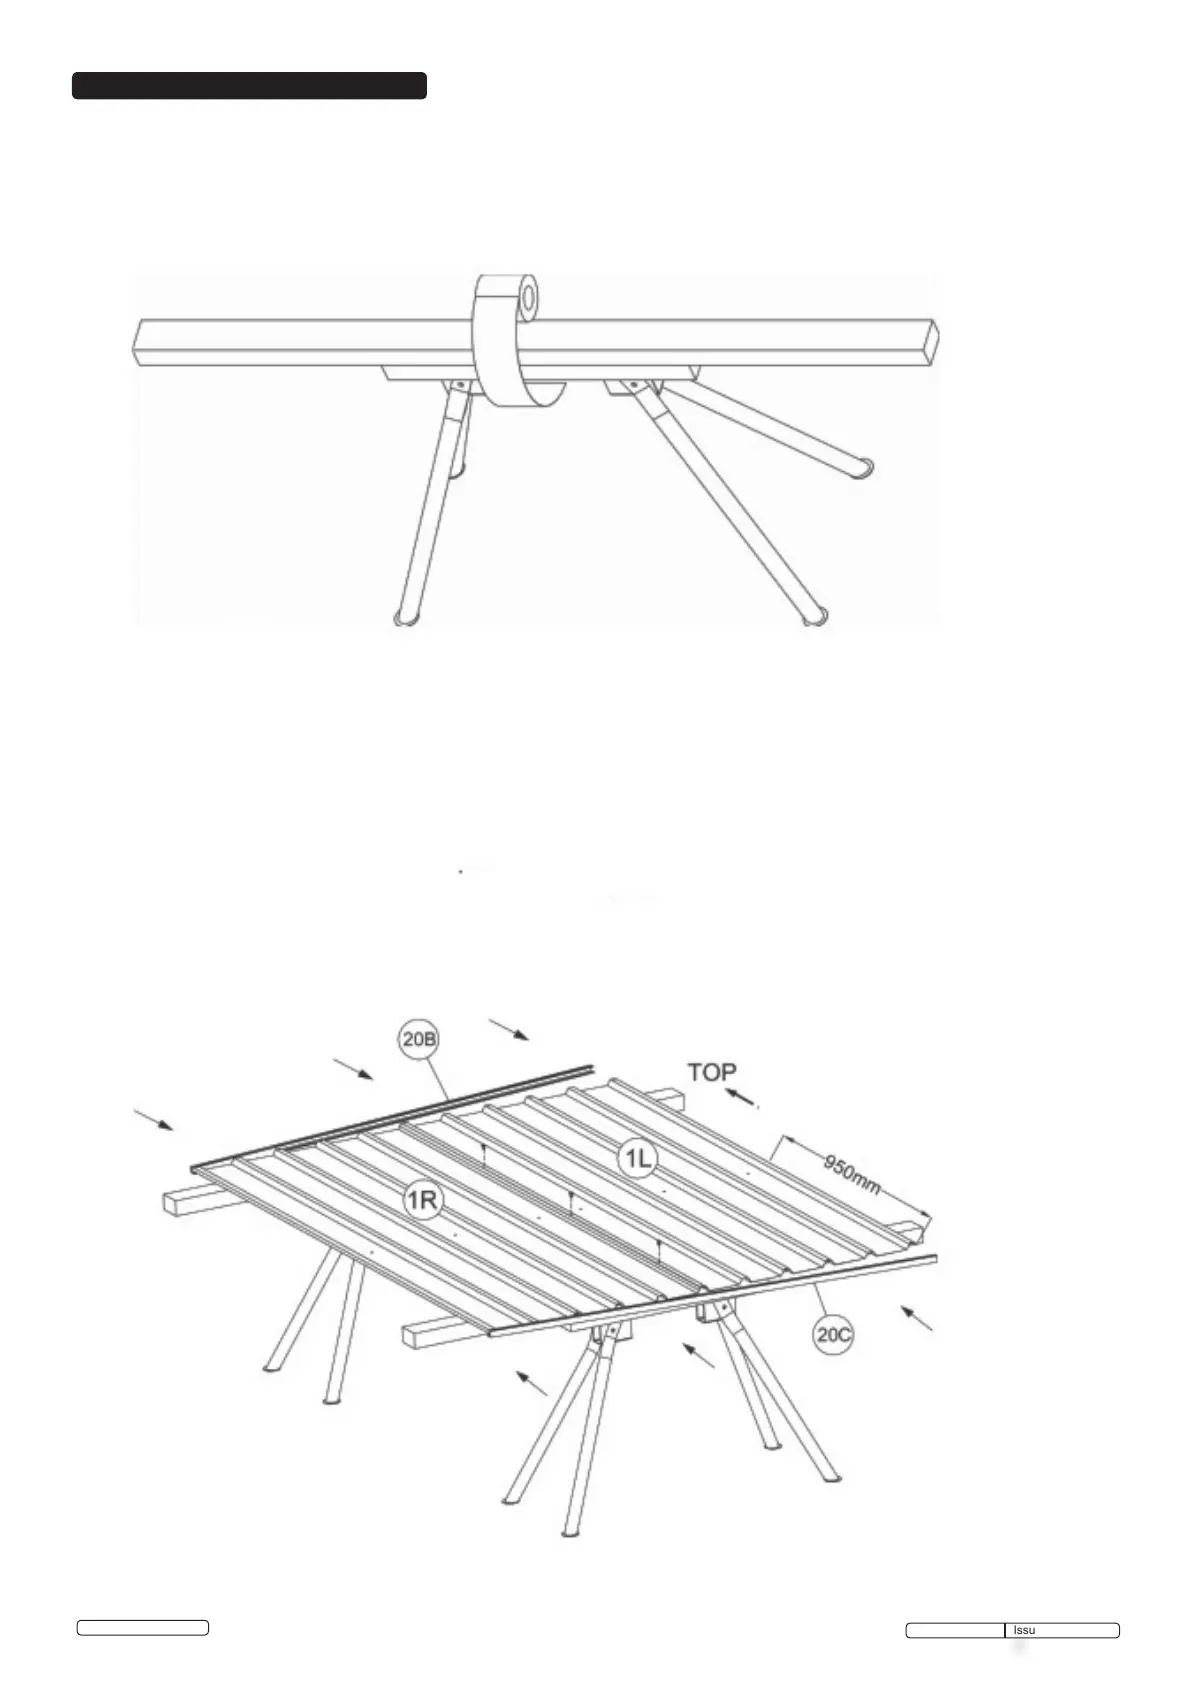
7.1.1 Youwillnditeasiertoassembletheshedusingtrestles,withtimberstuddingofequalorgreaterpanel
length. Trestles are available separately from your Jack Sealey Dealership. Attach the studding to trestles
withequaloverhangusingnyloncabletiesorsimilar“safe”method.
7.1.2 Place panel 1R and 1L on your work table and join them together with the 10mm long self tapping screws.
See the pre-punched holes and diagram below.
7.1.3Fittopandbottomchannels20Band20Ctopanelsbyrstlyslidingandnallytappingintoplaceasindicated
byarrowsinthediagramsNotethatthesmallerangeonthechannelsshouldalwaysbeadjacenttotheout
side face of the panel; this prevents rainwater entering the compartment of the shed. The outside face is the
top face in the diagram below.
© Jack Sealey Limited
Original Language Version


 To Next Page
 Loading...