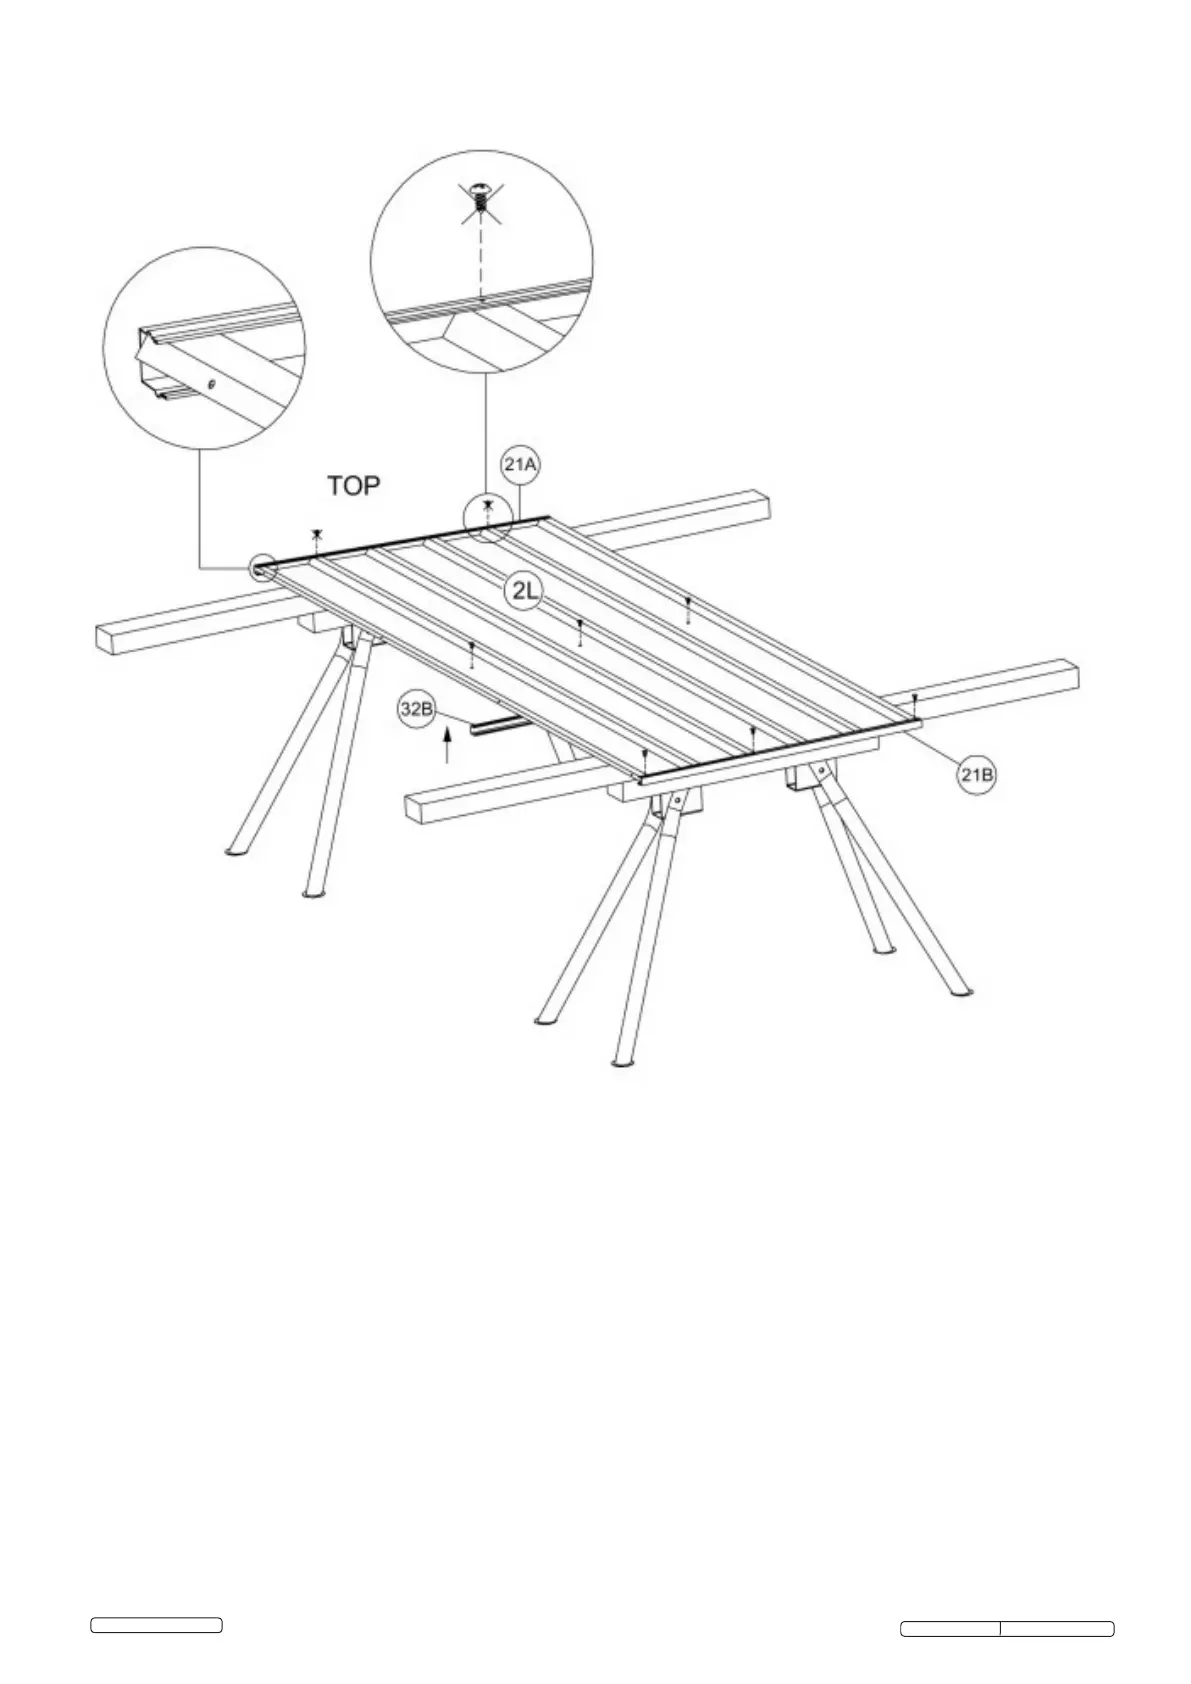
7.2.1 Place panel 2L on your work table.
7.2.2 Fittopandbottomchannels21Aand21Btopanelbyrstlyslidingandnallytappingintoplaceaspreviously
similarpanelbuild.Noteagainthatthesmallerangeonthechannelsshouldalwaysbeadjacenttothe
outside face of the panel. The outside face is the top face in the diagram.
7.2.3 Fit item 32B the mid height wall channel to the panel and position it by the pre-punched holes and 10mm
longselftappingscrews.Notethischannelisttedwiththeatfaceuppermost,ie.nearestthe“top”when
assembling the shed.
7.2.4 Withselftappingscrewsxitem21Btobottomedge,butdonotscrewxitem21Atotopedgeatthisstage.
Seethosexingsmarkedwithasterisk*.
7.2 ASSEMBLE THE END WALL PANEL.
GSS150819SL Issue: 1 - 30/08/12
© Jack Sealey Limited
Original Language Version
*
*



 To Next Page