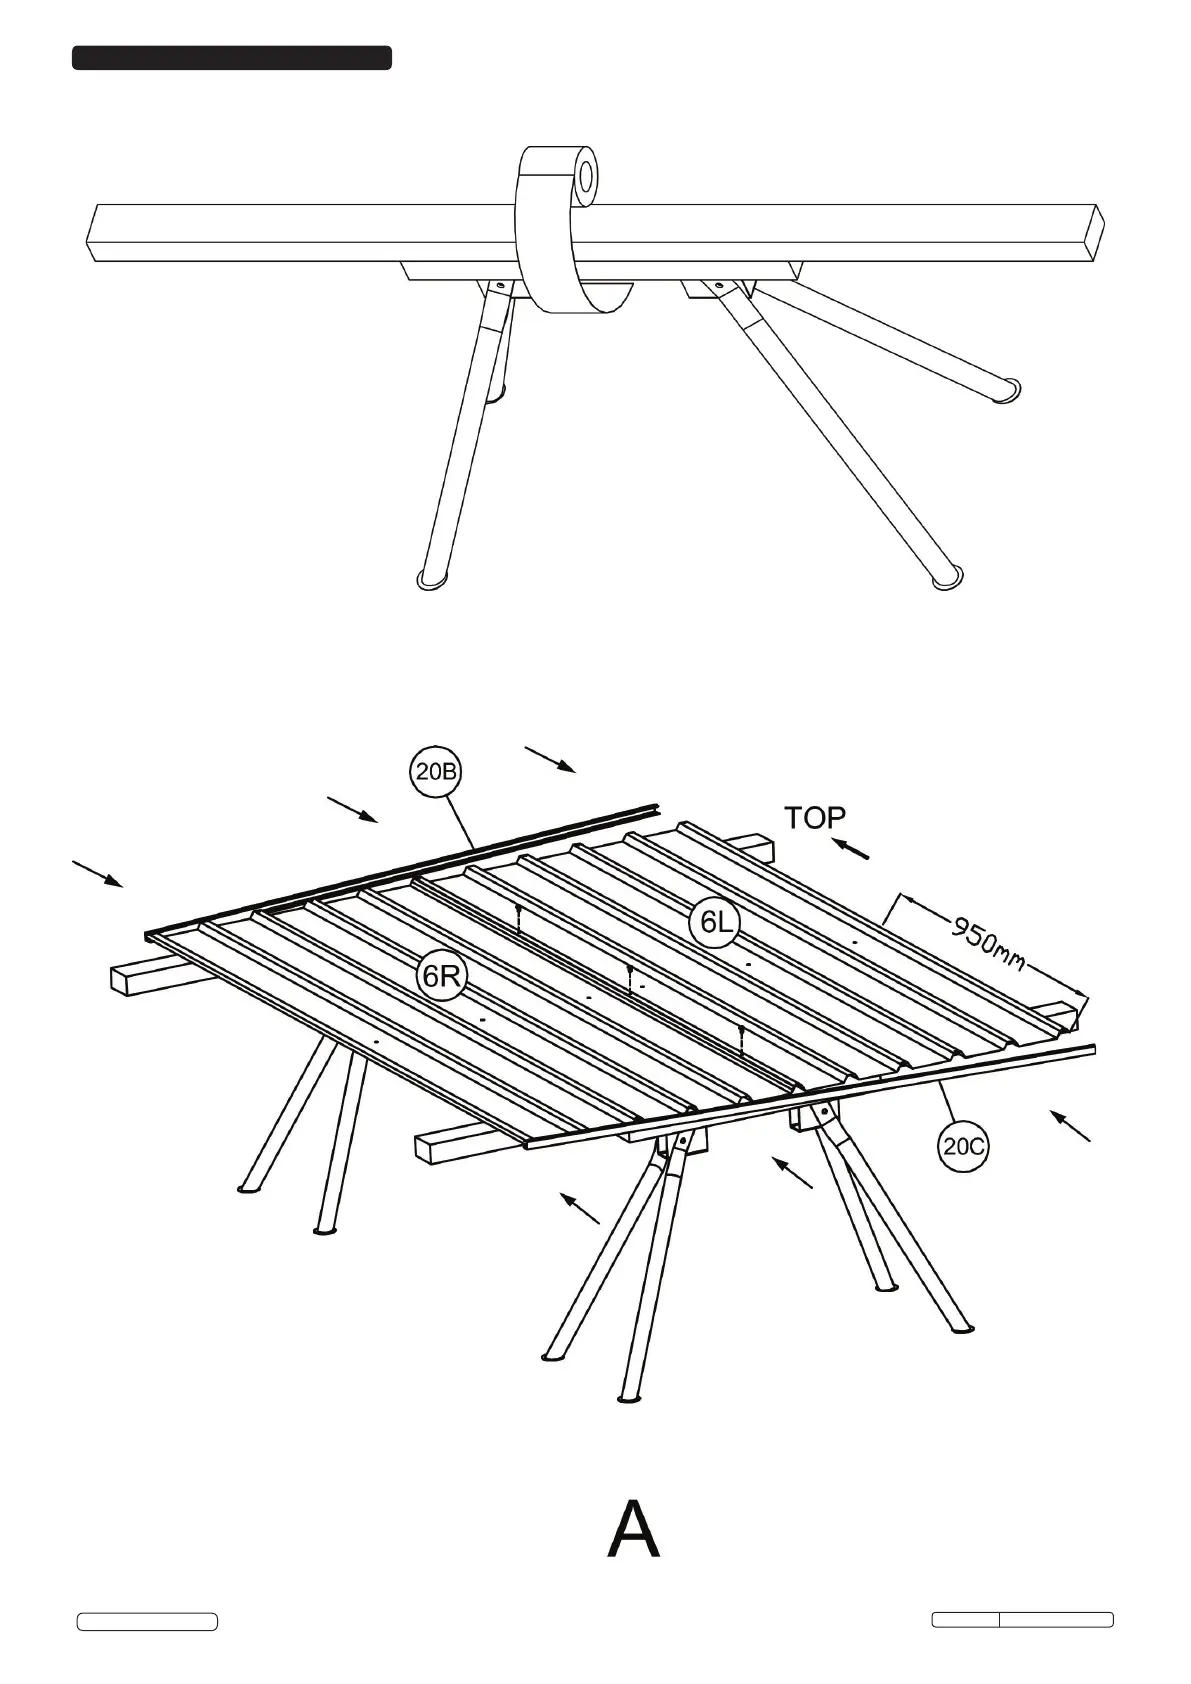
8.1. Assemble rear wall panels.
You will nd it easier to assemble the shed using sawhorses with timber studs attached
(timber needs to be the same length as the shed (1.5m) or alternatively, a trestle table.
8.1.1. Place 6R and 6L sheeting on the work table and join together with the self tapping screws as per
the diagram.
8.1.2. Now t 20B top channel and 20C bottom channel to the sheeting by tapping it in (diagram A) or
sliding it in. (diagram B) Note that the small lip of the channel is always facing out. This is to ensure
that rain water cannot build up inside the shed.
8. ASSEMBLY
Original Language Version
GSS1515G Issue: 1 - 26/09/14
© Jack Sealey Limited


 To Next Page