11
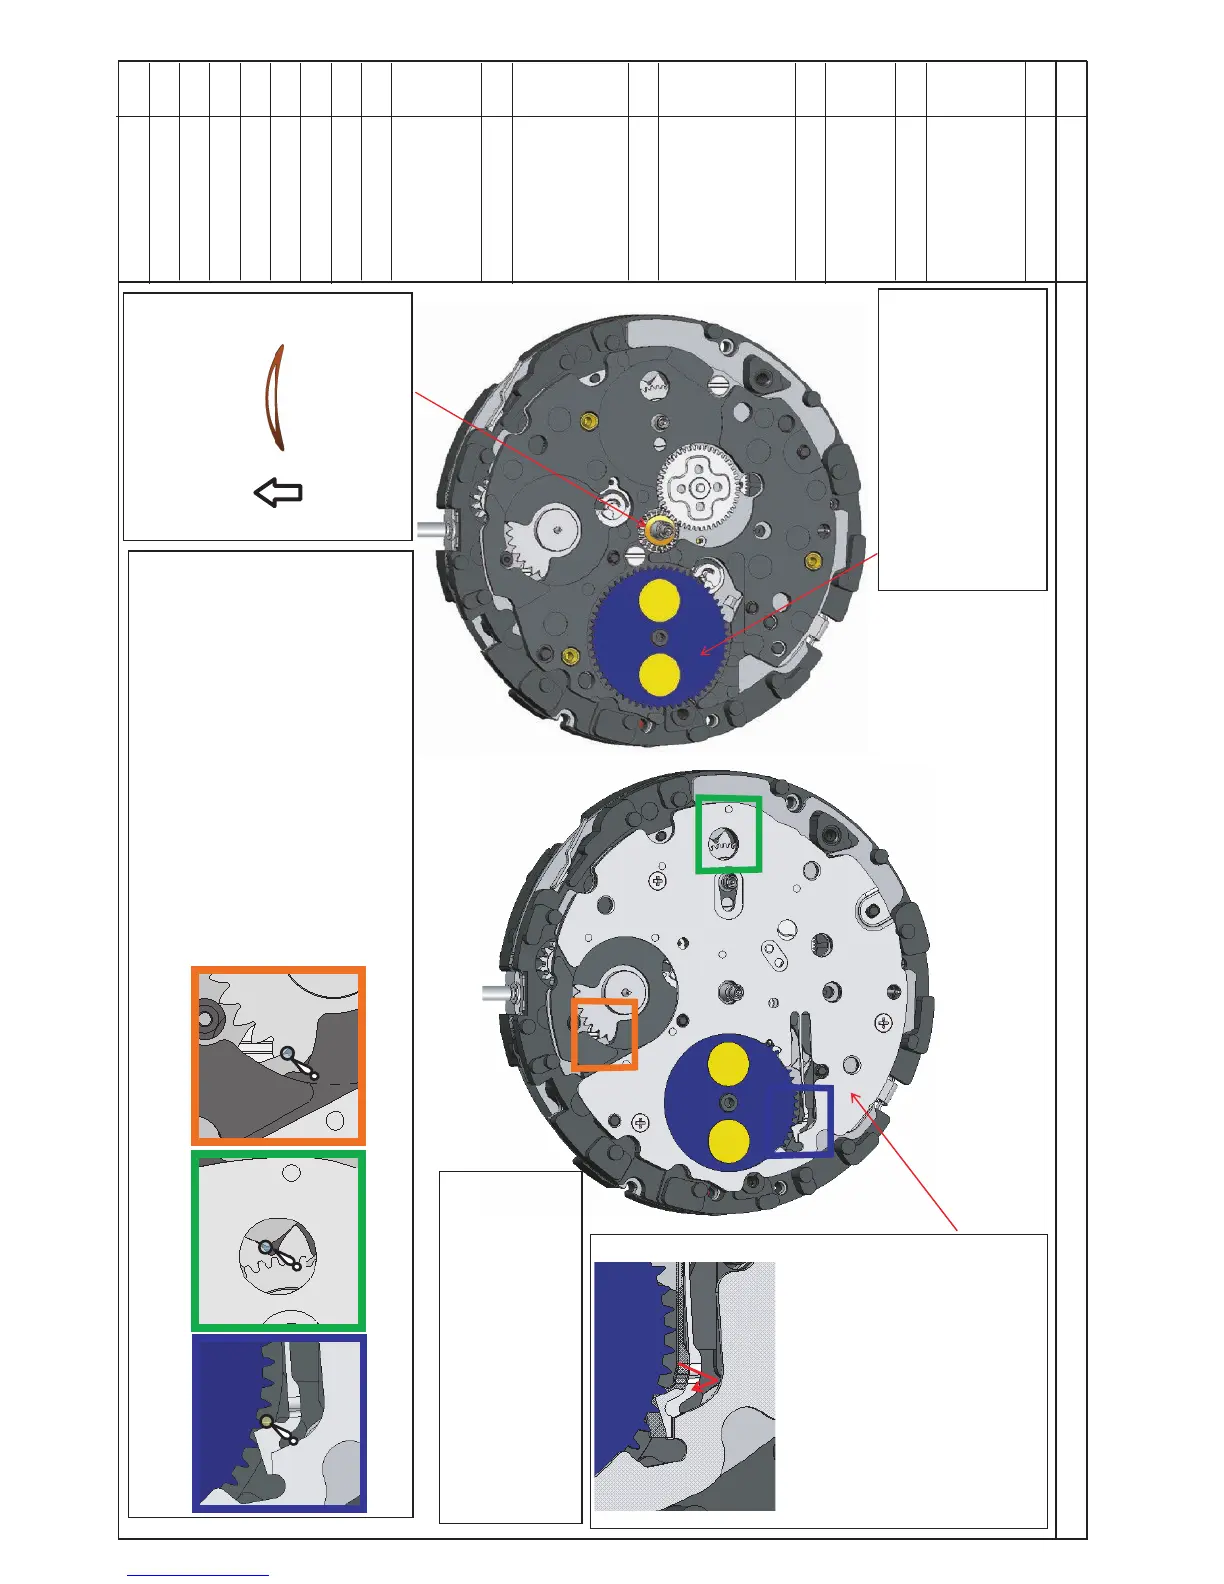
Mount the Moon
phase indicator
wheel.
Mount the Dial
washer.
10
9
Mount the calendar
train cover.
Set and hook the
jumper to the Moon
phase indicator
wheel.
9
Fix the calendar
8
train cover by
tightening the
calendar train
bridge screw.
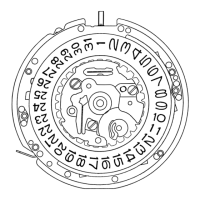
<11>
Mount the Moon phase
indicator wheel.
<10>
Mount the Dial washer.
Make sure the dial washer
◆
is put in the correct direction.
(See the Fig.63 below.)
When mounting the dial
◆
washer, handle it with
care so as not to bend
or deform it.
<9>
Mount the calendar train
cover.
<How to set and hook the jumper
of the Moon phase indicator
◆
Firmly press down the point
of engagement 451# first.
Hook the jumper before
pressing down the engage-
ment 452#. Then, press down
the point of engagement 452#.
◆
Take care so as not to deform
the jumper of the Calendar
wheel>
train wheel.
<8>
Fix the Calendar train cover by
tightening the Calendar train bridge
screw (453#, 454#, 457#.)
◆
When handling the Moon
phase indicator wheel, take
care so as not to damage the
printed surface of the Moon
phase indicator.
Target value)
lower than 200gcmTightening torque:
Lubricate the
jumpers.
Lubricate the jumpers.
Lubricate the jumper of the Date driving wheel
◆
Type of oil: AO-3
Lubricate the jumper of the Day driving wheel
(See Fig.64 shown as right)
◆
Type of oil: AO-3
(See Fig.65 shown as right)
Lubricate the jumper of the Moon phase
Type of oil: S-6
(See Fig.66 shown as right)
indicator driving wheel
◆
(For preventing the abrasion of the parts)
(For preventing the abrasion of the parts)
Fig.61
Fig.62
Fig.63
41/51
Fig.63
Fig.64
Fig.65
Fig.66
3
2
1
1
2
3
452#
454#
451#
457#
453#
PROCESS
No.
 Loading...