-
30
-
Chapter 12. Maintenance
12-1. Periodic inspection
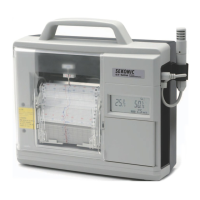
This instrument is a microprocessor-based hygrothermo-
graph. To maintain the optimal performance, do the following
inspections occasionally, and replace the parts, if necessary.
①
Check if screen display and re cording are performed normal-
ly. If any trouble is found, see Chapter 14, Troubleshooting.
②
Check if traces are made clearly. See “Setting (Replacing)
recording pen” in Chapter 3, if necessary.
③
Check if the chart paper is normally fed without being
caught inside.
If any trouble is found, see Chapter 14, Troubleshooting.
④
Check if the unused chart paper remains suciently
inside the instrument. When the remainder becomes 1
meter, a red END mark will appear. To replace the chart
paper, see “Setting (Replacing) chart paper” in Chapter 3.
⑤
Check if the battery life indicator is blinking on the LCD
screen.
To replace the batteries, see Inserting (Replacing) dry
batteries in Chapter 3.
* After replacing the chart cassette with a new one,
be
sure to execute the pen position adjustment.
Reference
Sensor check
For your information, we recommend an annual
inspection of the instrument when used at normal
temperature and in normal humidity, or semiannual
inspection when used in high humidity. If humidity ac-
curacy does not come to satisfy the specification, the
sensor (assembly) should be replaced. Please con-
tact our distributor for the replacement (to be paid).
12-3. Replacing the clock backup battery
An internal backup battery is provided for the clock
built into the ST-50M.
The lifespan of the clock backup battery is about five
years, but it can be more or less than this depending
on the usage conditions.
The clock backup battery should be replaced when
error 802 or 803 occurs.
Replacement of the clock backup is treated as repair
work (fee charged).
Please contact us or your dealer.
12-2. Replacement of sensor (assembly)
①
Remove the sensor cord clamp.
②
Disconnect the connector and replace the sensor as-
sembly with a new one. (Sensor assembly includes sen-
sor, cord and connector.)
CAUTION
When replacing the sensor assembly, be sure to turn
OFF (
【
】
) the power switch.
 Loading...

