SELKIRK CORPORATION
5030 Corporate Exchange Blvd. SE,
Grand Rapids, MI 49512
1.800.992.VENT (8368)
SELKIRK CANADA
375 Green Road
Stoney Creek, ON L8E 4A5
1.888.SELKIRK(735.5475)
©2016 ROOF BRACE KIT All Rights Reserved 0015145 03/30/2016 Printed in the United States
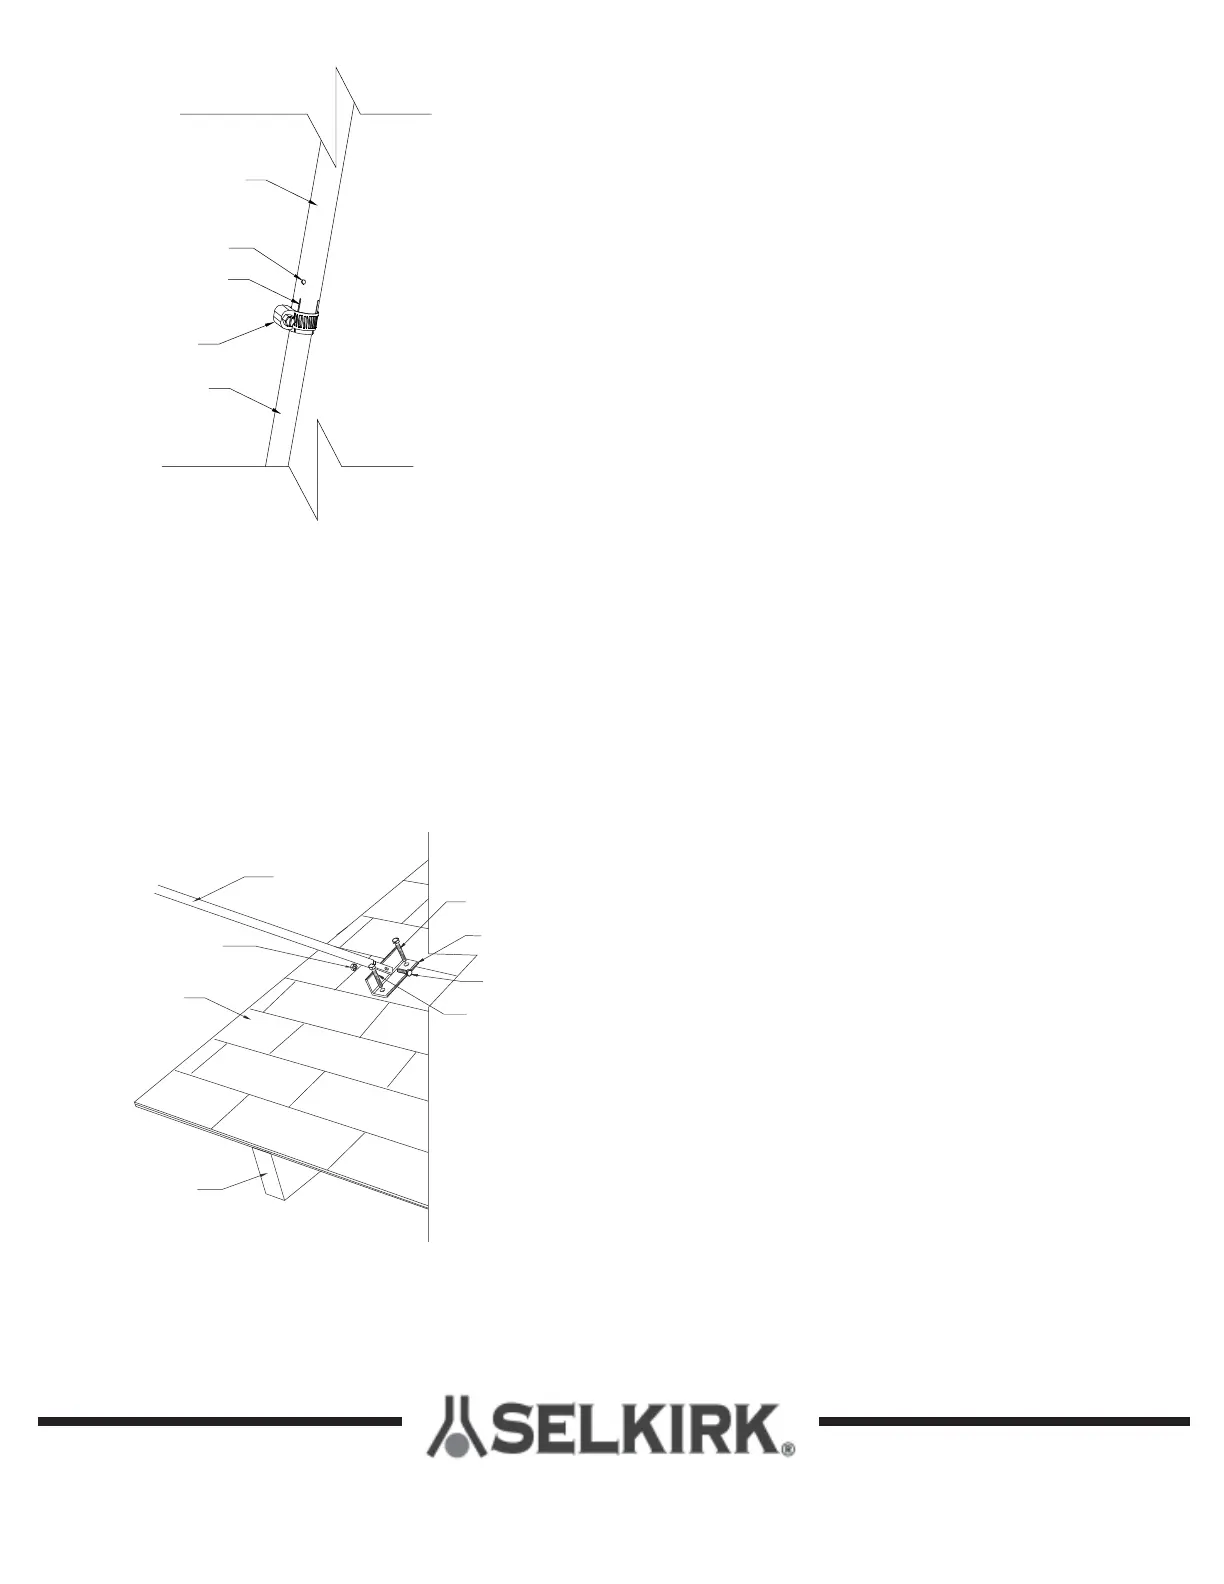
Smaller Diameter
Telescoping Leg
Cut Section of Larger
Telescoping Leg
Larger Diameter
Telescoping Leg
Pilot Hole for
Securing Screw
Hose Clamp
FIG 3
NOTE: Do periodic inspections of all fasteners including the hose
clamps as high winds can cause the chimney system above the roof
to vibrate and in time loosen some of the fasteners.
Adjust the Telescoping Tubes as needed by loosening the hose
clamp which secures the inner tube to the outer tube, extending
to the needed length and retightening the hose clamp. Once in
its final position insert the securing screw through the pilot hole
(see Fig. 3).
Remove the nails which temporarily are holding the Angle
Brackets to the roof. Secure the Angle Brackets to the roof structure
using two (2) 1/4 x 2” Lag Bolts for each Bracket.
Check all required dimensions and angles, adjust if necessary.
Finish tightening all bolts and nuts.
Clean Tubing with solvent.
Paint with rust preventative, primer and outdoor paint.
FIG 4 - Securing Angle Bracket
Smaller Diameter
Telescoping
Leg
2” Lag Screw
Flanged Nut
Roof Shingles
Rafter or Framing
Structure
Angle Bracket
1” Bolt
2” Lag Screw
8.
9.
10.
11.
12.
13.
 Loading...