14
142 x 208 mm
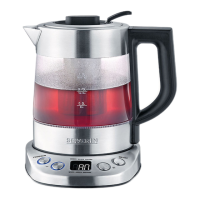
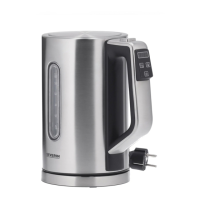
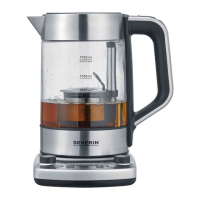
Control panel
ON/OFF button
Pushing this button turns the appliance on or off.
‘Program’ button
This button allows the selection of three different modes:
Press once:
Tea programme: The tea programme selected is shown
on the display (from 1-5), with an illuminated dot symbol
showing the type of tea selected.
Press twice:
Preparing tea manually: the temperature selected is shown
on the display.
Press three times:
Preparing tea manually: the steeping time selected is
shown on the display (01-15 minutes).
General remarks
∙ Connect the appliance to the mains. A beep signal is
heard and the current water temperature in the container
(≥ 20 °C) is shown in the display. The appliance is in
stand-by mode and ready for use. The display goes out
after 15 minutes of non-use.
∙ If the container is not placed on its base, the display
shows the error code E.
∙ When selecting temperatures below 100 °C, the
heating process takes place in steps, to ensure that the
temperature selected is not exceeded.
∙ If the current temperature inside the container exceeds
the temperature selected, the appliance cannot be
started; in this case, a sequence of three beep signals is
heard.
∙ Temperatures below 40 °C cannot be selected.
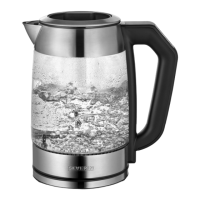
Heating water
∙ Remove the water container from its base; then turn the
lid insert anti-clockwise (UNLOCK) and take it off.
∙ Fill the container with water to the desired level,
observing the Min (0.5 l) and Max (1.0 l for heating
water) markings.
∙ Replace the lid insert and turn clockwise (LOCK) until it
is heard locking into place.
∙ Place the container back on its base.
∙ Insert the plug into a suitable wall socket. A beep signal
is heard and the display shows C, followed by the
current water temperature inside the container.
∙ Press the ‘Program’ button twice. The display shows
80. Use the +/– buttons to set the desired temperature,
and then conrm by pressing the ON/OFF button, which
lights up red.
∙ The kettle heats the water to the selected temperature.
∙ Once the pre-set temperature has been reached, the
heating element switches off, three beep signals are
heard and the current temperature is shown on the
display.
∙ The appliance goes into keep-warm mode. The
‘Program’ button lights up blue.
∙ The boiling process may be interrupted by pressing the
ON/OFF button.
∙ To pour hot water, remove the container from its base.
∙ To prevent hot steam from being emitted, ensure that
the lid remains closed while pouring out the water.
∙ Remove the plug from the wall outlet after use.
∙ Do not leave any residual water in the container.
Making tea – general remarks
Quick-Boil & Tea function
When the water container is placed on the base and the
ON/OFF button is pressed, the water is heated to
100 °C without the need to set a temperature – the
appliance is now in herbal-tea mode.
Pressing the ON/OFF button returns the appliance to
stand-by mode.
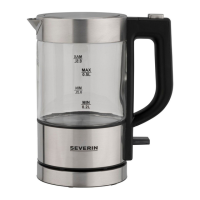
Preparing the appliance
∙ Remove the water container from its base, turn the lid
insert anti-clockwise (UNLOCK) and take it off. Take out
the tea lter.
∙ Fill the container with water to the desired level,
observing the Min (0.5 l) and Max (0.75 l for making tea)
markings. Replace the lid insert.
∙ Put the required amount of tea into the tea lter.
∙ Select a programme or use the manual mode to heat the
water.
Fitting the tea lter
∙ Once the water is heated and three beep signals are
heard, release the lid insert by turning it anti-clockwise,
and remove it. Caution: Take special care, as hot
steam may be emitted! If necessary, use oven
gloves.
∙ Fit the tea lter in the container, observing the recess in
the container lid; the tea lter handle must be aligned
with the water container handle.
∙ Replace the lid insert and allow the tea to steep as
desired, using either a programme or the manual mode.
Remove the lter and place it carefully on a heat-
resistant surface.
∙ Replace the insert in the container lid and close it by
turning clockwise.
∙ Remove the plug from the wall outlet after use.
 Loading...