15
142 x 208 mm
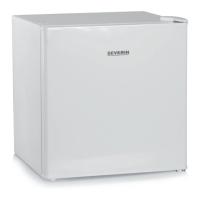
Set-up dimensions Ventilation
The heated air
around the rear of
the unit must be able
to circulate freely.
Therefore, ensure that
the air circulation is
not obstructed.
Warning: Take special care that the ventilation
openings in the upper part of the rear panel are not
blocked or obstructed.
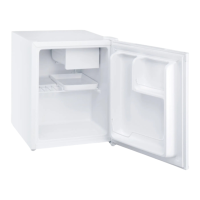
Temperature control
∙ The unit is activated by connecting it to the mains. It is
only switched off completely when the plug is removed
from the wall socket.
∙ The green mains indicator light shows that the unit is
connected to the mains.
∙ The temperature in the refrigerator cabinet can be
adjusted by setting the temperature control (0-5).
Turning the control clockwise will decrease the
temperature, while turning it anti-clockwise will increase
it.
∙ The temperature can be set within a 0 to 10°C range.
∙ The temperature in the cabinet largely depends on
factors such as the ambient temperature, the setting and
the number of bottles stored.
∙ We recommend using a thermometer to check the actual
temperature inside the cabinet and make adjustments
as necessary.
∙ Always ensure that the door is properly closed and that
the seal is not obstructed by bottles stored inside the
cabinet.
∙ Following a power interruption, or if the unit has been
switched off on purpose, it may take 3 to 5 minutes
before it switches on again.
∙ Note: With the temperature control in position ‘0’,
only the compressor is switched off, while the fan is
still running.
Interior lighting
∙ The interior light can be switched on by means of the
separate On/Off switch.
∙ Caution: Do not remove the cover of the interior LED
light. If there should be any malfunction, please contact
the customer service for assistance.
Cleaning and defrosting
During operation, you may notice a build-up of frost around
the integral evaporator sealed into the rear of the inside
cabinet. This layer of frost will start melting when the
compressor is not working. Through a system of hoses,
the melt-water drains into the collection tray below the
compressor, where it will be absorbed into the surrounding
air.
∙ The unit does not therefore require de-frosting, but only
proper cleaning.
∙ To enable the melt-water to drain freely, always ensure
that the channel and discharge opening in the cabinet
are free of any blockage.
∙ Any water collecting in the bottom should be removed.
∙ Always remove the plug from the wall socket before
cleaning.
∙ Do not pour water over or inside the unit.
∙ Do not use aggressive cleaning detergents or those
containing alcohol. Also, do not use electrical devices
such as steam cleaning devices for defrosting or
cleaning.
∙ For frequent cleaning we recommend the use of warm
water with some mild detergent.
∙ The cabinet should be cleaned once a month.
∙ Any accessories should be cleaned separately with soapy
water. Do not put them in a dishwasher.
∙ After cleaning, thoroughly clean all surfaces with fresh
water before wiping them completely dry. When re-
inserting the plug into the wall socket ensure that you
have dry hands.
∙ To save energy and to ensure optimum performance, the
compressor (at the rear) should be carefully cleaned at
least twice a year, with a brush or a vacuum cleaner.
Trouble-shooting
Certain typical sounds can be heard when the appliance is
switched on. These sounds are caused by:
∙ the electric
motor within
the compressor
assembly; during
compressor
start-up the sound
level will be slightly
higher for a short
time.
∙ the cooling agent owing through the circuit.
The following table lists possible malfunctions, their
probable causes and solutions. In the event of operational
problems, check rst whether a solution can be found