3
THREADING YOUR SEWING MACHINE
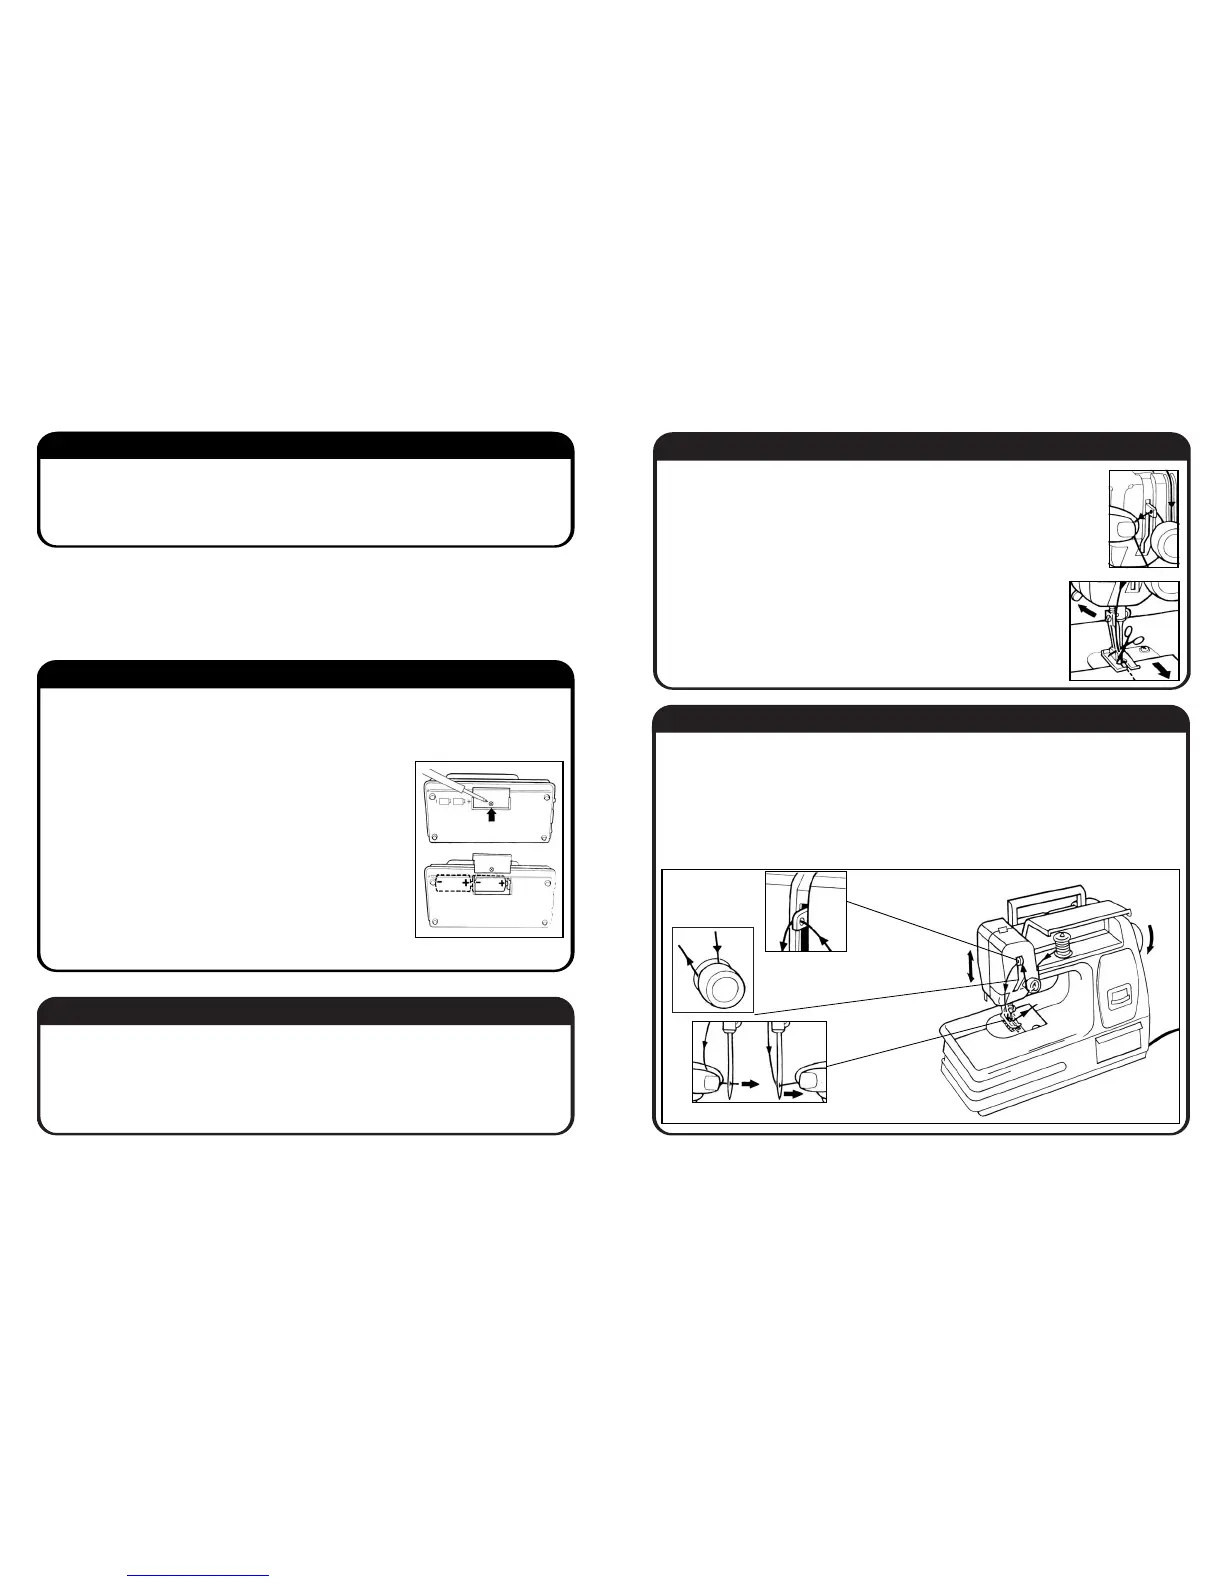
Use cotton or polyester thread in this machine when the thread supplied has run out. Lower the presser
foot using the presser foot lever. After placing the spool of thread in the spool compartment, pass
thread through the thread guide as shown in diagram E. (Make sure you place the thread between the
machine and the tension dial.) Raise the needle to its highest position by turning the hand wheel in the
direction of the arrow and thread the needle from left to right. Pass the thread under the presser foot,
between the forks and to the rear of the machine.
Diagram E
INSERTING THE BATTERIES
HOW TO SEW
2
PREPARATION
You should organize your supplies away from carpeting and upholstery on a suitable working area such
as a kitchen table. Always cover your work area with scrap paper to protect it. Please keep this sewing
machine out of the reach of very young children. Please read these instructions before using your new
sewing machine. Ask an adult to assist you.
We recommend the use of alkaline batteries.
To insert batteries into the machine you will need a Philips screw driver.
To remove the screw turn counter-clockwise removing the screw,
the cover will then lift off. Fit 2 x 1.5 volt batteries (type R20, HP2 or D)
in the compartment as shown in diagram B. Now replace the cover and
fasten the screw turning clockwise to tighten. Do not mix different types
of batteries (i.e. alkaline and zinc carbon) or old and new batteries
together. Always make sure that you dispose of the old batteries carefully
(never burn or puncture an old battery). Make sure you remove the
batteries from the machine if you are not going to use it for a long time.
THIS SEWING MACHINE HAS ALREADY BEEN THREADED,
READY FOR YOU TO USE FOR THE FIRST TIME.
Push the on/off switch to turn the power on. Lift the presser foot by using the presser foot lever.
Place the material under the presser foot and lower the lever. Sew a few stitches first, by turning
the hand wheel in the direction of the arrow. Press the foot pedal and start to sew normally.
When the line of stitching has been completed, release the foot pedal. Stop sewing before you reach
the edge of the fabric.
LOCKING THE STITCH
To prevent the stitch from unraveling after you have finished sewing you can
lock the stitch by following these instructions. Pull a length of thread through
the tension dial to release the tension on the needle (see diagram C). Lift the
presser foot and turn the hand wheel in the direction of the arrow to lift the
needle out of the material.
REMOVE YOUR SEWING MACHINE CAREFULLY FROM THE BOX. PLACE THE SEWING MACHINE ON A FLAT
SURFACE WHERE A CHAIR CAN BE PLACED FOR YOU TO SIT ON IN ORDER TO OPERATE THE SEWING
MACHINE SAFELY.
WARNING
: DO NOT USE RE-CHARGEABLE BAT TERIES (i.e. nickel cadmium).
ADULT SUPERVISION RECOMMENDED.
Diagram B
Diagram C
Diagram D
You must cut the thread (see diagram D) using scissors (not included), with adult
supervision, before removing your fabric from the machine otherwise your
stitches will pull away. Remove the fabric by pulling it toward you and the stitch
will be locked automatically. (If your machine jams or the thread catches in the
lower part of the sewing mechanism, you can remove the material by gently
turning the hand wheel until the fabric or thread can be removed from the machine).
 Loading...