EasyManua.ls Logo

Shark HYDROVAC WD101 - User Manual

Shark HYDROVAC WD101
9 pages
Print Icon
To Next Page IconTo Next Page
Loading...
Corded 3-in-1 Cleaner
WD100 Series
OWNER’S GUIDE
Question and Answer IconNeed help?

Do you have a question about the Shark HYDROVAC WD101 and is the answer not in the manual?

Summary

Important Safety Instructions

General Safety Precautions

Essential safety guidelines to reduce the risk of fire, electric shock, and injury during use.

Assembly and Initial Setup

Assembling the HydroVac

Step-by-step instructions for connecting the pole to the main body for assembly.

Filling the Clean Solution Tank

Guide on how to properly fill the clean solution tank with water and concentrate.

Using Your 3-in-1 Cleaner

Controls Overview

Explanation of the power button functionality for operating the cleaner.

Cleaning Modes

Details on selecting Hard Floor and Area Rug modes for different cleaning tasks.

Self-Clean Cycle Maintenance

Performing the Self-Clean

Instructions for performing the automatic self-clean cycle for system maintenance.

Manual Maintenance Procedures

Cleaning the Brushroll

How to manually clean the brushroll by removing debris and hair for optimal performance.

Cleaning the Dirty Water Tank

Steps for emptying and cleaning the dirty water tank and its components.

Troubleshooting and Blockages

Checking for Blockages

Procedure to identify and clear blockages in the nozzle, brushroll, or inlet hose.

Troubleshooting Common Issues

Solutions for common problems indicated by LED lights and operational errors.

Product Support and Warranty

Ordering Replacement Parts

Information on where and how to order replacement filters and brushrolls.

Three (3) Year Limited Warranty

Details on warranty coverage, exclusions, and service procedures.

Product Registration and Specs

Register Your Purchase

Instructions and benefits of registering your Shark HydroVac for warranty and support.

Record Key Information

Section to record essential product details like model number and purchase date.

Technical Specifications

Key technical details including voltage and power consumption of the 3-in-1 cleaner.

Overview

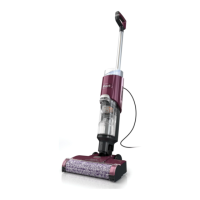
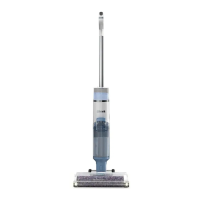
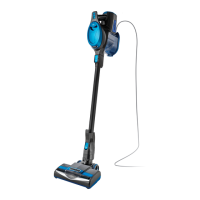
The Shark HydroVac™ Corded 3-in-1 Cleaner, WD100 Series, is a versatile cleaning appliance designed for household use, offering a comprehensive solution for maintaining various floor surfaces. This owner's guide provides essential safety instructions, assembly steps, operational controls, and maintenance procedures to ensure optimal performance and longevity of the device.

Function Description

The Shark HydroVac™ is a multi-functional 3-in-1 cleaner that vacuums, mops, and cleans itself simultaneously. It is designed to handle both hard floors and area rugs, making it a comprehensive tool for diverse cleaning needs. The device features a motorized nozzle, a main body pole, and a handle, all working in conjunction to deliver effective cleaning. It utilizes a clean solution tank to dispense cleaning fluid and a dirty water tank to collect waste, ensuring a hygienic cleaning process. The cleaner is corded, providing continuous power during operation without the need for battery recharging.

Usage Features

To begin using the Shark HydroVac™, users must first assemble the unit by aligning the pole with the opening in the main body and inserting it firmly until it clicks into place. Once assembled, the unit can be placed on its storage tray near a wall outlet.

Before operation, the clean solution tank needs to be filled. Users unscrew the cap, add water up to the "WATER" line, and then add Shark HydroVac™ Multi-Surface Concentrate up to the "HYDROVAC CONCENTRATE" line. It is crucial to use only Shark HydroVac Multi-Surface Concentrate, Shark Hydrovac Disinfectant, and water with this product to prevent internal component damage and streaking. Overfilling the concentrate should be avoided. If the clean solution tank is empty, the unit may make a pumping sound, which is normal, and refilling the tank will resolve this. The 3-in-1 Cleaner will not operate without sufficient water supply in the clean solution tank.

To power on the device, the power cord is unwrapped from the back of the unit and plugged into a safe outlet, ensuring the prongs are dry. The Power button on the handle is then pressed and released. To turn off the unit, the button is pressed again.

The Shark HydroVac™ offers two primary cleaning modes:

  • Hard Floor Mode: This mode is designed for powerful cleaning on bare floors. To activate, the unit is turned on, and the handle is tilted back. It is important to keep the nozzle flat on the floor to prevent leakage. If floors appear cloudy, streaky, or spotty after cleaning, it may be due to accumulated soap or grease residue, and several cleanings with the Hydrovac may be required.
  • Area Rug Mode: For cleaning area rugs, the Area Rug icon on top of the handle is pressed. The Area Rug light on the main body will illuminate to indicate that this mode is active. To turn off Area Rug mode, the button is pressed again. This mode is also recommended for improved stain cleaning and for addressing stubborn odors on floors or area rugs until the odor is gone.

The device should always be kept moving over surfaces to avoid damaging anything, such as carpet fibers. It is not recommended to use the cleaner on unstable surfaces like chairs or tables. The cleaner should not be used to pick up large, hard, or sharp objects (like glass, nails, screws, or coins), large quantities of dust (e.g., drywall dust), smoking or burning objects (hot coals, cigarette butts, or matches), flammable or combustible materials (lighter fluid, gasoline, or kerosene), or toxic materials (chlorine bleach, ammonia, or drain cleaner). It should also not be used in poorly lit areas, outdoor areas, or enclosed spaces that may contain explosive or toxic fumes.

Maintenance Features

Regular maintenance is crucial for the Shark HydroVac™ to ensure its peak performance. The device incorporates a self-clean cycle and requires manual cleaning of various components.

Self-Clean Cycle: This cycle automatically cleans the system and the brushroll and is recommended after every use.

  1. Place the unit on the Storage Tray. The Self-Clean mode icon on the top of the main body will pulse.
  2. Empty the Dirty Water Tank and ensure the clean solution tank is at least half full.
  3. Press the Power Button to start the self-clean cycle. The icon will illuminate for the full 2-minute duration of the cycle.
  4. It is important NOT to remove the unit from the tray during the self-cleaning cycle. The icon will turn off when the cycle is complete.
  5. After the cycle, the dirty water tank should be emptied.

Manually Cleaning the Brushroll: This can be done as an alternative to the self-clean cycle or to remove debris or hair wrapped around the brushroll.

  1. To access the brushroll, press the button on the top of the nozzle and lift off the brushroll cover.
  2. Remove the brushroll by pulling up on the pull tab on the left side of the nozzle. Any debris stuck on the back wall should be wiped away.
  3. The brushroll should be washed thoroughly with warm water and allowed to air-dry completely in a well-ventilated area for at least 24 hours. The brushroll should not be placed in a washing machine or dishwasher.
  4. To reinsert the brushroll, align the grooves on its end with the helix on the inner right side of the nozzle, then press down on the left side. The brushroll tab should be flush with the left side of the nozzle when properly installed.
  5. To reinstall the brushroll cover, insert the tabs on the cover into the slots on the nozzle and press down until it clicks into place. Brushrolls should be replaced every 6 months.

Cleaning the Dirty Water Tank:

  1. To remove the dirty water tank, press the release button and pull out the tank.
  2. For liquid waste disposal, pour it out through the Easy Pour spout on the back of the dirty water tank.
  3. For solid debris, lift out the Solids Separator by grasping the recessed areas on its sides. Empty the solid debris into the trash. If any liquid waste remains, pour it down a drain. To clean, rinse the separator and the tank with water. The dirty water tank should not be placed in a washing machine or dishwasher.
  4. Clean the filter housing and the foam filter after every use. Pull out the foam filter and hand-wash it with warm water and soap.
  5. Allow the foam filter to air-dry completely in a well-ventilated area for 24 hours before reinstalling it. Filters should be replaced every 6 months.
  6. After cleaning the dirty water tank and solids separator, allow them to air-dry in a well-ventilated area for at least 24 hours. To reinstall the tank, insert the bottom into the opening in the main body, then tilt the tank back until it clicks into place.

Checking for Blockages: If the unit runs over a hard or sharp object, or if a noise change is noticed, users should check for blockages or objects caught in the brushroll, nozzle chamber, or inlet hose.

  1. Turn off the power.
  2. Remove the brushroll cover, brushroll, and dirty water tank.
  3. Check the openings and remove all debris.
  4. When finished, reinstall the brushroll and the cover.

Troubleshooting with LED Indicators: The device provides LED indicators to help diagnose issues.

  • Water Droplet LED pulsing red: Indicates the dirty water tank is full. Empty the fluid. If it's a false error, remove the solids separator, clean it completely, and allow it to dry for 24 hours or manually.
  • Water Droplet LED pulsing aqua: Indicates the clean solution tank is empty. Fill the clean solution tank.
  • Area Rug icon and three water droplet lights flashing red at the same time: Indicates the brushroll cover is not installed properly. Refer to the brushroll cleaning section for reinstallation.
  • Area Rug icon and three water droplet lights flashing out of sync: Indicates the brushroll is jammed. Turn off the power, clean the brushroll, and remove any debris causing the jam.
  • Self-Clean icon and droplets flashing blue: Indicates not enough solution to run the Self-Clean Cycle. Fill the clean solution tank.
  • Self-Clean icon and droplets flashing red: Indicates the dirty water tank is full and preventing the Self-Clean Cycle. Empty the dirty water tank.

Only use Shark® branded filters and accessories. Do not modify or attempt to repair the 3-in-1 Cleaner yourself. If the unit is not working as it should, or has been dropped, damaged, or left outdoors, contact customer service.

Shark HYDROVAC WD101 Specifications

General IconGeneral
Cord TypeCordless
FiltrationHEPA
Power SourceBattery
Surface RecommendationHard Floors, Carpets
Special FeaturesSelf-Cleaning Brushroll
Included AccessoriesCrevice tool, Multi-Surface Brushroll

Related product manuals