26
R-763 -
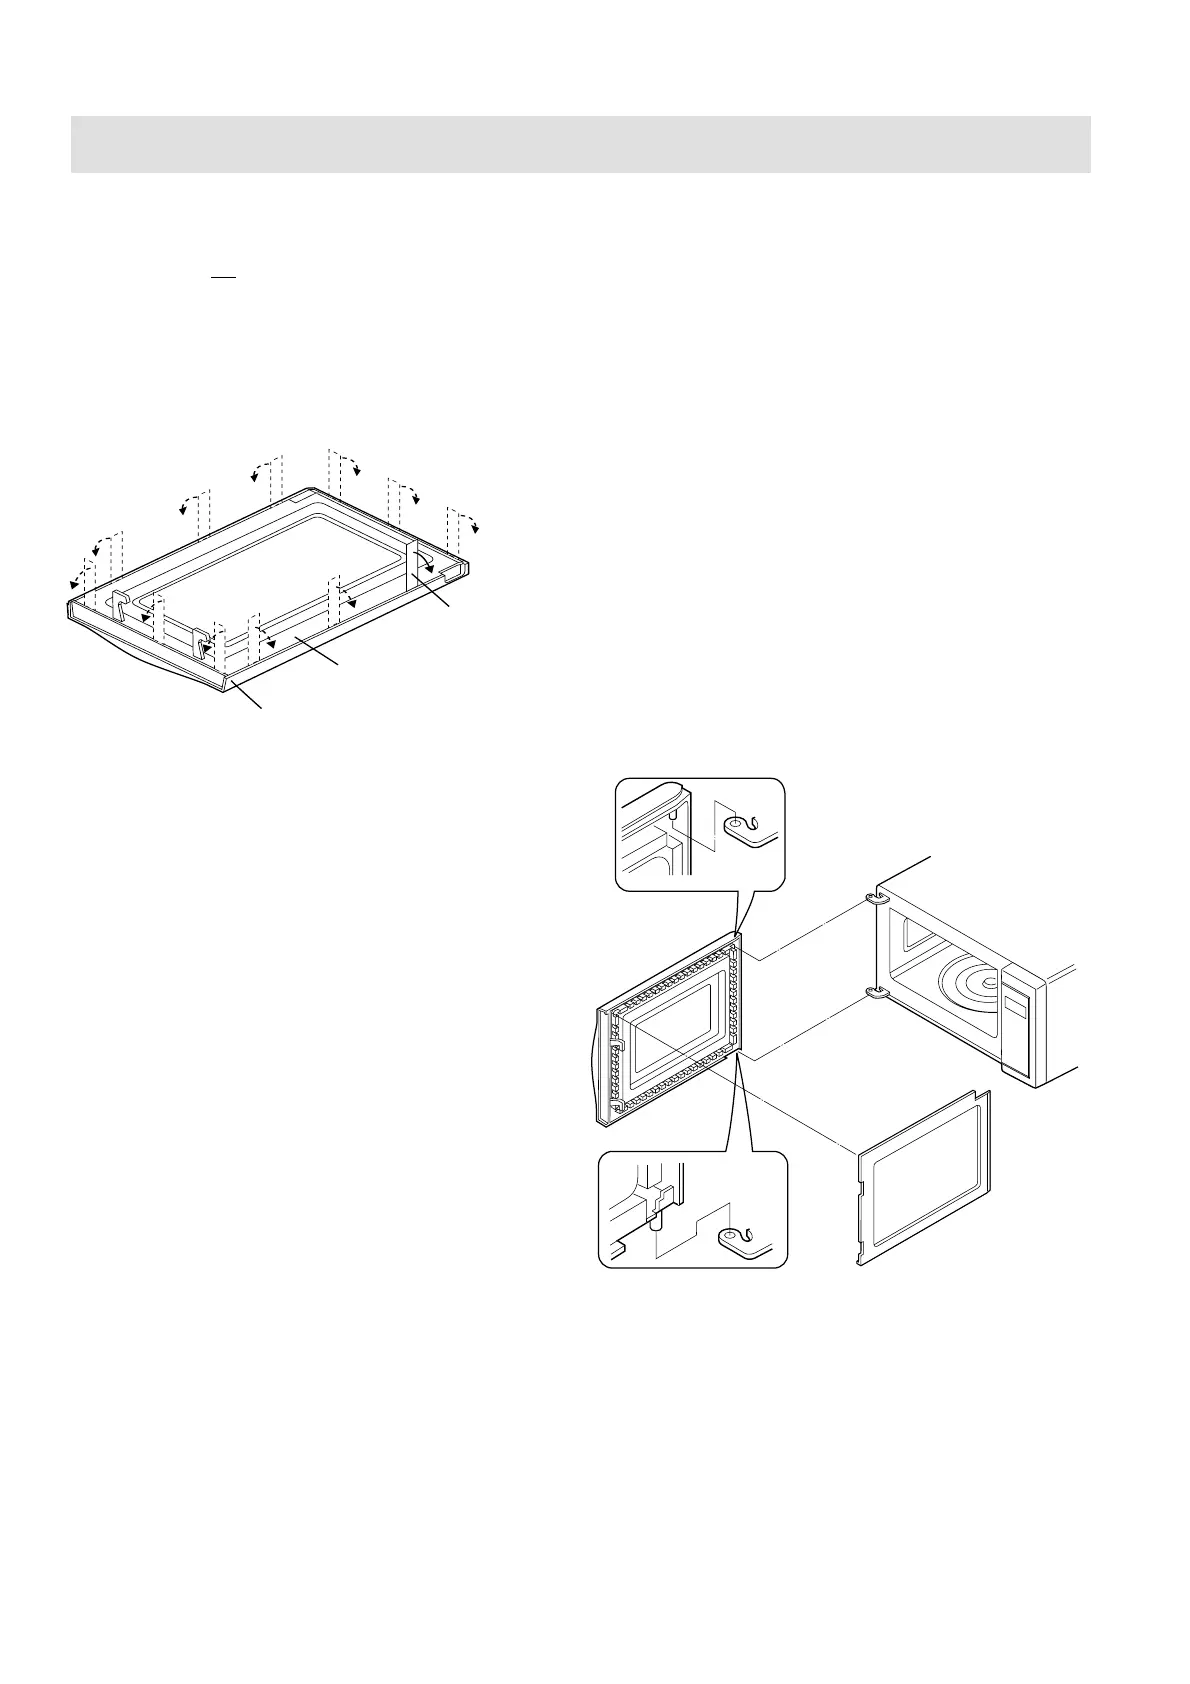
Figure C-6. Door Replacement
COMPONENT REPLACEMENT AND ADJUSTMENT PROCEDURE
DOOR REPLACEMENT
REMOVAL
1. CARRY OUT 3D CHECKS.
2. Pull door handle to open the door.
3. Insert a putty knife (thickness of about 0.5mm) into the
gap between the choke cover and door frame as shown
in Figure C-5 to free engaging parts.
4. Release choke cover from door panel.
5. Now choke cover is free.
Putty knife
Choke cover
Door frame
Figure C-5. Door Disassembly
6. Release two (2) pins of door panel from two (2) holes of
upper and lower oven hinges by lifting up.
7. Now, door sub assembly is free from oven cavity.
8. Remove the four (4) screws holding the door panel to
the door frame.
9. Now, door panel is free.
10.Slide latch head upward and remove it from door frame,
releasing latch spring from door frame and latch head.
11.Now, latch head and latch spring are free.
12.Remove the two (2) screws holding the handle and the
door frame.
13.Remove the handle from the door frame.
14.Slide the front door glass rightwards.
15.Now, the front door glass is free
RE-INSTALL
1. Re-install the front door glass to the door frame as follows.
1) Insert the left edge of the front door glass into the of the door
frame.
a) Slide the front door glass leftwards into the door frame.
2. Re-install the handle to the door frame as follows.
a) Re-install the handle to the door frame so that the two (2)
holes of the glass stopper meet the two (2) pins of the door
frame.
3) Hold the handle to the door frame with the two (2) screws.
4. Re-install the latch spring to the latch head. Re-install the
latch spring to the door frame. Re-install latch head to door
frame.
5. Fit the door panel to the door frame with four (4) screws.
6. Insert two (2) pins of door panel on two (2) hole of upper and
lower oven hinges.
7. Re-install choke cover to door panel.
Note: After any service to the door;
Make sure that door sensing switch and monitored
latch switch are operating properly.
 Loading...