21
Water dispenser
Cleaning the dispenser tank
Remove the dispenser tank approximately once a month
and wash it with water.
1
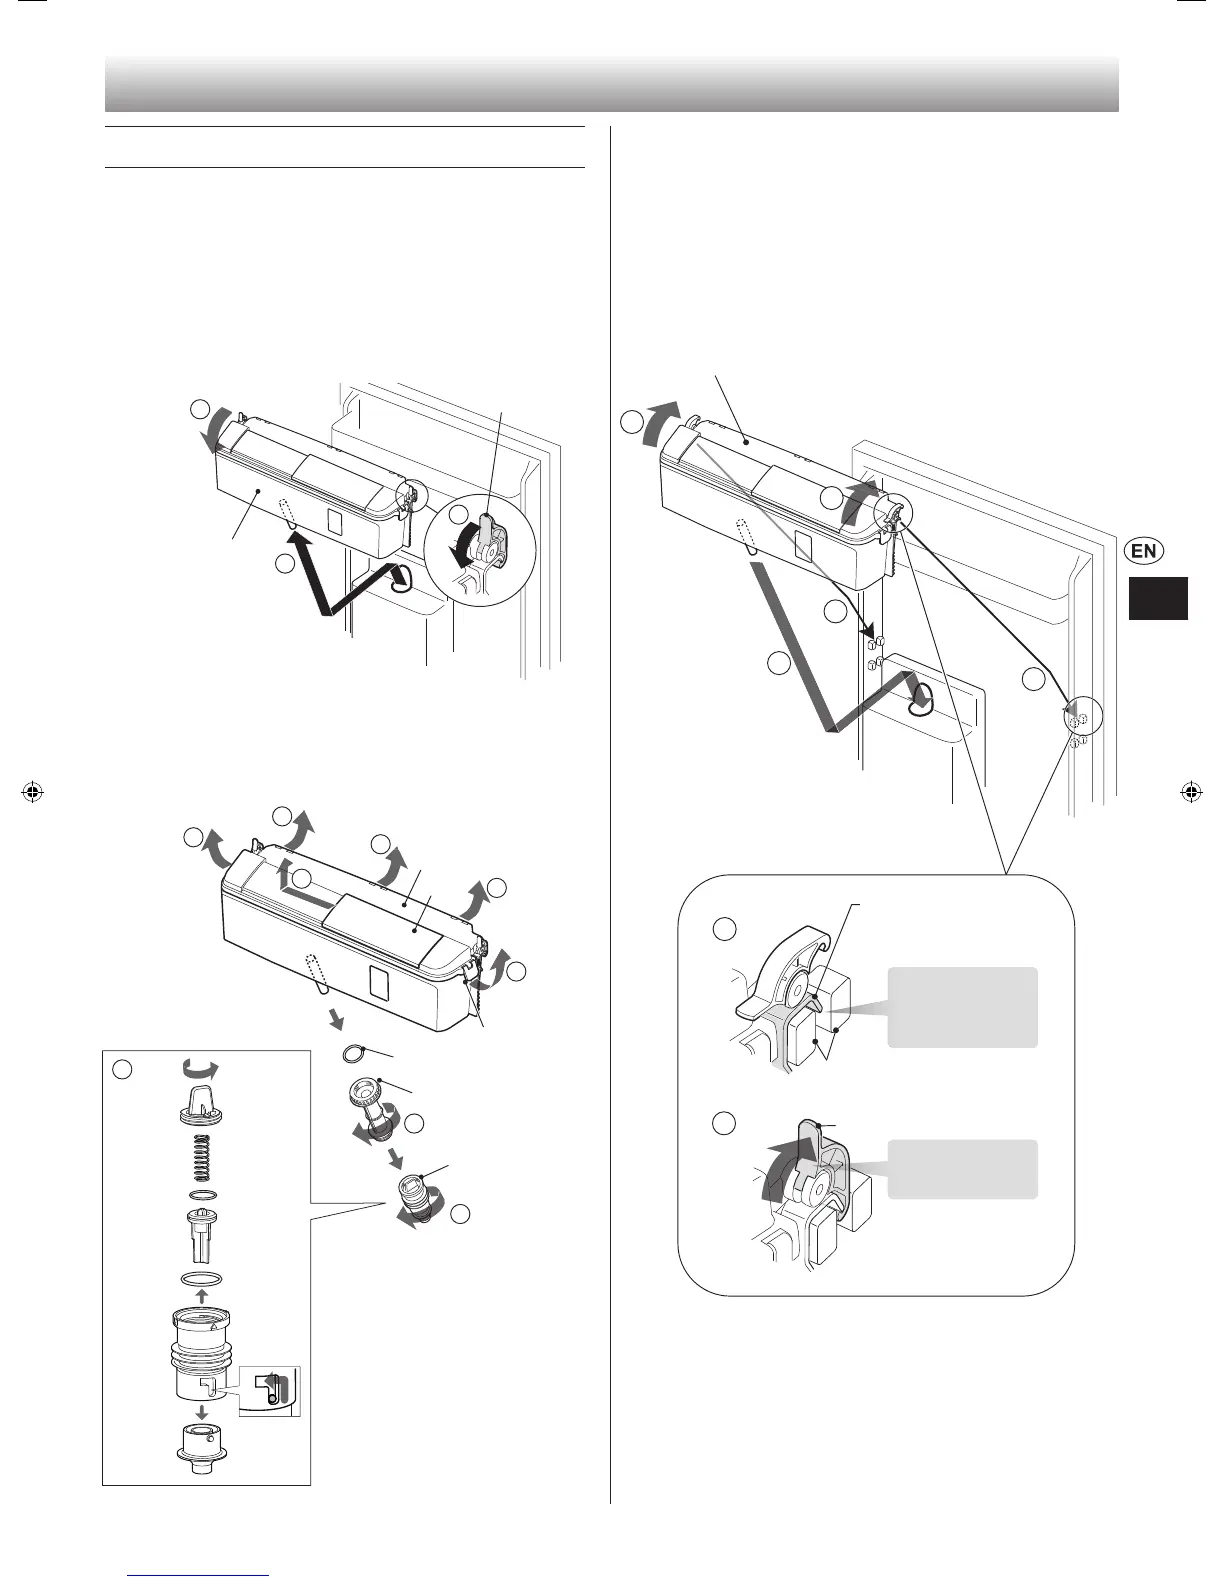
Empty the dispenser tank.
Push the lever and let out all water in the dispenser tank.
2
Remove the dispenser tank from the door.
1�
Take the both latches o .
2�
Lift the dispenser tank up to remove.
2
1
1
3
Disassemble the dispenser tank.
1�
Remove the cap.
2�
Remove the cover. (Latches : 5 pieces)
3�
Remove the tank pipe and the tank nozzle.
4�
Disassemble the tank nozzle.
2
2
2
2
2
1
3
3
4
Latch
Dispenser tank
Latch
Cover
Cap
Tank pipe
Tank nozzle
After cleaning
1
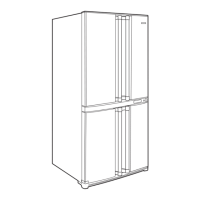
Assemble the dispenser tank.
(Reverse procedure to disassemble.)
Ensure that each parts are attached rmly. Otherwise
it may cause water leakage.
2
Install the dispenser tank.
Insert the dispenser tank fully and make sure to fasten
the latches to install.
2
2
3
3
2
3
1
Dispenser tank
Latch
Hook of the dispenser
tank
Put the hook on
the protrusion of
the door.
Tilt the latch
back.
Protrusions of
the door
Packing
Note
• When humidity is high, dew condensation may occur on
tank pipe and tank nozzle.
• Make sure not to lose the packing when you
disassemble the tank.
(B777).indb 21 2017/01/19 11:45:31