- 2 -
SCANNING A PAPER PHOTO OR PHOTO ALBUM
Thanks to the preset focus and built-in glare-free LED lights, it is now possible to make a digital
copy of a paper photo from a table top, or directly from a photo album, without removing it from the
album. This allows you to duplicate precious family photos without disturbing delicate and fragile
photo albums.
1. Remove the bottom tray and place the scanner on top of the image you wish to scan.
2. Slide Photo/Film Focus Switch to “PHOTO.” (See illustration at right.)
3. Slide the Photo/Film Light Switch to “PHOTO.” (See illustration at right.)
4. Press the Power button to turn on the scanner. You will see the image of the media under the
scanner on the LCD screen.
5. Select the size of the photo you wish to scan by pressing the DOWN button.
Size options are:
• 3.5”x 5”
• 4”x6”
• 4”x4” (Polaroid or Fuji instant photo)
• 4.2”x 3.2” (Polaroid or Fuji instant photo)
• 3.4”x2.1” (Polaroid or Fuji instant photo)
6. Press the OK button to scan the picture. The scanned digital image will automatically store on
your SD card. TIP: If you see a black image on the LCD screen and do not see the image you want
to scan, please check that both switches are on the “Photo setting.” Please do not insert the film
holder into the scanner when scanning a photo.
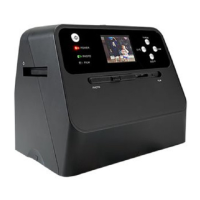
OPERATING YOUR ALBUM SCANNER
1. Insert an SD memory card into the SD Card Slot until the card locks in place. Push once again to
release the card. This unit accepts only SD or SDHC card up to a maximum of 32GB.
2. Select the media you wish to scan. Slide the Photo/Film focus switch and Photo/Film light switch
to the appropriate media. Photo = a paper photo, small document or magazine article, etc.
Film = 35mm slide or negative.
3. Connect the USB cable to a computer or plug it into an AC outlet with the supplied adapter.
4. Press the Power button, then the OK button to select NO on the pop up icon on the LCD screen.
(This means you are not linked to a computer.) The LED indicator will light up Green or Blue,
depending on your media selection. The scanner is now ready for use.
NOTE: If you are not able to see the light from your LCD screen, slide the Photo/Film Light Switch to
its proper position.