Do you have a question about the Shimadzu UV-VIS and is the answer not in the manual?
Configure spectrum acquisition parameters like wavelength range and scan speed.
Zero the baseline with no sample or reference, ensuring the lid is closed.
Place sample and optional blank cuvette in the sample and reference compartments.
Click "Start" to begin collecting spectral data and save the file.
Click the "Peak Pick" button to display the Peak Pick table.
Adjust peak labeling parameters by right-clicking the Peak Pick table and selecting "Properties".
Preview and print peak information using "File, Print Preview".
Click the "Data Print" button to view raw data points in a table.
Ensure "All Data" is selected in "Data Print Properties" via right-click.
Save data using "File, Save As", selecting "Data Print Table (*.txt)" file type.
Ensure data is saved, then click the "Disconnect" button.
Press the "Mode" button to return local control and turn off the deuterium lamp.
Click the photometric button and "M" button to change method parameters.
Enter desired wavelengths in the Photometric Method Wizard.
Set concentration units, calibration wavelength, and curve fit order.
Ensure "Data Acquired By: Instrument" is selected for standards.
Ensure "Data Acquired By: Instrument" is selected for samples.
Enter concentration information for standards and names for samples.
Perform baseline correction and cell blanking before measurements.
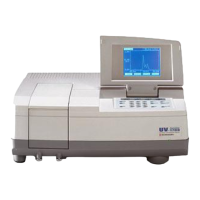
| Device Type | UV-Vis Spectrophotometer |
|---|---|
| Detector Type | Silicon photodiode |
| Wavelength Range | 190-1100 nm |
| Photometric Repeatability | ±0.001 Abs |
| Light Source | WI lamp and D2 lamp |
| Display | LCD |
| Data Output | USB |
| Power Requirements | 100-240 VAC, 50/60 Hz |
| Spectral Bandwidth | 1 nm |