Mounting
26 © SICK AG • Subject to change without notice • 8021823/126P/2018-12-17
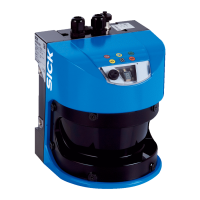
6 Mounting
6.1 Mounting process
1. Determine mounting site under consideration of the mounting notes.
→ See following chapter.
2. Mount alignment bracket and distance measuring device.
→ See page 32, chapter 6.7.
3. Perform electrical connection
→ See page 35, chapter 7.
4. Aligndistancemeasuringdeviceandreectoragainsteachother.
→ See page 31, chapter 6.6
5. Aligndistancemeasuringdevicewiththereectorusingthealignment
bracketneadjustment.→ See page 33, chapter 6.8.
6. Fasten alignment of the distance measuring device.
→ See page 33, chapter 6.8.
6.2 Mounting notes
Observe the following mounting notes for trouble-free operation:
• Complywithtechnicalspecicationslikethemeasurementrange.
→ See page 106, chapter 14.3.
• Use distance measuring device with optional heating in low ambient
temperatures, e.g. in deep freeze storage.
• At higher temperatures, use the distance measuring device with optional
cooling casing. → See page 115, chapter 15.4.
• Protect the distance measuring device from solar irradiation.
• To avoid condensation, do not expose the distance measuring device to
any quick temperature changes.
• Observetheassemblynotesforthereector.
→ See page 26, chapter 6.2.
• Keepsucientdistancetootherdistancemeasuringdevices.
→ See page 28, chapter 6.4.
• Keepsucientdistancetodatatransmissionphotoelectricswitches.
→ See page 30, chapter 6.5.
 Loading...