12
First steps
Gigaset SL910/910A / GBR/IRL / A31008-M2300-L101-1-7619 / starting.fm / 08.12.2011
Version 4.1, 21.11.2007
First steps
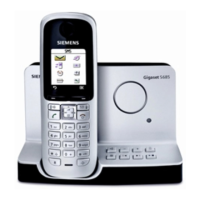
Checking the package contents
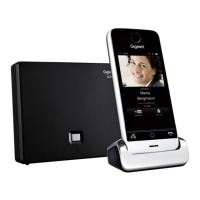
u One Gigaset SL910/SL910A base
u One power adapter for the base
u One phone cable (flattened)
u One Gigaset SL910H handset
u One battery cover (rear cover for the handset)
u One battery
u One charger
u One power adapter for the charger
u One user guide.
Installing the base and charger
The base and charger are designed for use in dry rooms in a temperature range of
+5°C to +45°C.
¤ Set up the base on a level, non-slip surface at a central point in the building or
mount the base on the wall (
¢ page 14).
The phone's feet do not usually leave any marks on surfaces. However, due to the
multitude of different varnishes and polishes used on today's furnishings, the
occurrence of marks on the surfaces cannot be completely ruled out.
Please note:
u Never expose the telephone to the effects of heat sources, direct sunlight or
other electrical devices.
u Protect your Gigaset from moisture, dust, corrosive liquids and fumes.
Please note
Pay attention to the range of the base.
This is up to 300 m in unobstructed outdoor areas and up to 50 m inside build-
ings. The range is reduced when Eco Mode is activated (
¢ page 62).
 Loading...