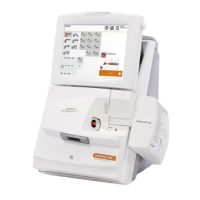
Hematek
®
3000 System – Instruction Manual – Version 1.327
To install the Hematek Stain Pak, proceed as follows:
1. Raise the lid.
2. Check if another Hematek Stain Pak is already installed.
• If so: Go to step 3.
• If not: Go to step 5.
Remove used Hematek Stain Pak 3. Remove the three cannulas from the used Hematek Stain Pak.
4. Lift the used Hematek Stain Pak out of the pocket at the rear of the
system.
Insert new Hematek Stain Pak 5. Remove the perforated tabs from the new Hematek Stain Pak carton.
6. Insert the new Hematek Stain Pak, with the stain bottle to the right,
into the pocket at the rear of the system.
7. Make sure the carton is all the way down and resting on the tray at the
bottom of the pocket. The carton should be level when properly
installed.
Replace cannulas 8. Check if the cannulas appear damaged or bent.
• If so: Replace the cannulas, see Chapter 7.3.2, step 3 to step 4.
• If not: Go to step 9.
Insert cannulas 9. Insert the appropriate cannula into its respective bottle by puncturing the
center of the indentation in the visible corner of the bottle.
Vent bottles 10. Remove the cannula, turn it 1/4 turn, and insert it again into the same
puncture. The double puncture creates a slightly larger hole for venting.
11. Decide if you want to have additional venting.
• If so: Go to step 12.
• If not: Go to step 13.
Risk of burns by combustion of flammable liquids. The Hematek Stain
Pak contains methanol which is highly flammable.
Death or serious injury can result.
• Do not install and operate the system in the proximity of sources of
ignition, for example, ovens, hot plates, burners, radiators, or open
flames.
• Refer to the Hematek Stain Pak labeling and to Material Safety Data
Sheets for details concerning any special precautions related to the
handling of Hematek Stain Paks. Material Safety Data Sheets are
available from Siemens.

 Loading...