4 Installation
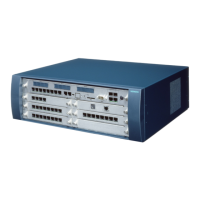
4.1 Installation of Hicom 150 E OfficePro
4.1.1 Overview
Chapter contents:
This chapter discusses the following topics:
Installation of the Hicom 150 E OfficePro communication system.
It describes the predominantly used standard installation procedures. See Section 6.1 for
information about supplementary equipment and expansions.
Configuration (board configuration).
Danger
The system may only be installed by authorised service personnel.
Tools and equipment required
The following tools and equipment are required for installing Hicom 150 E OfficePro:
Tools:
- Ring or fork wrench, 8 mm
- Diagonal cutting pliers, telephone pliers, wire stripper, flat-nosed pliers
- Slotted screwdrivers, from 2 to 8 mm
- Posidriv cross-point screwdrivers, sizes 1 and 2
- TORX screwdriver, size TX20
- Wiring tool (C39407-A139-A11)
- Electric drill, hammer
- Level. metric rule
- Special tools for Hicom cordless 150 E (BS installation), page 12-5
Equipment:
- Hicom Assistant T or Hicom Assistant E
- Digital multimeter for testing earth connections and partial voltage
- Hicom 150 E Office (electronic) service manual
http://cmweb01.mch.pn.siemens.de/e_doku/en/h150/h15/30/sh/2/15_4m.htm (1 of 27) [06/04/2000 13:04:41]
 Loading...
