Installing/mounting
4.6 Installation instructions
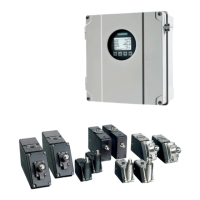
FSS200 clamp-on sensors
Installation Manual, 08/2017, A5E36255466-AC
31
Installing the mounting frames
1. On a flat surface, attach the spacer bar to a mounting frame so that the reference hole on
the spacer bar aligns with the hole on the mounting frame and attach using supplied
screw stored on end of spacer bar. Tighten the clamping screw.
2. Align second mounting frame with number on spacer bar that corresponds to the number
index provided by transmitter and attach with second screw found on end of spacer bar.
Then tighten the clamping screw.
Ensure that the angled sides of both frames face away
from each other.
3. Wrap a mounting strap around the pipe. Make sure to position it so there is easy access
to the mounting strap adjusting screw.
4. At the mounting location, place the mounting frame/spacer bar assembly on the pipe so
that it rests on the top of the pipe.
5. Engage the end of the mounting strap with the mounting strap adjusting screw.
6. Slide strap under the spring clip of one of the mounting frames.
7. Tighten the mounting strap screw enough to take up all of the slack, but not enough to
prevent rotation of the assembly.
Repeat procedure for the other mounting frame
.
8. Rotate the assembly on the pipe to the final conditioned location, ensuring that it is
straight along the pipe axis. (Refer to the sensor orientation diagram.)
9. Tighten the mounting straps to seat the assembly firmly on the pipe. Do not over tighten.
Mounting frame and sensor (not shown)
Mounting strap adjusting screw
Optional: On larger pipes multiple lengths of straps can be linked together
Figure 4-7 Reflect mount with mounting frames
 Loading...