EasyManua.ls Logo

Siemens SN536S01KE - User Manual

Siemens SN536S01KE
2 pages
Print Icon
To Next Page IconTo Next Page
Loading...
9001733616 (020403) SN536S01KE
*9001733616*
Quick reference guide  Dishwasher
en
Short and handy...
... everything your dishwasher needs.
Before using for the first time, make sure you read both the op-
erating and the installation instructions.
Overview of water hardness settings
You can find an overview of the
water hardness values that can
be selected here.
A table of country-specific units
can be found in the instruction
manual.
Hardness
range
mmol/l Setting
value
Soft 0 - 1.1 H00
Soft 1.2 - 1.4 H01
Medium 1.5 - 1.8 H02
Medium 1.9 - 2.1 H03
Medium 2.2 - 2.9 H04
Hard 3.0 - 3.7 H05
Hard 3.8 - 5.4 H06
Hard 5.5 - 8.9 H07
Setting water softening system
1.
Press ⁠.
2.
Hold programme button A and press
repeatedly until the display
shows H:xx.
3.
Release programme button A and
⁠.
a Programme button A flashes.
4.
Press programme button C re-
peatedly until the right water hard-
ness has been set.
5.
Press to save the setting.
Adding special salt
To avoid damage to the appliance, only add special
salt to the dispenser for special salt just before the
programme starts.
1.
Unscrew the lid of the dispenser for special salt
and remove.
2.
On initial start-up: Fill the dispenser right up with
water.
3.
Add the special salt to the
dispenser. The water in the
dispenser is displaced and
forced out. Never add de-
tergent.
4.
Place the lid back on the dispenser and turn to
close.
Adding rinse aid
1.
Press the catch on the lid
of the dispenser for rinse
aid and lift ⁠.
1
2
2.
Add rinse aid up to the
max mark.
max
3.
Close the lid of the dispenser for rinse aid.
a The lid clicks into position.
How to use your appliance
1.
Load the tableware.
Only clean tableware that is suitable for dish-
washers. Remove large remnants of food from
the tableware. Check that the spray arms can ro-
tate freely.
2.
Add detergent.
3.
Switch on the appliance ⁠.
4.
Select the programme.
5.
Start the programme ⁠.
6.
Remove the tableware at the end of the pro-
gramme.
7.
To cancel the programme, press for
approx. 3seconds.
The programme is cancelled and ends after ap-
prox. 1minute.
Programs
The program data has been meas-
ured in the laboratory according to
European standard EN60436.
The consumption figures depend on
the program and additional function
selected.
The runtime will change if the rinse
aid system is switched off or rinse aid
needs to be added.
Program 1) Duration [h:min]
2) Energy [kWh]
3) Water [l]
/
Intensive 70°
1) 2:05 - 2:15
2) 1,400 - 1450
3) 12 - 15
/
Auto 45-65°
1) 1:35 - 2:40
2) 0,950 - 1,550
3) 9 - 19
/
Eco 50°
1) 3:30
2) 0,920
3) 9,5
/
Glass 40°
1) 1:25 - 1:30
2) 0,850 - 0,900
3) 11 - 14
1 hr Programme
1) 1:00
2) 1,300
3) 10
/
PreRinse
1) 0:15
2) 0,050
3) 4
Adding detergent
1.
Add the detergent to the
dry detergent dispenser.
15 ml
25 ml
50 ml
2.
Close the lid of the deter-
gent dispenser.
a The lid clicks into position.
Question and Answer IconNeed help?

Do you have a question about the Siemens SN536S01KE and is the answer not in the manual?

Overview

This document serves as a quick reference guide for a dishwasher, providing essential information on its operation, maintenance, and troubleshooting. It is designed to help users get started quickly and address common issues.

Function Description

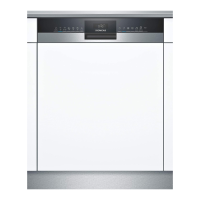
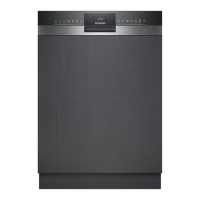
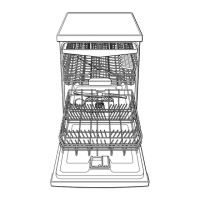
The dishwasher is designed to clean tableware efficiently. It features a water softening system to adapt to different water hardness levels, ensuring optimal cleaning results and preventing limescale buildup. The appliance also has dedicated dispensers for special salt and rinse aid, which are crucial for effective washing and drying. Various washing programs are available, tailored for different types of loads and soil levels, from intensive cleaning for heavily soiled items to quick washes for lightly soiled glassware. The device is equipped with spray arms that distribute water and detergent, and a filter system to capture food remnants, ensuring clean water circulation. A wastewater pump is integrated to drain used water from the appliance.

Usage Features

Initial Setup and Water Hardness: Before first use, users are instructed to read both the operating and installation instructions. A key initial step is setting the water softening system according to the local water hardness. This involves accessing a specific setting menu by pressing and holding program buttons, then adjusting the hardness level (H:xx) using another program button. A table is provided to help users convert mmol/l values to the appropriate setting value (H00-H07).

Adding Special Salt: Special salt is essential for the water softening system. To add salt, the lid of the dispenser needs to be unscrewed and removed. For initial startup, the dispenser should be filled with water before adding salt, which will displace the water. Detergent should never be added to the special salt dispenser. After adding salt, the lid must be replaced and turned to close securely. This process should be performed just before a program starts to prevent damage to the appliance.

Adding Rinse Aid: Rinse aid helps with drying and prevents water spots. To add rinse aid, the catch on the dispenser lid is pressed, and the lid is lifted. Rinse aid should be filled up to the maximum mark. After filling, the lid is closed until it clicks into position.

Adding Detergent: Detergent is added to a dedicated dry detergent dispenser. The dispenser often has markings (e.g., 15 ml, 25 ml, 50 ml) to guide the user on the appropriate amount. After adding detergent, the dispenser lid is closed until it clicks into position.

Operating the Appliance: The general usage sequence involves:

  1. Loading tableware: Only dishwasher-safe items should be loaded, with large food remnants removed. It's important to ensure that the spray arms can rotate freely.
  2. Adding detergent: As described above.
  3. Switching on: The appliance is turned on.
  4. Selecting a program: Users choose from various programs like "Intensive 70°," "Auto 45-65°," "Eco 50°," "Glass 40°," "1h Programme," or "PreRinse," depending on the load. The manual provides estimated duration, energy consumption, and water usage for each program.
  5. Starting the program: The "Start" button initiates the chosen program.
  6. Removing tableware: After the program finishes, the clean tableware can be removed.
  7. Cancelling a program: To cancel a running program, the "Reset 3 sec." button is pressed for approximately 3 seconds. The program will then cancel and end after about 1 minute.

Program Data: The manual includes a table detailing program data, measured according to European standard EN 60436. This data provides estimates for duration, energy consumption, and water usage. It notes that these figures can vary based on additional functions selected and that the runtime may change if the rinse aid system is switched off or if rinse aid needs to be added.

Maintenance Features

Cleaning Filters: Regular filter cleaning is crucial for optimal performance.

  1. Checking for residue: After each wash, users should check the filters for any food remnants.
  2. Removing filters: The coarse filter is turned anticlockwise and removed along with the filter system. The micro filter is then pulled down to remove it.
  3. Cleaning: All filter elements should be cleaned under running water.
  4. Re-assembly: The filter system is re-assembled and inserted back into the appliance, ensuring the arrow markings match up, and the coarse filter is turned clockwise to secure it.

Cleaning Spray Arms: Blocked spray arm nozzles can impair cleaning performance.

  1. Removing spray arms: The upper spray arm is unscrewed and pulled down, while the lower spray arm is simply pulled up to remove.
  2. Checking and cleaning nozzles: Users should check the outlet nozzles on both spray arms for blockages and remove any foreign bodies under running water.
  3. Re-inserting spray arms: The lower spray arm is re-inserted until it clicks into position. The upper spray arm is re-inserted and screwed firmly into place.

Cleaning Wastewater Pump: If the wastewater pump is blocked, it needs to be cleaned.

  1. Disconnecting power: The appliance must be disconnected from the power supply.
  2. Removing filter system: The filter system is removed.
  3. Scooping out water: Any remaining water is scooped out.
  4. Removing pump cover: The pump cover is pried off using a spoon, gripped by the crosspiece, lifted inwards at an angle, and removed.
  5. Removing foreign bodies: Any food remnants or foreign bodies in the impeller area are removed.
  6. Re-inserting pump cover: The pump cover is re-inserted and pressed down until it clicks into position.
  7. Installing filter system: The filter system is re-installed.

Troubleshooting: The manual provides a comprehensive troubleshooting guide for common faults:

  • E:18 or water supply indicator: Often indicates a kinked supply hose or turned-off/jammed water tap. Solutions include straightening the hose, turning on the tap, or checking the water flow rate (at least 10 l/min). If the filter in the water supply is blocked, a detailed 11-step process is provided to clean it, involving disconnecting power, turning off water, unscrewing connections, cleaning the filter, and re-assembling.
  • E:22 lights up: Indicates soiled or blocked filters, requiring cleaning.
  • E:25 lights up: Indicates a blocked wastewater pump (requiring cleaning) or a loose wastewater pump cover (requiring securing until it clicks).
  • Remnants of food on tableware: Possible causes include tableware placed too close together (requiring proper spacing), blocked spray arm rotation (requiring arrangement of tableware to allow free rotation), blocked spray arm nozzles (requiring cleaning), soiled filters (requiring cleaning), incorrectly inserted filters (requiring proper insertion and engagement), or a too-weak washing program (requiring selection of a more intensive program).
  • Removable streaks on glasses/glassware with metallic appearance/cutlery: Indicates too much rinse aid (requiring adjustment to a lower setting) or no rinse aid (requiring addition).
  • Rust spots on cutlery: Indicates non-rust-resistant cutlery (requiring use of rust-resistant tableware) or washing rusting items together (requiring avoidance of this).
  • Detergent residue in dispenser/tablet collecting tray: Indicates blocked spray arms (requiring checking and ensuring free rotation).

Siemens SN536S01KE Specifications

General IconGeneral
TypeBuilt-in
SizeFull-size
Energy Efficiency ClassA++
Capacity13 place settings
Noise Level44 dB
Water Consumption9.5 L
Dimensions (H x W x D)845 x 600 x 600 mm
Programs6
Annual Energy Consumption262 kWh
Annual Water Consumption2660 L
Drying ClassA
Delay StartYes
Child LockYes
Water ProtectionAquaStop

Related product manuals