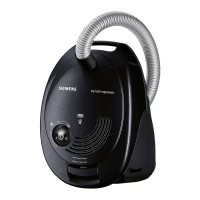
35
R
eplacing the bag
Figure
a)If the dust bag change indicator lights up red
continuously when the floor tool is lifted from the
floor and the highest power setting has been
s
elected, the dust bag must be changed, even
though it may not yet be full. Even if the dust bag is
not full, it may still need changing, due to the type of
dust which has been vacuumed.
First check that the nozzle, suction pipe and flexible
hose are not blocked, as this would also lead to the
d
ust bag change indicator being triggered.
b
)The handle can easily be detached from the hose to
remove blockages.
Figure Opening the lid
● Open the lid by moving the locking lever in the
direction of the arrow.
Figure
a)Seal the dust bag by pulling the sealing tab, and
remove the bag.
b)Insert the new dust bag fully into the holder.
!
Caution: the lid will only close if a dust bag has been
inserted.
Cleaning the motor protection filter
The motor protection filter should be cleaned regularly
by tapping out the dirt and rinsing.
Figure
● Open the dust bag compartment lid.
Figure
● Pull out the motor protection filter in the direction of
the arrow.
● Clean the motor protection filter by tapping out the
dirt.
● If it is very dirty, the motor protection filter should
be rinsed out.
● The filter must then be left to dry for at least 24
hours.
● After cleaning, insert the motor protection filter into
the appliance and close the dust bag compartment
lid.
If required, you can purchase a replacement motor
protection filter through our after-sales service
(see after-sales service centres directory).
Order no. 618907
Replacing the exhaust filter
Replacing the micro-hygiene filter
This should be replaced with every replacement filter
pack
Figure
● Open the dust bag compartment lid.
Figure
● Release the filter holder by turning the locking lever
in the direction of the arrow.
● Remove the micro-hygiene filter. Insert the new
micro-hygiene filter into the appliance.
● Insert the filter holder in the appliance and lock it in
place.
19
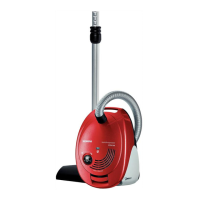
20
21
1
9
22
19
1
8*
The Hepa filter can be rinsed out to clean it.
If you would like to replace the Hepa, the replacement
fi
lter is available at retailers (see special accessories).
Rinsing the HEPA filter
With normal household use, the Hepa filter must be
rinsed once a year.
Figure
● Open the dust bag compartment lid.
Figure
● Unlock the Hepa filter by pressing the locking tab
a
nd remove it from the appliance.
●
Rinse the Hepa filter under running water and use a
brush to help you clean it.
● Do not re-insert the Hepa filter into the appliance
until it has dried completely (24 hrs.) and then close
the dust bag compartment lid.
If you have vacuumed up fine dust particles, clean the
motor protection filter and, if necessary, replace the
micro-hygiene filter or rinse the Hepa filter.
Care
Always switch off the vacuum cleaner and disconnect it
from the mains before cleaning the vacuum cleaner.
The vacuum cleaner and plastic accessories can be
cleaned with a commercially available plastic cleaner.
!
Do not use a scourer, glass-cleaning agent or all-
purpose cleaning product. Never immerse the
vacuum cleaner in water.
The dust compartment can, if necessary, be cleaned
with a second vacuum cleaner or simply wiped with a
dry cloth or dusting brush.
Subject to technical modifications.
23
19
*
depending on model
 Loading...