PISTOL MOUNTED WHITE LIGHT
FOXTROT1X
™
OPERATORS MANUAL
ELECTRO-OPTICS
Please visit sigsauer.com for Owners Manual downloads.
INTRODUCTION:
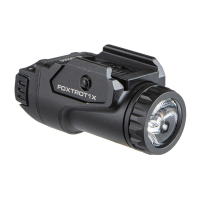
The FOXTROT1X™ is a compact yet powerful pistol mounted white light that is
perfect for concealed carry, home defense and duty use. The FOXTROT1X™ is
compatible with any firearm that uses a MIL-STD 1913 rail, as well as many other
pistols on the market.
The FOXTROT1X™ is covered by the SIG SAUER Electro-Optics Infinite
Guarantee and Electronics & Tritium Component Limited 5-Year Warranty.
KEY FEATURES:
• 450 Lumens
• 1.5 Hours of Runtime
• Runs on 1 x CR123A Lithium Battery
• Compact 6061 Aluminum Housing
• Ambidextrous Side Activation Switches with Momentary and Latching
Modes
• Lockout Mode
• 4-Position Sliding Rail Interface Adapter Inserts For Maximum Adjustment
Range on the Firearm
CONTENTS:
• FOXTROT1X™ Tactical White Light
• CR123A Lithium Battery
• 2 Rail Interface Adapter Inserts
• E-Clip Removal/Installation Tool
PRODUCT IDENTIFICATION:
A. Bezel
B. Cross Bolt
C. Activation Switch
D. E-Clip
E. Rail Mount Keeper
F. Rail Interface Adapter Insert
IMPORTANT:
Prior to installation, battery change, cleaning or maintenance, follow the firearm
operator’s manual to ensure the firearm is unloaded and pointed in a safe
direction.
BATTERY INSTALLATION/CHANGE
Turn the bezel counter-clockwise completely to remove it. Insert a fresh CR123A
lithium primary battery into the battery compartment of the flashlight, positive (+)
end first (Fig. 1). Replace the bezel and turn it clockwise until fully tightened.
SELECTING THE PROPER RAIL INTERFACE INSERT
The FOXTROT1X comes with 2 sliding rail interface insert pieces. One is
marked M1913 and is meant for any MIL-STD 1913 or similar rail. The other
insert piece is marked OTHER and is meant for pistols with non-MIL-STD 1913
rail designs. To change out the rail interface insert piece, the FOXTROT1X must
be completely disconnected from the rail.
1. Turn the cross bolt head clockwise with a athead screwdriver until the
small E-clip is exposed on the other end of the bolt.
2. Use the included E-clip tool (with the word REMOVE face down) to push
the E-clip o the end of the cross bolt (Fig. 2 & 3), taking care not to lose
the small E-clip.
3. Next, turn the cross bolt head counter-clockwise until the cross bolt can
be pulled completely out, taking care not to lose the wave spring that is
on the cross bolt, or the rail mount keeper.
4. Test both rail interface insert pieces to determine which one has a recoil
lug that ts securely into a slot on the rearm rail with the least amount
of free play.
5. Put the correct rail interface insert piece into the slot on top of the light,
reinsert the cross bolt with wave spring through the rail insert piece and
thread it clockwise into the rail mount keeper.
6. Turn the cross bolt head clockwise completely, to expose the groove on
the end of the cross bolt. Use the E-clip tool (with the word INSTALL face
down) to slide the E-clip onto the groove on the end of the cross bolt (Fig.
4 & 5).
A
B
C
A
D
E
A
D
F
E
B
C
FIGURE 1.
FIGURE 3.
FIGURE 2.
FIGURE 5.
FIGURE 4.