EasyManua.ls Logo

Signature Hardware ROTUNDA - User Manual

Signature Hardware ROTUNDA
5 pages
Print Icon
To Next Page IconTo Next Page
Loading...
1Rotunda Wall-Mount Faucet Installation Instructions
ROTUNDA WALL-MOUNT FAUCET INSTALLATION
GETTING STARTED
TOOLS AND MATERIALS:
BEFORE YOU BEGIN
We recommend consulting a professional if you are
unfamiliar with installing bathroom fixtures and
plumbing. Signature Hardware accepts no liability for
any damage to the floor, walls, plumbing, or personal
injury during installation.
For the following installation instructions, it is
assumed that any old fixture has been removed and
the main water supply is prepared for faucet installa-
tion.
Unpack and inspect the item for damage. If any
damage is found, contact our Customer Relations
team at 1-866-855-2284.
Ensure that you have gathered all of the required
materials that are needed for the installation.
Plumber’s Tape
Shut off the main water supply where the new faucet
is being installed.
PLANNING
Use the faucet’s PDF specification sheet as a refer-
ence when planning your installation. The specifica-
tion sheet can be found and downloaded from the
product page on our website.
Because the faucet specification
measurements are approximate and slight variations
may occur, we highly recommend performing any
rough-in procedures with the faucet on site.
Drill
Thread Sealant
Tape Measure
Level
Hex Wrench
(provided)
Flathead
Screwdriver
Pipe Clamps
SKU(s): 919045

Other manuals for Signature Hardware ROTUNDA

Question and Answer IconNeed help?

Do you have a question about the Signature Hardware ROTUNDA and is the answer not in the manual?

Summary

Faucet Installation

Prepare Wall Blocking

Install wood blocking between studs, considering finished wall material thickness.

Mount Valve Body

Attach the valve body to wood blocking using pipe clamps, ensuring it is mounted straight.

Connect Water Lines

Attach existing water lines to the valve body using thread sealant or tape for a watertight seal.

Test and Flush System

Turn on water supply, remove aerator to flush sediment, and verify hot/cold water flow.

Drain Installation

Insert Drain Components

Insert the drain flange and tailpiece through the sink's drain hole.

Install Tapered Gasket and Washer

Slide the tapered rubber gasket and plastic friction washer onto the tailpiece.
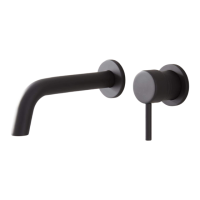
Signature Hardware ROTUNDA Specifications

General IconGeneral
BrandSignature Hardware
CategoryKitchen & Bath Fixtures
ModelROTUNDA
MaterialBrass
StyleTraditional
Number of Handles2
Faucet Holes3
AeratorYes
WarrantyLimited Lifetime
Installation TypeDeck Mounted
Spout Reach6 inches
FinishPolished Nickel

Related product manuals