INSTALLING A BATTERY
1.
Hold the tool firmly with one hand.
2. Using your other hand, insert the battery into the
tool with a sliding motion.
3. Firmly push the battery until fully seated. When
fully seated the battery locks in place.
The Green indicator light will flash for
app
roximately while the tool energizes. One the
light stops flashing the tool is ready for use.
4. To remove the battery press the Red release
button on the battery and slide out.
NOTE: The power indicator light on the top of the tool will flash Green indicating the battery
has enough charge. If the indicator light flashes Red, charge the battery accordingly.
REPLACEMENT BATTERIES & CHARGERS
110 VOLT
BATTERY CHARGER
P/N 800294 P/N 800293
220 VOLT
BATTERY CHARGER
P/N 800386 P/N 800385
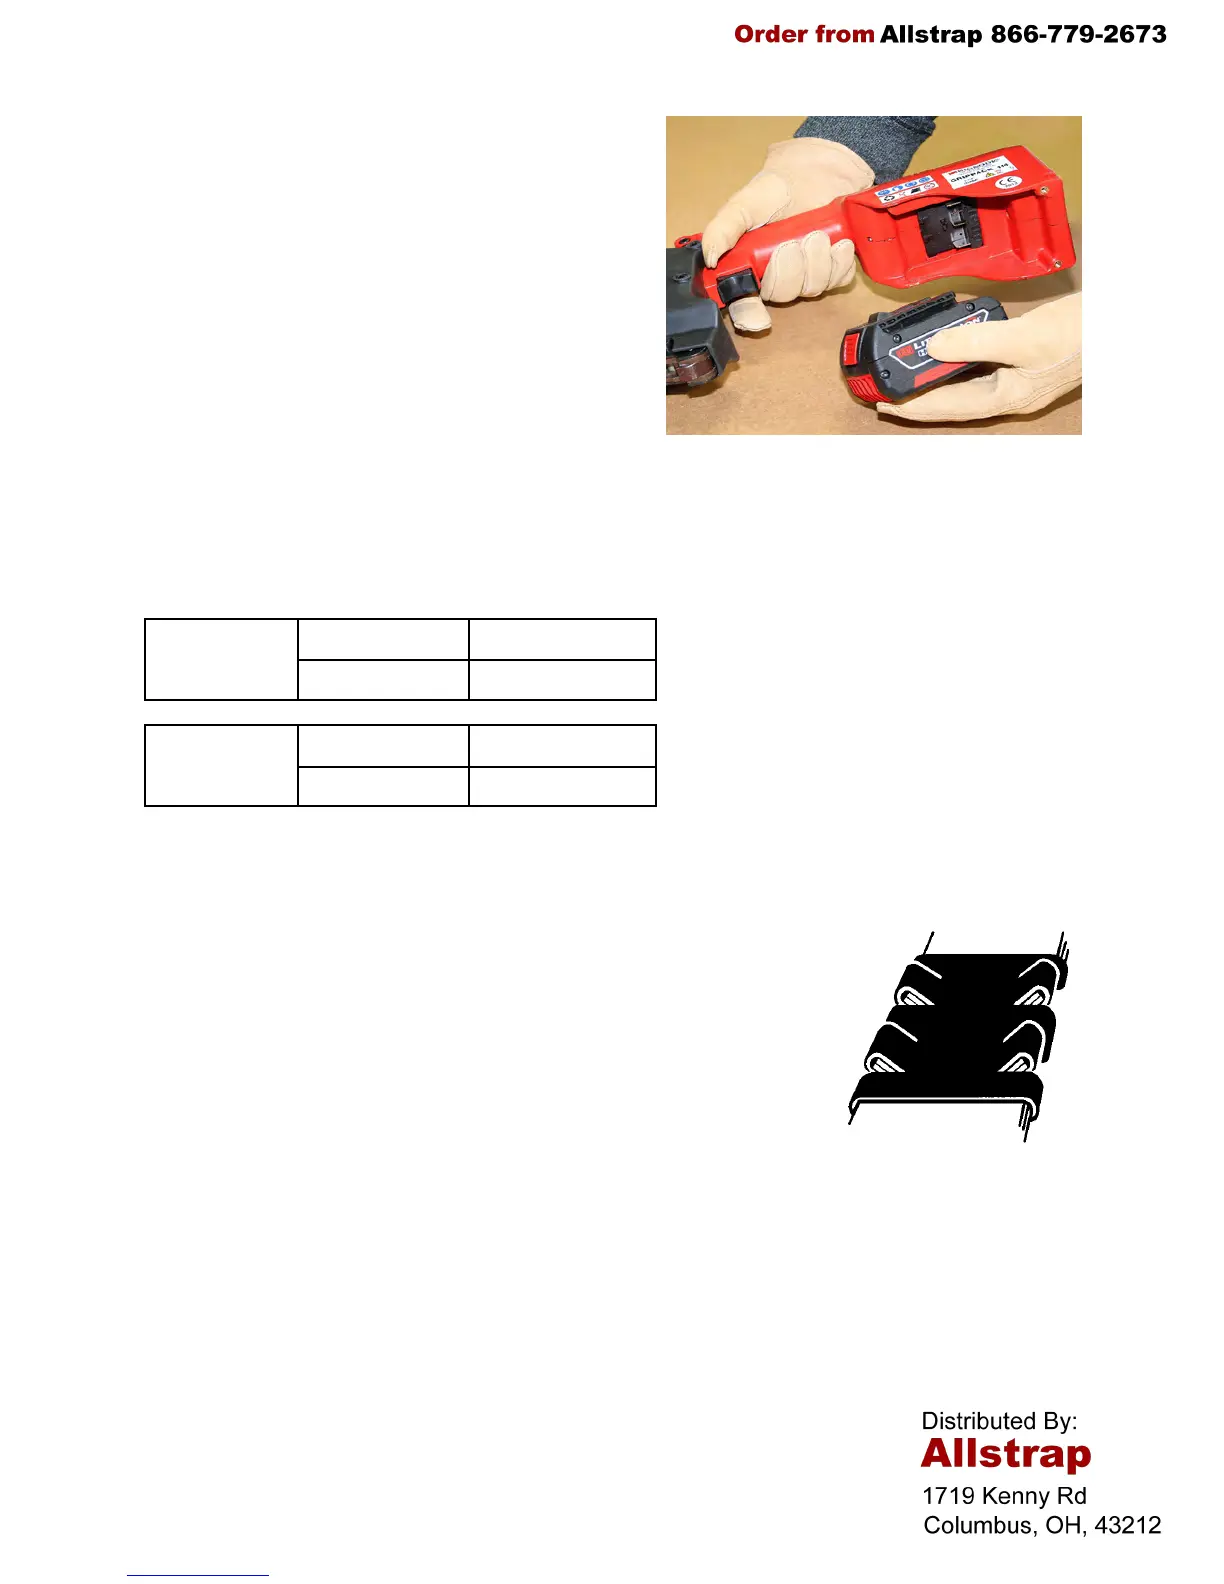
JOINT FORMATION & INSPECTION
An improperly formed joint, or a joint with an incorrect number of
notches, could result in strap separation. Before moving any package,
be certain that the joint is formed as shown in the illustration. If not,
remove the strap and check the tool for worn or broken parts. Repair
the tool before applying another strap. Failure to follow this procedure
could result in serious injury or death. If you have questions regarding
proper joint formation, contact your Signode Sales Representative.
Before making a double reverse notch seal joint, read the sealing tool’s
Operation, Parts and Safety Manual. A properly formed double reverse
notch joint will appear as shown in the illustration. Always use the correct number of seals
recommended by your Signode Sales Representative.
If the double reverse notch joint does not appear as shown in the illustration, proceed as
follows:
A. Review the tool’s operating instructions to be certain that the tool is being operated
properly before applying another strap.
B. Cut the strap off and apply a new strap and seal.
Tuck strap end back into the dispenser when not in use.
8
 Loading...