Getting Started with Silhouette Curio™
Prepare the blade plunger by removing the protective covering and adjusting the blade to the
appropriate number setting for the material you plan to cut. Refer to Silhouette Studio® for
recommended blade settings for different materials.
9
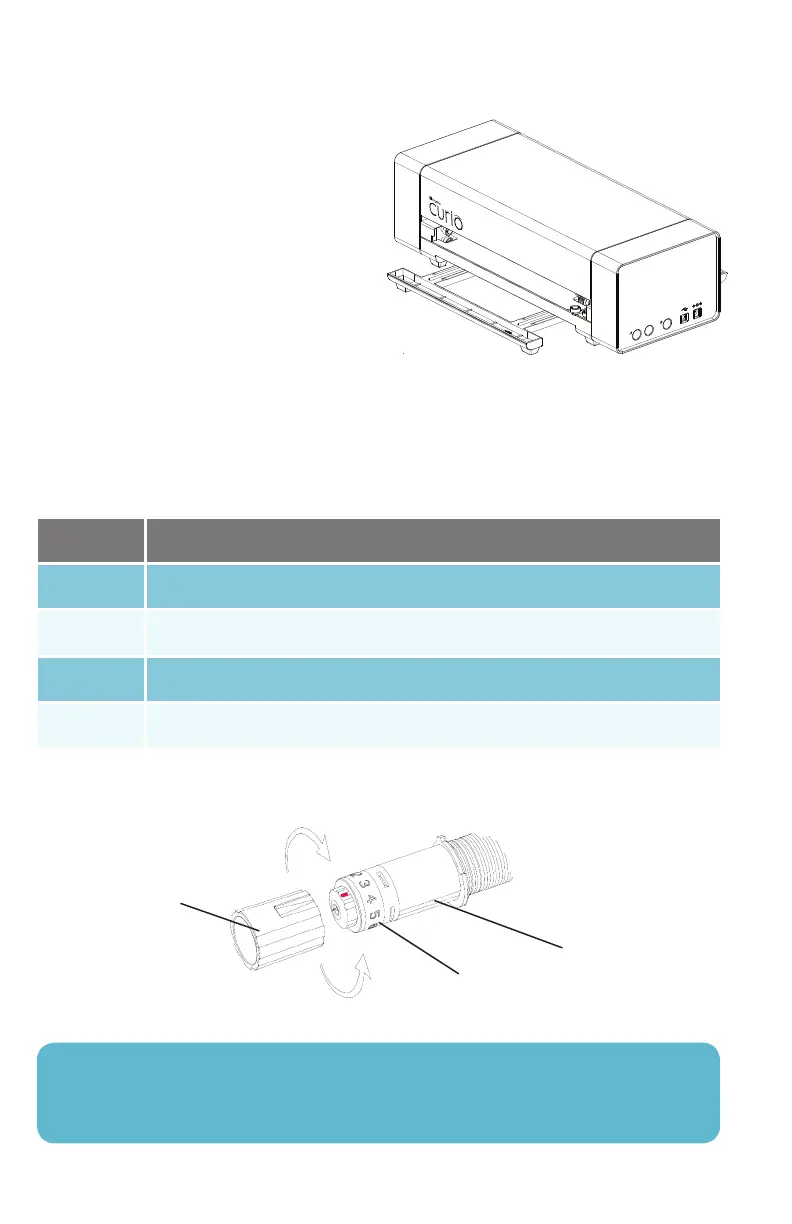
ratchet cap
blade
numbered blade setting
To adjust the blade setting, place the grey ratchet cap on the end of the blade so the arrow on the cap
lines up with the red line on the blade. Turn the ratchet to the desired number.
Blade setting
1
4-6
7-10
2-3
Material
Thin materials such as vinyl and smooth heat transfer material
Thicker materials such as textured cardstock and pattern papers
Thick materials such as canvas
Medium-weight materials such as paper, cardstock and flocked heat transfer material
NOTE: To remove fibers from blade housing, ratchet blade down to 0 and carefully grasp the
white tip turning it counterclockwise to remove the small end cap. Blow fibers away (do not
touch blade). Replace and hand-tighten cap.
Inserting the Base into the Curio
Before inserting the base into the Curio, it is important to
ensure there is adequate clearance in front of and
behind the Curio for the base to move in and out
unimpeded. You can also extend the stabilizing feet
for additional stability of heavy or long projects.
To load the base into the Curio:
1. Power off the Silhouette Curio
2. Insert the base into the front of the Curio
3. Push the base inward until the leading edge of
the base extends out the back of the Curio
4. Power on the Curio
 Loading...