1� Slide the union nut (1) on the radiator valve
until you hear a distinct "click" and the union
nut (1) can be rotated freely.
If the union nut (1) is tted the wrong way around
on the radiator valve, the union nut (1) can be
simply screwed o and then tted the right way
around.
If the wrong union nut (1) is tted, the union nut (1)
must be removed as described below:
1� Use a at object, e.g. a screwdriver, to press
lightly on the rim of the device.
2� Pull the union nut (1) o.
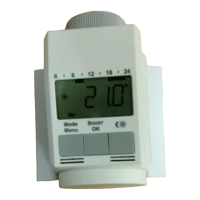
9� Navigating in the Menu
Press the Menu button (10 a), and keep it
pressed, to open the menu.
Turn the Setting wheel (5) to select the function re-
quired.
Press the OK button (10 b) to activate the function.
You can use the Setting wheel (5) to change the
settings�
Press the OK button (10 b) to conrm your input.
Following 30 seconds without any input, the dis-
play switches back to the main screen.
DISPLAY Explanation
Timer programme
Current valve position
Reset the default factory settings
 Loading...