10 GB/IE/NI
Before use
Unpacking
Remove the packaging. Check if the product is
damaged.
Assembly
Accessory needed: Cross head screwdriver
Number of persons needed for assembly: 1 adult
Fig. Step
B
1. Remove the 4lock screws[] from the
cross base[].
2. Place both parts of the cross base[] on
the floor so they resemble the shape of a
cross.
C
1. Remove the pole cover[] from the lower
pole[].
2. Loosen the height adjustment lock[] on
the extension pole[].
3. Pull out the extension pole[].
D
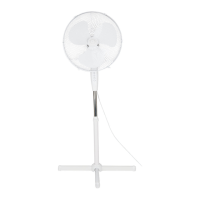
1. Place the lower pole[] on the cross
base[].
2. Tighten with the 4lock screws[].
E
1. Insert the pole cover[] into the lower
pole[] until it hits the bottom.
2. Tighten the height adjustment lock[] at
the desired height.
F
1. Remove the grille lock nut[4] from the
motor unit[6].
2. Attach the rear grille[5] to the motor
unit[6].
3. Tighten with the grille lock nut[4].
G
1. Place the blade[3] on the motor shaft[].
2. Tighten with the blade lock nut[2].
Fig. Step
H
1. Open the 4grille clips on the front
grille[1].
2. Remove the lock screw and the lock
nut[] from the front grille[1].
3. Hang the hanger of the front grille[1] on
the rear grille[5].
4. Insert the lock screw[]. Fasten the lock
nut[]. Close the 4grille clips at the grille
frame.
NOTE: The 4grille clips must fit over the
frame of the rear grille[5].
I
1. Place the motor unit [6] with speed button
panel[8] on the extension pole[].
2. Align the hole on the back side.
3. Tighten with the lock screw[9].
Height adjustment
Loosen the height adjustment lock [] (positioned
on the extension pole []) in a counter-clockwise
direction.
Adjust the length of the extension pole [].
Tighten the height adjustment lock [] in a
clockwise direction.
Tilt adjustment
Adjust the tilt angle manually.
Do not perform the tilt adjustment when the
product is in operation.
NOTE: Do not remove the lock screw[9] when
adjusting the tilt angle.
 Loading...
