Mechanically Installing the
Relay IAM with T-Sense
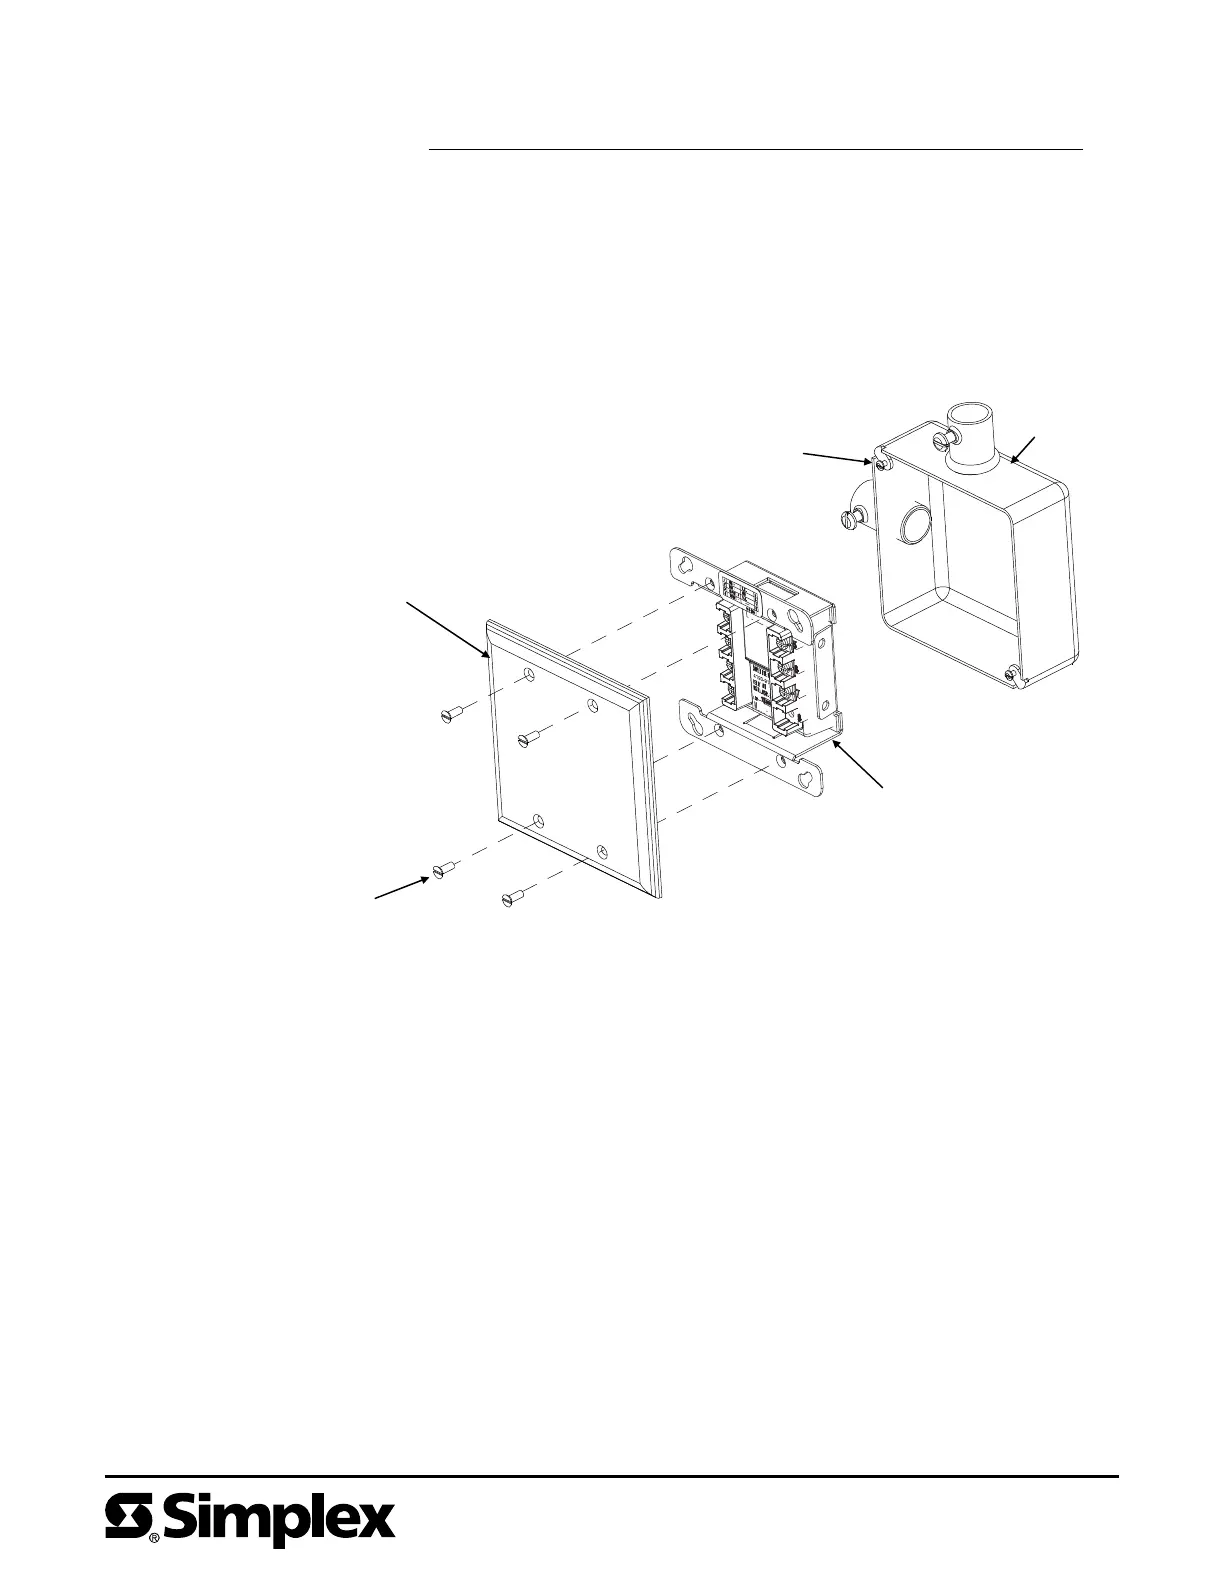
Install the Relay IAM with T-Sense into a grounded, 4-inch (10.16 cm)
UL-Listed back box (not supplied) using Figure 4 as a reference. Mount the
Relay IAM with T-Sense to the back box as follows:
1. Loosen the two screws on the square back box.
2. Mount the Relay IAM with T-Sense to the back box using the teardrop holes on
the mounting bracket.
3. Secure the Relay IAM with T-Sense to the back box using the two #8/32
panhead screws.
Note: Simplex offers semi-flush and surface covers (ordered separately) with
a light pipe. The cover(s) with light pipe allow viewing of the
communications LED without taking the cover off. Installation of the
4090-9801 semi-flush cover and 4090-9802 surface cover are detailed
in publication 4090 IDNet
™
Semi-Flush/Surface Covers and IAM
Bracket Installation Instruction (574-796).
UL-Listed
4-Inch (10.16 cm)
Square
(2-Inch [5.08 cm]
Deep)
Back Box
(Not Supplied)
Cover
(Not Supplied)
4090-9118
Relay IAM with T-Sense
#6/32 Flathead Screw
(Not Supplied)
#8/32 Panhead Screw
(Not Supplied)
Figure 4. Relay IAM with T-Sense Back Box Installation
574-874
Rev. C
 Loading...