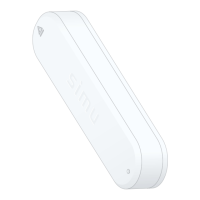
Le Windy Hz Accel est un capteur de mouve-
ment en trois dimensions sans fi l et autonome.
Il permet la remontée automatique du store lorsque
celui-ci est soumis à des secousses provoquées par
le vent. La détection des secousses correspond à un
seuil de sensibilité.
Le Windy Hz Accel est conçu uniquement pour les
stores “Terrasse” à bras de type banne, coffre ou
cassette.
Le Windy Hz Accel est compatible avec la gamme
actuelle de moteurs Hz (Hz.02, DMI Hz, ESP Hz),
télécommandes Hz Simu.
Attention : Ce capteur ne protège pas votre
store en cas de rafale de vent ; en cas de risque
météorologique de ce type, s’assurer que le store
reste fermé.
1. SÉCURITÉ
Ce produit Simu doit être installé par un professionnel
de la motorisation et de l’automatisation de l’habitat,
auquel cette notice est destinée.
Avant toute installation, vérifi er la compatibilité de ce
produit avec les équipements et accessoires associés.
Cette notice décrit l’installation, la mise en service et le
mode d’utilisation de ce produit.
L’installateur doit par ailleurs se conformer aux normes
et à la législation en vigueur dans le pays d’installation,
et informer ses clients des conditions d’utilisation et de
maintenance du produit.
Toute utilisation hors du domaine d’application défi ni
par Simu est non conforme. Elle entraînerait, comme
tout irrespect des instructions fi gurant dans cette
notice, l’exclusion de la responsabilité et de la garantie
de Simu.
Pour éviter d’endommager le produit :
1) Éviter les chocs !
2) Ne pas le faire tomber !
3) Ne pas l’immerger !
4) Ne pas utiliser de produits abrasifs ni de solvants
pour nettoyer le produit.
5) Ne pas le nettoyer par pulvérisation d’eau ou par
un nettoyage haute pression. Veiller à la propreté
du capteur et vérifi er régulièrement son bon
fonctionnement.
2. MODES DE RÉGLAGE
• Réglage par seuil prédéfi ni
Le réglage par seuil prédéfi ni correspond à une
détection des mouvements à partir de valeurs seuil
préréglées à l’aide du potentiomètre.
Chaque valeur correspond à un seuil de sensibilité aux
secousses :
Seuil 1 = FORTE sensibilité aux secousses : des
secousses de faible intensité provoquent la remontée
du store.
Seuil 9 = FAIBLE sensibilité aux secousses : des
secousses de forte intensité provoquent la remontée
du store.
Le seuil 2 offre une sensibilité aux secousses dans des
conditions normales.
En sortie d’usine, le Windy Hz Accel est réglé sur le
seuil 2.
• Réglage par seuil personnalisé
Le réglage par seuil personnalisé correspond à une
détection de secousses à partir d’un seuil de sensi-
bilité réglé par l’installateur.
Le store est secoué manuellement jusqu’à la remontée
automatique : l’intensité des secousses provoquées
est enregistrée par le capteur. Si aucune secousse
n’est émise avant la remontée automatique, le capteur
repasse automatiquement en confi guration d’origine:
le Windy Hz Accel se règle automatiquement sur le
seuil 2.
Après réglage du seuil, le capteur passe en mode
« Démonstration » lors des deux premiers cycles
suivant le réglage. Ce mode permet de modifi er facile-
ment le réglage sélectionné. Un simple appui sur la
touche STOP arrête la remontée du store et permet
demodifi er le seuil de sensibilité en renouvelant les
secousses manuelles.
3. DESCRIPTION DES ÉLÉMENTS
☛ VOIR FIGURE A
Couvercle
Potentiomètre
Capteur
Bouton PROG
Support
Piles alcalines AAA
4. INSTALLATION
• Préconisations d’installation
☛ VOIR FIGURE B
Le Windy Hz Accel se fi xe sur la barre de charge au
niveau des extrémités ou au milieu. La détection des
secousses est plus sensible au niveau des extrémités.
Attention : Le Windy Hz Accel ne doit jamais
être enfermé dans la barre de charge !
Attention : Le Windy Hz Accel ne fonctionne que
lorsque le capteur
est fi xé au support
et que les
réglages sont fi nis.
Attention :
La portée radio du capteur est de X = 20 m.
Certains équipements à forte puissance radio (par
exemple des casques hifi sans fi ls) avec une fréquence
de transmission identique peuvent affecter sa fonction.
• Pré-montage du support
Attention : Ne jamais associer plusieurs systèmes de
fi xation !
1- Fixation du support avec l’adhésif
☛ VOIR FIGURE C
Attention : L’adhésif fourni est à usage unique !
Toujours utiliser l’adhésif fourni par Simu.
L’utilisation de tout autre adhésif est interdit !
- Placer le support
sur la barre de charge : la surface
doit être plane et adaptée au collage du support.
- Contrôler si l’emplacement choisi n’empêche pas la
remontée du store et ne détériore pas le capteur.
- Nettoyer la barre de charge.
- Coller l’adhésif sur l’arrière du support
.
- Fixer l’ensemble adhésif-support sur la barre de
charge : la fl èche gravée sur le support doit être
orientée pointe vers le haut.
2- Autres moyens de fi xation du support
☛ VOIR FIGURES D ET F
Le support
se fi xe sans rondelle à l’aide de 2 vis
cylindriques bombées Ø 4, de 2 vis à tête fraisée Ø 4,
de 2 rivets pop Ø 4.
- Placer le support
sur la barre de charge.
- Contrôler si l’emplacement choisi n’empêche pas la
remontée du store et ne détériore pas le capteur.
- En fonction du moyen de fi xation choisi, percer deux
trous dans la barre de charge selon l’entraxe du
support (voir Caractéristiques techniques, fi gure F).
- Fixer le support : la fl èche gravée sur le support doit
être orientée pointe vers le haut.
• Mise en place des piles
☛ VOIR FIGURE E
Attention : Ne jamais utiliser de piles
rechargeables pour alimenter le capteur !
- Sortir le capteur du couvercle à l’aide d’un tournevis
plat.
- Insérer les piles AAA fournies
dans le capteur en
respectant la polarité indiquée : La LED s’allume
pendant 1 sec pour confi rmer la mise en place
correcte des piles.
5.
CARACTÉRISTIQUES TECHNIQUES
- Alimentation : 2 piles alcalines AAA (LR03) 1,5 V
- Dimensions : 25 x 38 x 153 mm (h x l x L)
-
Veillez à séparer les piles et batteries des
autres types de déchets et à les recycler via
votre système local de collecte.
The Windy Hz Accel is a wireless, independent,
three-dimensional motion sensor. It enables
the awning to be raised automatically when it is being
shaken by the wind. The detection of shaking corre-
sponds to a sensitivity threshold.
The Windy Hz Accel has been designed for terrace
awnings with arms, such as canopy, box or cassette
awnings. The Windy Hz Accel is compatible with Hz
motors (Hz.02, DMI Hz, ESP Hz), Hz remote controls
from Simu.
Caution! The sensor does not protect the
awning against sudden squalls; keep the awning
closed if there is a risk of such a meteorological
phenomenon.
1. SAFETY
This product must be installed by a person with profes-
sional knowledge of motorisation and home automa-
tion, for whom these instructions are intended.
Never begin installing without fi rst checking the
compatibility of this product with the associated equip-
ment and accessories. These instructions describe
how to install, commission and operate this product.
Moreover, the installer must comply with the current
standards and legislation in the country in which the
product is being installed, and inform his customers of
the usage and maintenance conditions relevant to the
product.
Any usage outside of applications defi ned by Simu
constitutes non-compliance, and is therefore not
covered by the guarantee.
In this event, as for all usages not consistent with the
instructions given here, Simu declines any, responsi-
bility for harm or damage.
To prevent damaging the product:
1) Avoid impacts!
2) Do not drop it!
3) Do not submerge it!
4) Do not use abrasive products or solvents to clean
the product.
5) Do not clean it using a water spray or high pressure
cleaning method. Ensure that the sensor is kept
clean and regularly check it is operating correctly.
2. METHODS OF ADJUSTMENT
•
Predefi ned threshold adjustment method
Predefi ned threshold adjustment sets the detection of
shaking to one of the threshold values pre-set in the
potentiometer. Each value is a threshold of sensitivity
to shaking:
Threshold 1 = HIGH sensitivity to shaking: low inten-
sity shaking will cause the awning to close.
Threshold 9 = LOW sensitivity to shaking: high inten-
sity shaking will cause the awning to close.
Threshold 2 provides sensitivity to shaking under usual
conditions.
When leaving the factory, the Windy Hz Accel is set to
threshold 2.
•
Personalised threshold adjustment method
Personalised threshold adjustment will allow the
detection of shaking at a sensitivity threshold set by
the user.
The awning is shaken manually until it rises automati-
cally: the intensity of the shaking caused is recorded
by the sensor. If the awning is not shaken before it
rises automatically, the sensor switches automatically
to the factory pre-setmode: the Windy Hz Accel is set
to threshold 2.
Once the threshold has been set, the sensor switches
to « Demonstration » mode for the fi rst two cycles
following adjustment. This mode enables the selected
setting to be modifi ed easily. Simply pressing the
STOP button stops the awning rising and enables the
threshold of sensitivity to be modifi ed by shaking the
awning again manually.
3. DESCRIPTION OF THE PARTS
☛ SEE ILLUSTRATION A
Casing
Potentiomer
Sensor
PROG button
Support
Alkaline batteries AAA
4. INSTALLATION
• Installation recommendations
☛ SEE ILLUSTRATION B
The Windy Hz Accel is fi xed to the load bar, either
at the ends or in the middle. Shaking is more easily
detected at the ends.
Caution! The Windy Hz Accel must never be
enclosed in the load bar.
Caution! The Windy Hz Accel only works when the
sensor
is secured to the bracket
and the settings
are done.
Caution! The sensor’s radio range is X = 20m.
Powerful local transmitter equipment (e.g. wireless
headphones) with a transmission frequency identical
to the Windy Hz Accel can affect its function.
• Premounting the support
Caution! Never combine several fi xing systems.
1- Fixing of the support with adhesive
☛ SEE ILLUSTRATION C
Caution! The adhesive supplied is only to be
used for this operation. Always use the adhesive
delivered by Simu. The use of any other adhesive is
forbidden.
- Position the support
on the inside surface of the
load bar; the surface must be fl at and suitable for
gluing the support.
- Check that the position chosen does not prevent
the awning from closing and does not damage the
sensor.
- Clean the load bar with a cloth.
- Fix the support
onto the adhesive.
- Fix the adhesive and the support to the load bar: the
arrow engraved into the support must point upwards.
2- Other ways of fi xing the support
☛ SEE ILLUSTRATIONS D AND F
The support
may be fi xed, without washers, using
2 domed cylindrical-head 4-mm-diameter screws (not
supplied), 2 countersunk-head screws 4 mm in diam-
eter (not supplied), 2 pop rivets 4 mm in diameter (not
supplied).
- Position the support
on the inside surface of the
load bar.
- Check that the position chosen does not prevent
the awning from closing and does not damage the
sensor.
- Drill two holes into the load bar tomatch the holes in
the support and to suit the selected method of fixing
(see Technical characteristics, illustration F).
- Fix the support using the selected method of fi xing:
the arrow engraved into the support must point
upwards.
• Installing the batteries
☛ SEE ILLUSTRATION E
Caution! Never use rechargeable batteries to
power the Windy Hz Accel sensor.
- Remove the sensor from its casing using a fl at
screwdriver.
- Insert the AAA batteries provided
into the sensor,
following the polarity indicated: the LED will come
on for 1 sec to confi rm that the batteries have been
properly inserted.
5.
TECHNICAL CHARACTERISTICS
- Power supply: 2 AAA alkaline batteries (LR03) 1,5 V
- Size: 25 x 38 x 153 mm (h x l x L)
- Please separate the storage cells and
batteries from other types of waste and
recycle them via your local collection facility.
Der WINDY Hz Accel ist ein drahtloser,
autonomer Schwingungssensor. Er misst die
an der Markise bei Wind auftretenden Schwingungen
in 3 Dimensionen und sendet bei Überschreiten des
eingestellten Schwellenwertes ein „Wind“-Signal an
einen Funkempfänger. Die Gelenkarmmarkise wird
dann durch den Antrieb eingefahren.
Der WINDY Hz Accel ist ausschließlich für offene,
halbgeschlossene und vollgeschlossene Markisen mit
Gelenkarmen bestimmt und kompatibel zu allen Simu
Rohrmotor mit integrierter Funksteuerung (Hz.02,
DMI Hz, ESP Hz).
Achtung! Die Markise kann nicht vor plötzlichen
Windböen geschützt werden. Im Falle solcher
witterungsbedingter Risiken müssen Sie sicherstellen,
dass die Markise geschlossen bleibt.
1. SICHERHEIT
Dieses Produkt muss von einer fachlich qualifi zierten
Person installiert werden, für den diese Anleitung
bestimmt ist. Vor der Montage muss die Kompatibilität
dieses Produkts mit den dazugehörigen Ausrüstungs-
und Zubehörteilen geprüft werden.
Diese Anleitung beschreibt die Installation, die
Inbetriebnahme und die Bedienung dieses Produkts.
Die fachlich qualifi zierte Person muss außerdem alle
im Installationsland geltenden Normen und Gesetze
befolgen, und seine Kunden über die Bedienungs und
Wartungsbedingungen des Produkts informieren.
Jede Verwendung, die nicht dem von Simu bestim-
mten Anwendungsbereich entspricht, gilt als nicht
bestimmungsgemäß. Im Falle einer nicht bestim-
mungsgemäßen Verwendung, wie auch bei Nicht-
Befolgung der Hinweise in dieser Anleitung, verfällt
die Verantwortung und die Gewährleistungspfl icht von
Simu.
Damit der Windy Hz Accel nicht beschädigt wird:
1) Vermeiden Sie Stöße!
2) Lassen Sie das Gerät nicht fallen!
3) Tauchen Sie das Gerät nicht in Flüssigkeiten.
4) Verwenden Sie für die Reinigung des Gerätes keine
Schleif- oder Lösungsmittel.
5) Reinigen Sie das Gerät nicht mit einem Wasserstrahl
oder Hochdruckreiniger.
2. EINSTELLMODI
•
Einstellungdurch das Auswählen eines
„vorgegebenen Schwellenwertes“
Diese Einstellung entspricht einer Bewertung der
Schwingungen anhand eines mit einem Potentiometer
vorgegebenen Schwellenwertes.
Schwellenwert 1 = HOHE Empfi ndlichkeit gegen
Schwingungen; schon schwache Schwingungen
führen zum Einfahren der Markise.
Schwellenwert 9 = NIEDRIGE Empfi ndlichkeit gegen
Schwingungen; schon schwache Schwingungen
führen zum Einfahren der Markise.
Der Schwellenwert 2 bietet eine Empfi ndlichkeit, die auf
allgemeine Erfahrungen beruht. Werksseitig wird der
Windy Hz Accel auf den Schwellenwert 2 eingestellt.
• Einstellung durch Vorgabe einer
„manuellen Schwingung“
Diese Einstellung erfasst Schwingungen, die an
der ausgefahrenen Markise von Hand vorgegeben
werden. Die Intensität der manuell hervorgerufenen
Schwingungen wird vom Sensor gemessen und
gespeichert.
Werden keine manuellen Schwingungen vorgege-
ben, schaltet der Windy Hz Accel automatisch
auf den Schwellenwert 2. Nach Einstellen eines
Schwellenwertes schaltet der Sensor für die ersten
zwei Zyklen in den Demo-Modus um. In diesem
Modus kann die Markise gestoppt und sofort wieder
ausgefahren werden. Die Empfi ndlichkeit kann neu
eingestellt werden. Nach diesen zwei Zyklen schaltet
der Sensor automatischin den Normalbetrieb.
3. BESCHREIBUNGDER
KOMPONENTEN
☛ SIEHE ABBILDUNG A
Gehäusedeckel
Potentiometer
Sensor
PROG-Taste
Halterung
Alkali-Batterien AAA
4. MONTAGE
• Montagehinweise
☛ SIEHE ABBILDUNG B
Montieren Sie die Halterung des Windy Hz Accel an
den Enden oder in der Mitte des Ausfallprofi ls. Für die
bestmögliche Erfassung der Schwingungen empfehlen
wir eine Montage an den Enden des Ausfallprofi ls.
Achtung! Der Windy Hz Accel darf nie in den
Hohlraum des Ausfallprofi ls eingeschlossen
werden!
Achtung! Der Windy Hz Accel ist erst aktiv, wenn der
Sensor
in der Halterung
eingeschoben und die
Einstellung abgeschlossen ist.
Achtung!
Die Reichweite des Sensors beträgt X = 20m.
Die Funktion des Sensors kann durch leistungsstarke
lokale Sendegeräte (z.B. schnurlose Kopfhörer), die
auf der gleichen Frequenz senden, beeinträchtigt
werden.
• Vormontage der Halterung
Achtung! Kombinieren Sie nie verschiedene
Befestigungssysteme mit einander.
1- Befestigung der Halterung mittels Klebeband
☛ SIEHE ABBILDUNG C
Achtung! Das mitgelieferte doppelseitige Klebeband
ist nur für eine einmalige Verwendung bestimmt. Nur
das von Simu mitgelieferte Klebeband verwe den. Die
Verwendung von anderen Klebebändern ist untersagt!
- Wählen Sie eine geeignete Stelle am Ausfallprofi l.
- Vergewissern Sie sich, dass bei vollständig geschlos-
sener Markise genügend Platz für den Windy Hz
Accel vorhanden ist. Das Schließen der Markise darf
nicht behindert und der Sensor beim Einfahren nicht
beschädigt werden.
- Reinigen Sie diese Stelle des Ausfallprofi ls.
- Tragen Sie das Klebeband auf die Rückseite der
Halterung
auf.
- Befestigen Sie die Halterung samt Klebeband am
Ausfallprofi l: Der Pfeil auf der Halterung muss nach
oben zeigen.
2- Weitere Befestigungs möglichkeiten für die
Halterung
☛ SIEHE ABBILDUNGEN D UND F
Die Halterung
kann ohne Unterlegscheiben mit Hilfe
von 2 passenden Zylinderkopfschrauben Ø 4 mm,
2 passenden Linsenkopfschrauben Ø 4 mm, 2 passen-
den Blindnieten.
- Wählen Sie eine geeignete Stelle am Ausfallprofi l.
- Vergewissern Sie sich, dass bei vollständig geschlos-
sener Markise genügend Platz für den Windy Hz
Accel vorhanden ist. Das Schließen der Markise darf
nicht behindert und der Sensor beim Einfahren nicht
beschädigt werden.
- Bohren Sie bei Befestigung mittels Schrauben
zwei Löcher in das Ausfallprofil. Der Abstand der
beiden Bohrlöcher muss dem Mittelabstand der
Befestigungsbohrungen an der Halterung entspre-
chen (siehe technische Daten – Abbildung F).
- Befestigen Sie die Halterung am Ausfallprofi l: Der
Pfeil auf der Halterung muss nach oben zeigen.
• Einlegender Batterien
☛ SIEHEABBILDUNG E
Achtung! Keine wiederaufl adbaren Akkus zum
Betrieb des Windy Hz Accel verwenden!
- Entfernen Sie den Sensor
mittels eines
Schlitzschraubendrehers aus dem Gehäusedeckel
.
- Legen Sie die mitgelieferten Batterien
entsprech-
end der angegebenen Polarität in den Sensor ein:
Die LED (Leuchtdiode) leuchtet 1 Sek. lang auf, um
zu bestätigen, dass die Batterien korrekt eingelegt
sind.
5.
TECHNISCHE DATEN
- Energieversorgung: 2 Alkali-Batterien
Typ AAA (LR03) 1,5 V
- Gehäuseabmessungen: 25 x 38 x 153 mm (h x l x L)
- Speicherzellen und Batterien gehören
nicht in den Hausmüll. Entsorgen Sie sie
entsprechend den geltenden Vorschriften
im Handel oder den kommunalen
Sammelstellen.