IllCHEMEHTAL SERIES . — FITTING ' 1.1
You will require a small conventional screwdriver, a small phillips (cross headed screw
screwdriver and the ZX81 manual.
Refer to Appendix A for description of board layout.
Remove all leads and attachments from your ZX81.
Place ZX8l on table before you as for normal use.
Turn ZX81 over as though it were the front cover of a 'book,
Peel off the footpads located at the HI, SW, and SE corners of the bottom of the 2X81J
Completely loosen the five small recessed bolts which are now visible and lightly replact
footpads to avoid losing the three corner screws.
Lift of the bottom of 2X81 case and put it aside.
Remove the two additional bolts now visible, remembering thai* position.
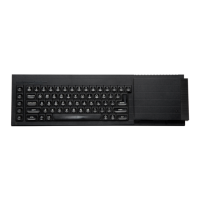
Note that the ZX81 board is now attached to the keyboard half of the case by just a thin
ribbon cable which you must take care not to damage. We do not recommend that the ribbon
be removed from its socket on the ZX8l board and there is no necessity to do this if thes
instructions are followed.
taking care not to strain the ribbon ca"ble, turn the ZX81 board (not the case) over as
though it were the top card on a deck (ie. the heat sink (big rectangle of metal) goes
under the board and away from you).
Turn to the chapter in the 2X81 manual entitled 'How the computer works' which contains a
picture of what now lies before you. Note the positions of the CPU and the IK HAM,
Take the memory board and find the positions of the ROM CS and the RAM CS depicted thereon
With these depictionsuppermost and towards you, position the memory board over the ZX81
board with the 40 protruding pins lying directly over the CPU on the ZX81. This is the
position of fitting which you should now remember.
If the Sinclair IK RAM is socketed (rather than soldered to the ZX81 board) then remove
it and put it aside, (see section entitled 'Hints and Tips' for advice on removal and
insertion of chips)
Remove CPU from ZX81 and insert it into memory boardbemng sure to match indentation at end
of CPU body with paint spot on memory board.
Remove the 14BA. bolts (there are 4) and washers from their guides on the memory board.
Note - you could fit the memory board directly in this position but this would necessitate
the removal of the ribbon cable from its socket in order to turn the board assembly back
on its tummy for reassembly of the case. - Instead make sure you know the poistion of
fitting before going on to next step.
Swivel the ZX81 heat sink to the extreme right to be sure of clearing thsraemory board
when fitting. Do not forget to move it back later!
Turn 2X81 board back on its tummy (ie components downward) .
Turn ZX81 (including ca.se) round 180 degrees so that heat sink is away from you.
Lift ZX81 board with left hand slipping memory board underneath it and around the ribbon cab.
and into poition with the other hand (ie so that pins are directly under ZX81 CPU socket) .
Carefully insert pins into ZX81 CPU socket with even pressure from thumbs on CPU body -
Be extremely careful to be sure that all 40 pins are going in straight and are not bending.
Do not insert too far into the socket - the correct depth of insertion will be automatically
attained on fitting the four bolts.
PTO
 Loading...