Do you have a question about the Singer 168W101 and is the answer not in the manual?
Specifies Type B oil for manufacturing machines.
Recommends Type D oil for stainless applications.
Lubricant for stainless thread stitching.
Oil for lubricated motors and bearings.
Grease for gear lubrication on machines.
Grease for ball bearings and electric transmitters.
Designation for the machine's configuration.
Designation for the machine's stitch and feed mechanism.
Prohibits improper use of the SINGER trademark on machines.
Recommends using genuine SINGER needles for proper operation.
Distinguishes genuine SINGER needles from others marked "FOR SINGER MACHINES".
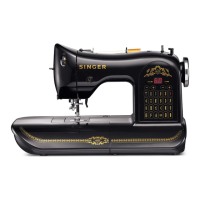
Details the machine's features and capabilities.
Specifies maximum recommended speed and break-in period.
Illustrates and describes lubrication points on the machine front.
Illustrates and describes lubrication points at the rear of the machine.
Illustrates and describes lubrication points in the machine base.
Illustrates and describes lubrication points from the machine's end view.
Specifies needle class (135x17) and variety for the 168w101 machine.
Guides on selecting needle size based on thread for optimal stitching.
Provides the correct format for ordering needles by quantity and size.
Specifies using left twist thread in the needle for proper stitching.
Allows either left or right twist thread for the bobbin.
Instructions for attaching the bobbin winder to the table.
Detailed steps for winding thread onto the bobbin using the winder.
How to adjust tension for even bobbin winding using screws A and B.
Notes that bobbins can be wound while the machine is actively stitching.
How to hold the bobbin case cap correctly for threading.
Steps for placing the bobbin into the bobbin case cap.
Guides on threading the thread under the tension spring for correct tension.
Detailed steps for routing the thread through all guides and levers.
How to catch the bobbin thread with the needle thread to start.
Steps to begin the sewing process after threading.
How to finish and remove the sewn material from the machine.
Illustrates a properly balanced needle and bobbin thread tension.
Shows needle thread lying straight on the upper surface due to tight tension.
Shows bobbin thread lying straight on the under side due to loose needle tension.
Instructions on adjusting needle thread tension using the thumb nut.
Instructions on adjusting bobbin thread tension via a screw.
Instructions on adjusting material pressure using a thumb screw.
Regulating the lift of alternating presser feet for material thickness.
Instructions for changing the stitch length using an adjusting screw.
Explains the function of the thread controller spring.
How to adjust controller action using stop screw S.
How to adjust the controller spring tension.
Instructions for correctly positioning the needle bar.
Procedure for setting the needle bar when timing marks are absent.
Adjusting needle bar frame and vibrating presser bar frame positions.
Procedure for timing the sewing hook relative to the needle.
Adjusting the hook's closeness to the needle without striking.
Adjusting the needle guard for proper thread loop catching.
Procedure for adjusting the feed dog's height.
Instructions for removing the needle bar rock frame.
Instructions for removing and replacing the arm shaft connection belt.
Instructions for using the Belt Replacer 265058 for pulley engagement.
Instructions for adjusting the bobbin case lever for proper opening.
| Brand | Singer |
|---|---|
| Model | 168W101 |
| Category | Sewing Machine |
| Language | English |