Do you have a question about the Singer 175-60 and is the answer not in the manual?
Lists specific SINGER oil types (B, D) for the machines.
Describes other lubricants like Type E and Type F.
Explains why using genuine SINGER parts and needles ensures successful operation.
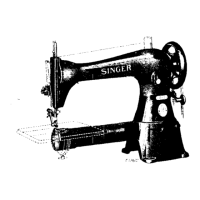
Details the capabilities of the 175-60 model, including stitch types and button adjustments.
Highlights the differences between the 175-61 and 175-60 models.
Illustrates the machine installation on a specific power table.
Shows the rear view of the machine installation, including belt and pulley guards.
Details the underside of the power table, showing idler and belt guide placement.
Specifies the maximum recommended operating speed for the machines.
Identifies specific oiling points within the machine's head.
Shows oiling points on the right side of the machine after removing the cover.
Displays oiling points on the left side of the machine.
Details oiling points visible from the bottom view of the machine.
Advises using only SINGER Type B or Type D oil.
Explains how to release the thread nipper for easier threading.
Illustrates the thread path at the top of the machine arm and face plate.
Instructions on setting the needle and regulating thread tension.
Method for severing thread and common causes of thread/needle breakage.
Details the types and classes of needles for the machines.
Adjusting clamp opening for flat buttons and switching between two/four-hole types.
Adjusting clamp motion, feed plate for Dubbilstay, and needle bar vibration.
Centering needle in flat button holes and adjusting for through-and-through stitching.
Centering needle in shank button holes and changing the button clamp.
Changing feed plates/holders and sewing flat buttons close to material.
Changing work support and sewing flat buttons away from material.
Sewing flat buttons with stay buttons, away from the material.
How to perform blind stitching on flat buttons close to the material.
Adjusting the work support for blind stitching flat buttons.
Instructions for blind stitching flat buttons away from the material.
Sewing flat buttons with stay buttons, close to the material.
Sewing flat buttons with stay buttons, away from the material.
Performing blind stitching on self-shank buttons.
Further details on blind stitching self-shank buttons and related adjustments.
Instructions for blind stitching metal shank buttons.
Instructions for stitching metal shank buttons through and through.
Further details on stitching metal shank buttons, including adjustments.
Sewing leather shank buttons through and through.
Adjustment for button holder G6 and button finger Y5.
Adjustment for work support F6.
Lists button types, stitching methods, and required fittings for the machines.
Lists fittings for blind stitched self-shank buttons.
Lists fittings for blind, through-and-through, and stay button shank stitches.
Information and equipment details for snap fasteners on Machine 175-61.
Instructions for adjusting the machine's stop motion mechanism.
Adjusting the spring tension of the stop motion shaft.
Procedure to set the needle bar to the correct height.
Instructions for timing the needle bar vibration.
Centering needle bar vibration with the looper shaft and needle plate.
Timing the looper shaft crank and the looper driving shaft crank.
Adjusting the looper's position relative to the needle.
Steps to correctly time the looper.
Adjusting automatic tension and regulating button clamp lift height.
Adjusting the tension of the front and back thread pull-off mechanisms.
Adjusting the thread nipper tension and timing.
Adjusting the stop motion pulley shifter.
| Buttonhole Type | 1-Step |
|---|---|
| Weight | 6.2 kg |
| Needle Threader | Yes |
| Free Arm | Yes |
| Stitch Type | Decorative |
| Presser Feet | Buttonhole, zipper, button |