Feed Dog Replacement (continued):
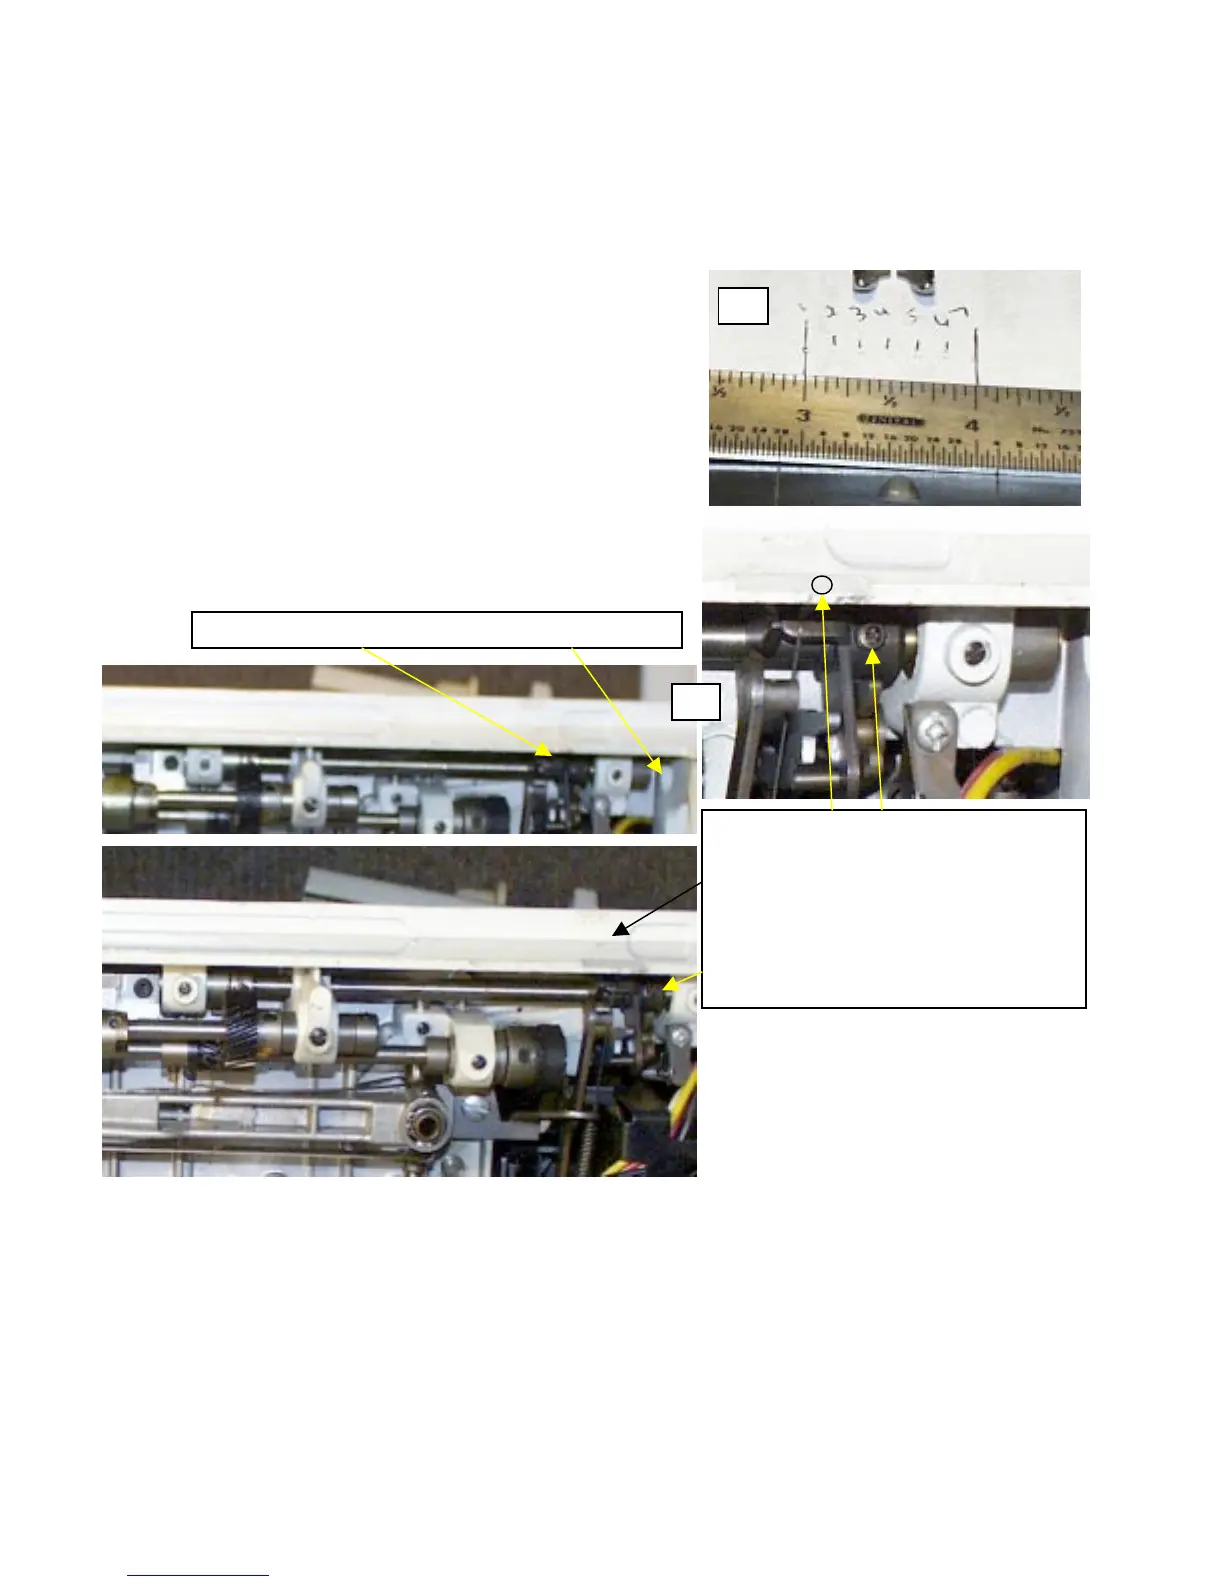
14. Finally, adjusting for that perfect 6 stitches to an inch, or ensuring our stitch length control is providing the actual
number of stitches the dial says it is. First lets check to see just how far off we might be. Put the Needle Plate, and
Presser Foot on. Insert a size 14 or 16 needle, and place a piece of paper under the presser foot. Set the Presser Foot
down as if you’re going to sew, and set the Stitch Length Control Dial to 6. Turn the Hand Wheel towards you, and
make 7 perforations in the paper. No more, no less. Using an accurate measuring tape, see if the first penetration and
the last penetration are exactly one inch in length. If the two end penetrations line up with the one-inch settings, you
have exactly 6 stitches to an inch, and no adjustment is required. Refer to picture O.
15. To adjusting the length setting, if the machine is producing
more or less than 6 stitches to an inch. Refer to picture P for
adjustment locations. Loosen the two setscrews as indicated in
picture P, and adjust the length shaft until you achieve 6
stitches to an inch. Move the shaft only slightly for each try,
and snug down one screw, the setting is rather sensitive. Move
the shaft about a 1/16 of a turn, or less, for each attempt. This
adjust can be very frustrating for a novice.
For changing a simple set of Feed Dogs, you’d think that would be easy.
And overall it is really. Like I’ve said, the last few adjustments are seldom
necessary. But it they are, hang on.
Ad
ustment shaft area
and ad
ustment entrance
O
Locking setscrew positions, and adjustment
control. Two left lines Black and Yellow
indicate setscrew positions, one accessible
through the bottom of the machine, the
other through the base casting. There is a
slot in the shaft, which can be reached from
a hole in the side of the machine
P
 Loading...


