Major Parts Replacement:
In this section of the manual we’ll cover major parts replacement, starting with the easier parts, and work our way through to the most
difficult parts. Some areas will require some special tools shown above in the tools section, and a great deal of patience. If you’re not
the mechanically inclined, I recommend you take your machine to a professional service center, which has a really good Singer
knowledgeable repairman. There are shortcuts, and I’ve seen quite a few of them put into use. However the end results are a machine
that continues to breakdown causing you nothing but pure grief, and considerable funds to have repaired again and again. So lets do it
right the first time. If possible, when replacing parts, attempt to purchase genuine Singer parts. There are a great deal of aftermarket
parts out their, most of which do work just fine, but require a little fine tuning. You may have noticed that in the previous sections as
we replaced some minor parts. And let us also remember to practice safety; don’t do something stupid with your hand tools. Ok, are
you ready? Lets go for it.
Main Shaft Fiber Washer Replacement:
With the new after market washers that snap into place, this repair is a snap. (See picture on the
right). If your local shop doesn’t have the snap in washer, and has the genuine Singer washer,
then skip on down to the timing belt section, as we’ll have to remove the entire main shaft in
order to replace it. And if you’re that far into the machine, I’d replace the timing belt anyway.
Unless you’ve recently had a timing belt installed that is, and I guess that the washer was
replaced also, that is if the shop does the job properly. To determine if the washer is broken,
most commonly you’ll find half of it, or at least part of it, lying down inside the needle bar area
behind the face plate area. Open the face plate, remove the top, and look inside to see if you see
any half round plastic washer. Or if the machine all of a sudden developed a knock when doing zigzag stitching, and the
hand wheel can be pushed in and out a little, I’d suspect the washer is missing. It’s sort of hard to determine if no parts
are lying in the area above, but lets take a look anyway and see if we can see the little critter. It’s located just between
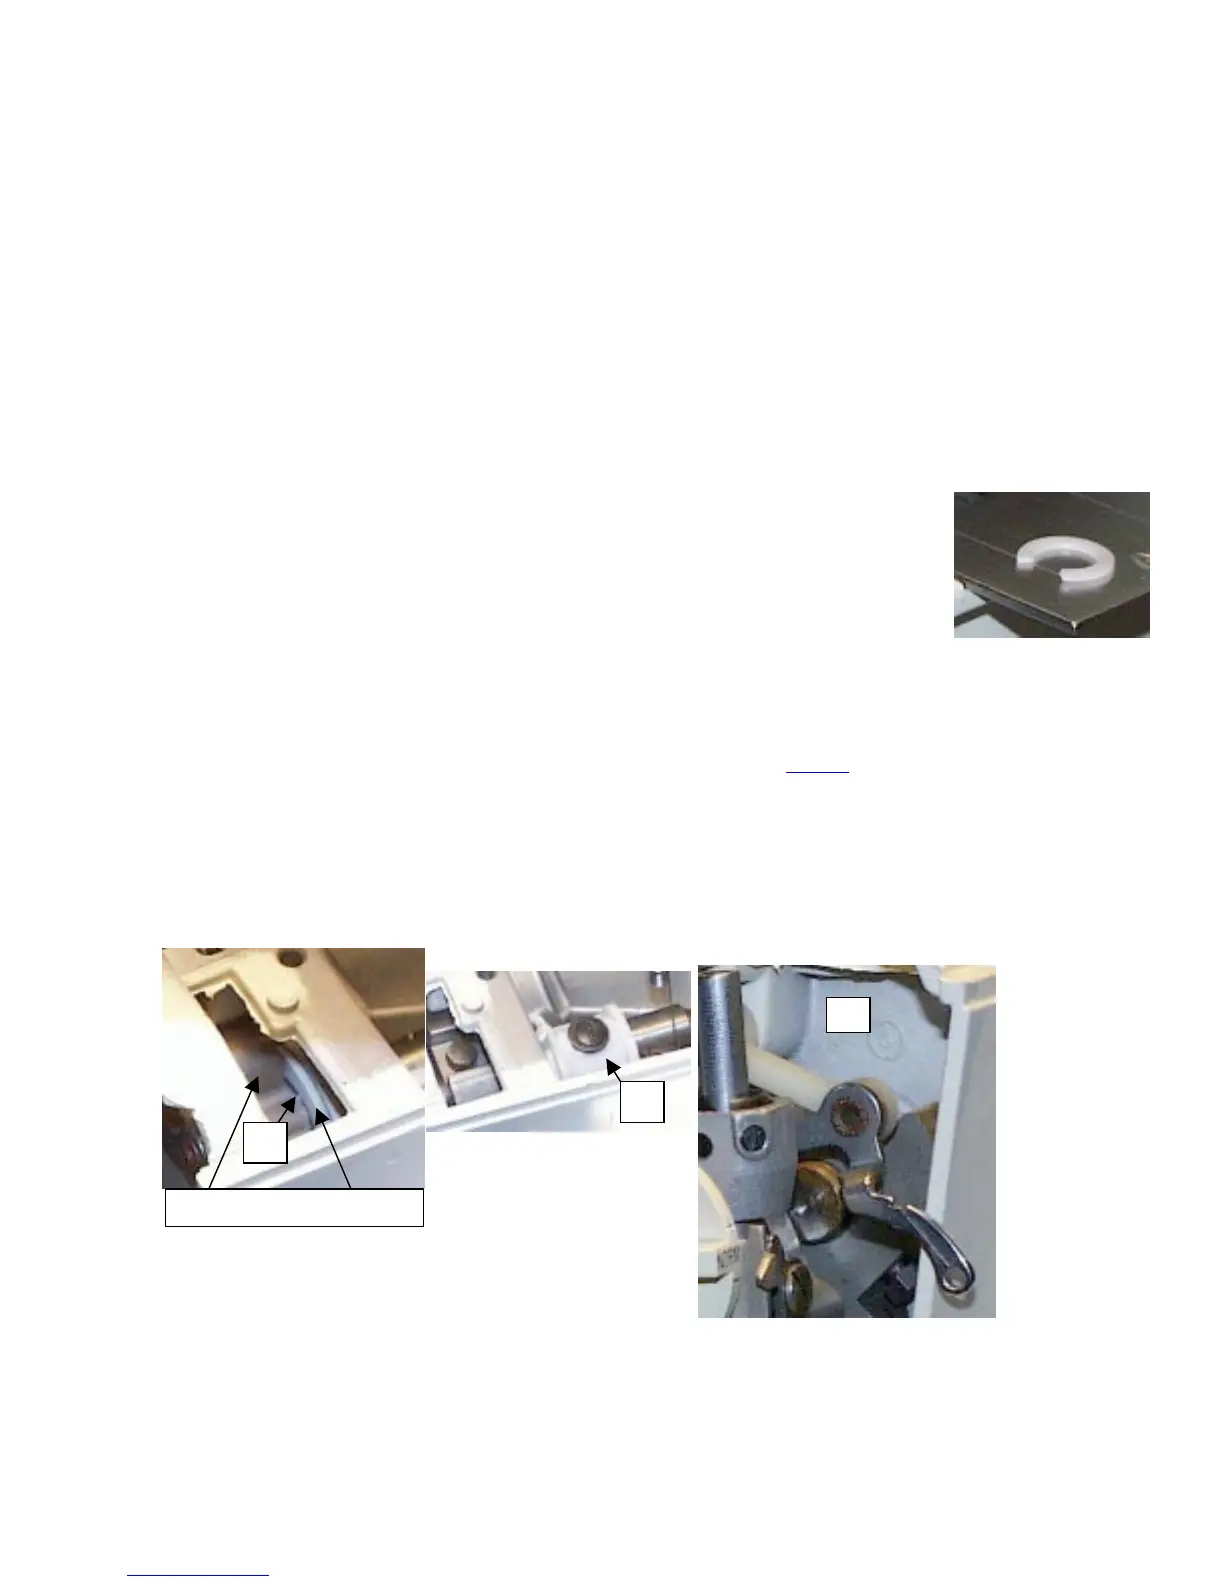
the main shaft bushing and the counter weight as seen in figure (A).
1. Remove the retaining collar, as seen in figure 1, and referred to on page 11
earlier in this manual.
2. Position the take up lever so it is on a downward movement and out of our way. (Fig 2)
1
Counter Weight Bushing
2