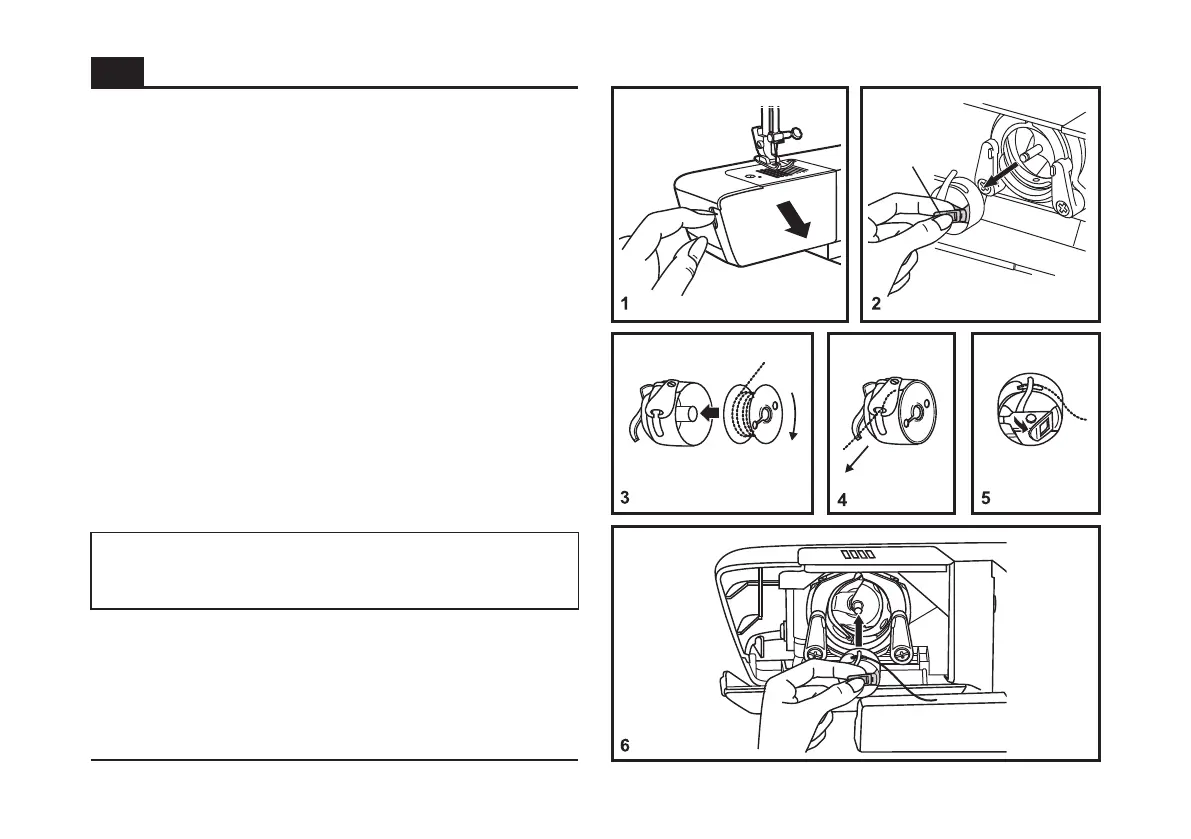
Inserting the Bobbin
When inserting or removing the bobbin, the needle must
be fully raised, to the highest position.
Attention:
- Remove the extension table, then open the hinged cover.
(1)
- Pull the bobbin case tab (a) and remove the bobbin case. (2)
- Hold the bobbin case with one hand. Insert the bobbin so
that the thread runs in a clockwise direction (arrow). (3)
- Pull the thread through the slit and under the finger,
(4) Leave a 6 inch tail of thread.
- Hold the bobbin case by the open hinged latch. (5)
-
(6)
Turn power switch to off ("O") before inserting or removing
the bobbin.
while
holding the bobbin down in the case until thread clicks into
place .
Insert the bobbin case into the shuttle, so that the bobbin
case finger is aligned at 12 o'clock.
13
EN