46
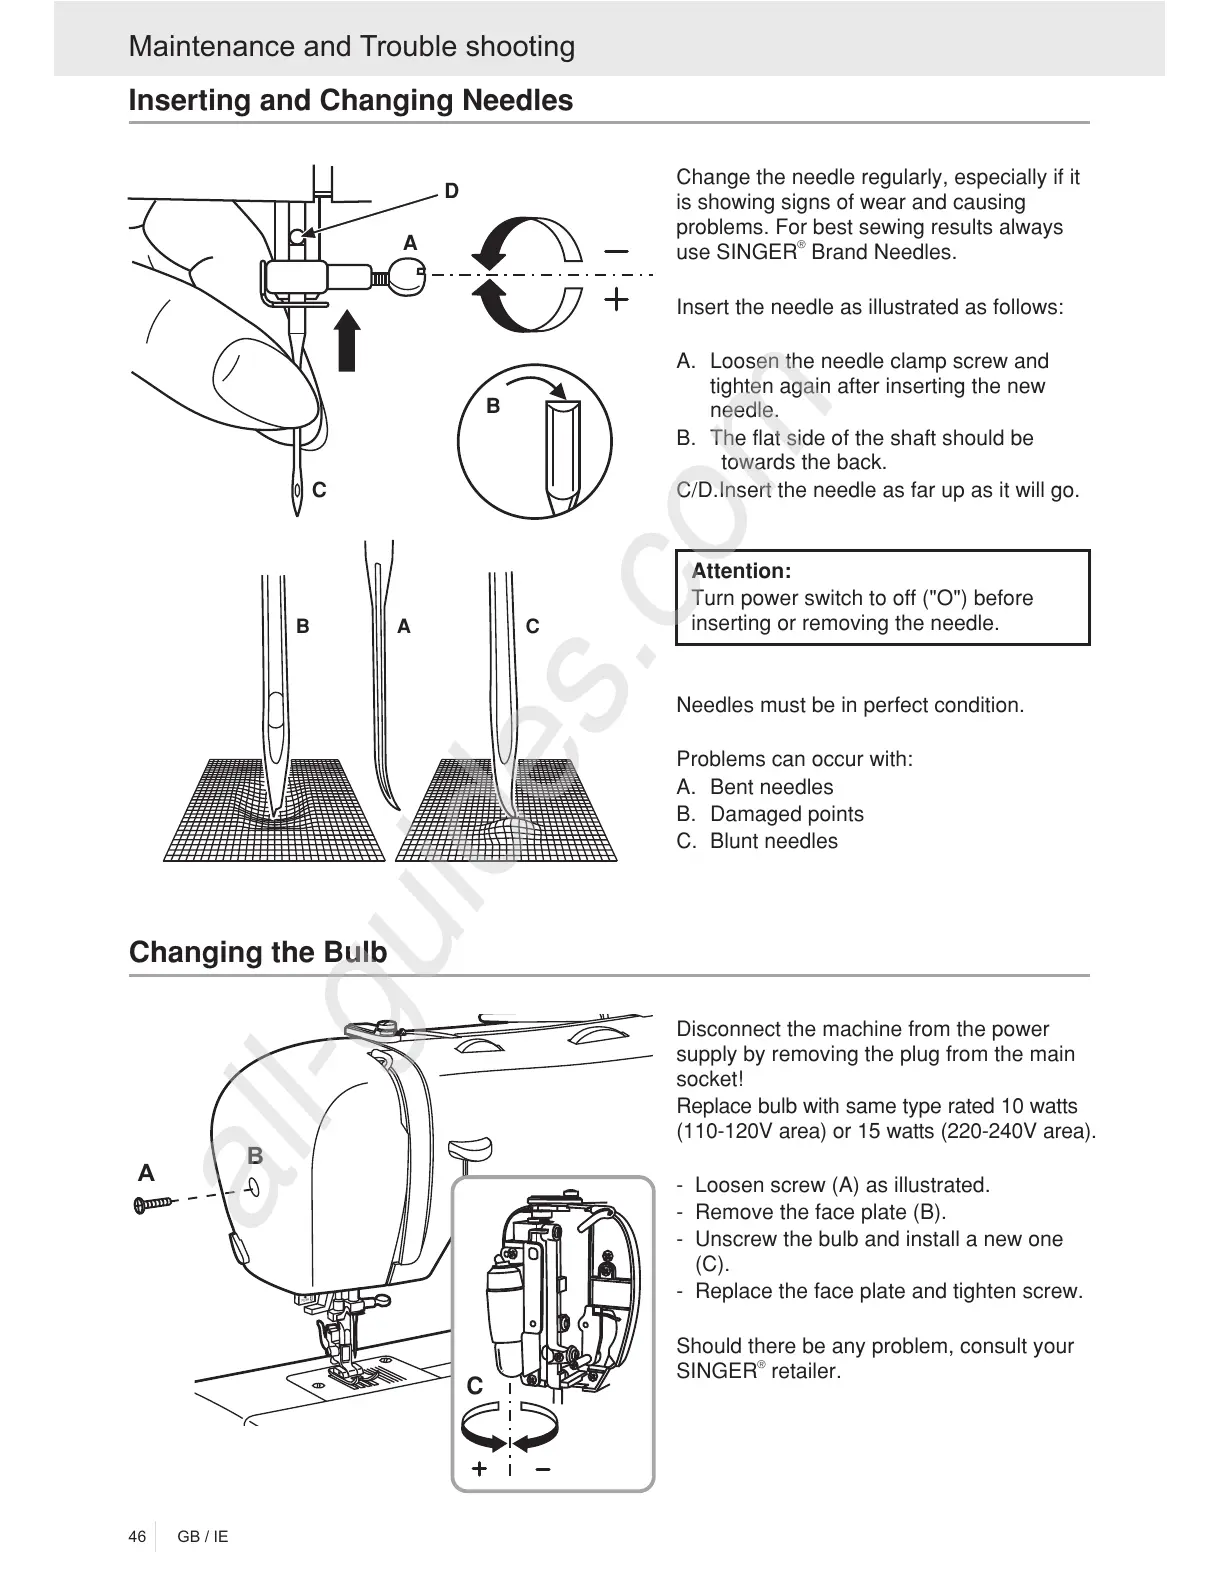
Inserting and Changing Needles
Change the needle regularly, especially if it
is showing signs of wear and causing
problems. For best sewing results always
use SINGER Brand Needles.
Insert the needle
A. Loosen the needle clamp screw and
tighten again after inserting the new
needle.
B. The flat side of the shaft should be
towards the back.
C/D.Insert the needle as far up as it will go.
Turn power switch to off ("O") before
inserting or removing the needle.
Needles must be in perfect condition.
Problems can occur with:
A. Bent needles
B. Damaged points
C. Blunt needles
®
Attention:
as illustrated as follows:
A
C
B
A
B
C
D
Maintenance and Trouble shooting
Disconnect the machine from the power
supply by removing the plug from the main
socket!
Replace bulb with same type rated 10 watts
(110-120V area) or 15 watts (220-240V area).
- Loosen screw (A) as illustrated.
- Remove the face plate (B).
- Unscrew the bulb and install a new one
(C).
- Replace the face plate and tighten screw.
Should there be any problem, consult your
SINGER retailer.
®
Changing the Bulb
GB/IE