Do you have a question about the Sinocan P11-USL and is the answer not in the manual?
Crucial safety guidelines for operating the printer to prevent hazards.
Lists common applications and industries where the receipt printer is utilized.
Details the included accessories upon unpacking the printer unit.
Highlights key functionalities like speed, print quality, and connectivity options.
Explains support for text formatting, image downloads, and command sets.
Covers DIP switch usage for settings and network printing capabilities.
Describes printer identification, driver modes, and supported character sets.
Mentions high-speed driver performance and direct web page setup capability.
Lists technical specifications including model, paper details, speed, and interfaces.
Details specifications for auto cutter, print reliability, barcode support, and paper thickness.
Provides information on power requirements, adapter specs, cash drawer, and operating conditions.
Specifies storage temperature range and physical dimensions of the printer.
Instructions for connecting power, data, and cash drawer cables to the printer.
Step-by-step guide for installing the paper roll into the printer.
Explains the function of DIP switches for various printer settings like mode and speed.
Details the process of accessing and configuring the printer's DIP switches.
Covers methods for installing the printer in flat or wall-mounted configurations.
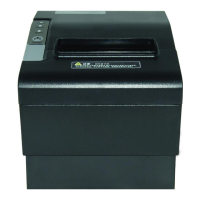
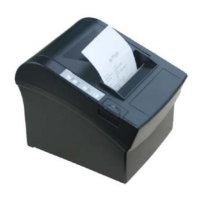
Illustrates the printer from different perspectives: top, side, and bottom.
Identifies the printer's control buttons and status indicators.
Explains the function of the FEED button for manual paper advancement.
Describes the meanings of the PAPER indicator lights regarding paper availability.
Explains the states of the POWER indicator to show if the printer is on or off.
Details the ERROR indicator's behavior for out-of-paper, errors, or overheating.
Instructions for resetting the cutter by cycling the printer's power.
Steps for manually resetting the cutter and correctly loading paper.
Warning against applying excessive force to the printer cover to avoid damage.
Details the printer's high-speed printing capability and support for various interfaces.
Initial steps for installing the printer driver using the setup wizard.
Selecting the printer connection type within the installation wizard.
Choosing the correct communication port for the printer during setup.
Loading printer software by using an installation disk or CD.
Process of inserting the driver CD-ROM to initiate software installation.
Identifying and selecting the specific printer model (P11-USL) for software setup.
Notification when new hardware (virtual serial port) is detected via USB.
Selecting the advanced installation method for the virtual serial port driver.
Navigating to the folder containing the necessary driver files for installation.
Proceeding with driver installation even if the software is not digitally signed.
Finalizing the hardware installation wizard for the virtual serial port.
Locating the assigned COM port (COM3) in Device Manager for printing.
Accessing the properties dialog box for the virtual serial port.
Adjusting port settings and advanced configurations for the virtual serial port.
Choosing the specific COM port number (COM3) in the advanced settings.
Accessing the main properties window for the installed printer.
Assigning COM3 as the active serial port for the P11-USL printer.