Section 04 ENGINE
Sub-Section 09 (ROTARY VALVE, COOLANT PUMP AND RESERVOIR)
04-09-3
CAUTION : Ensure that the rotary valve
shaft is perfectly perpendicular with the
press tip or damage will occur.
14,15,16, Shim, Rubber Washer and
Support Plate
Pry support plate out of crankcase and remove
rubber washer and shim.
11,12,14,15, Bearing 6201 and Seal
To remove bearing 6201 (the smallest one), seals
and rubber washer, use seal pusher (P / N 420
8765 12).
INSPECTION
Inspect rotary valve cover for warpage. Small de-
formation can be corrected by surfacing with fine
sand paper on a surface plate. Surface part
against oiled sand paper.
Inspect bearings. Check for scoring, pitting, chip-
ping or other evidence of wear. Make sure plastic
cage (on bigger bearing) is not melted. Rotate
them and make sure they turn smoothly.
Check for presence of brass fillings in gear hous-
ing.
Visually check gear wear pattern. It should be
even on tooth length all around. Otherwise it
could indicate a bent shaft ; check deflection. Re-
place gear if damaged.
Refer to ENGINE DIMENSION MEASUREMENT
04-04.
ASSEMBLY
Assembly is essentially the reverse of disassem-
bly procedures. However pay particular attention
to the following.
4,5,7, Rotary Valve Shaft, Seal and
Bearing 6203
At assembly apply lithium grease on seal lips. Po-
sition the seal with shielded portion against
splines of shaft.
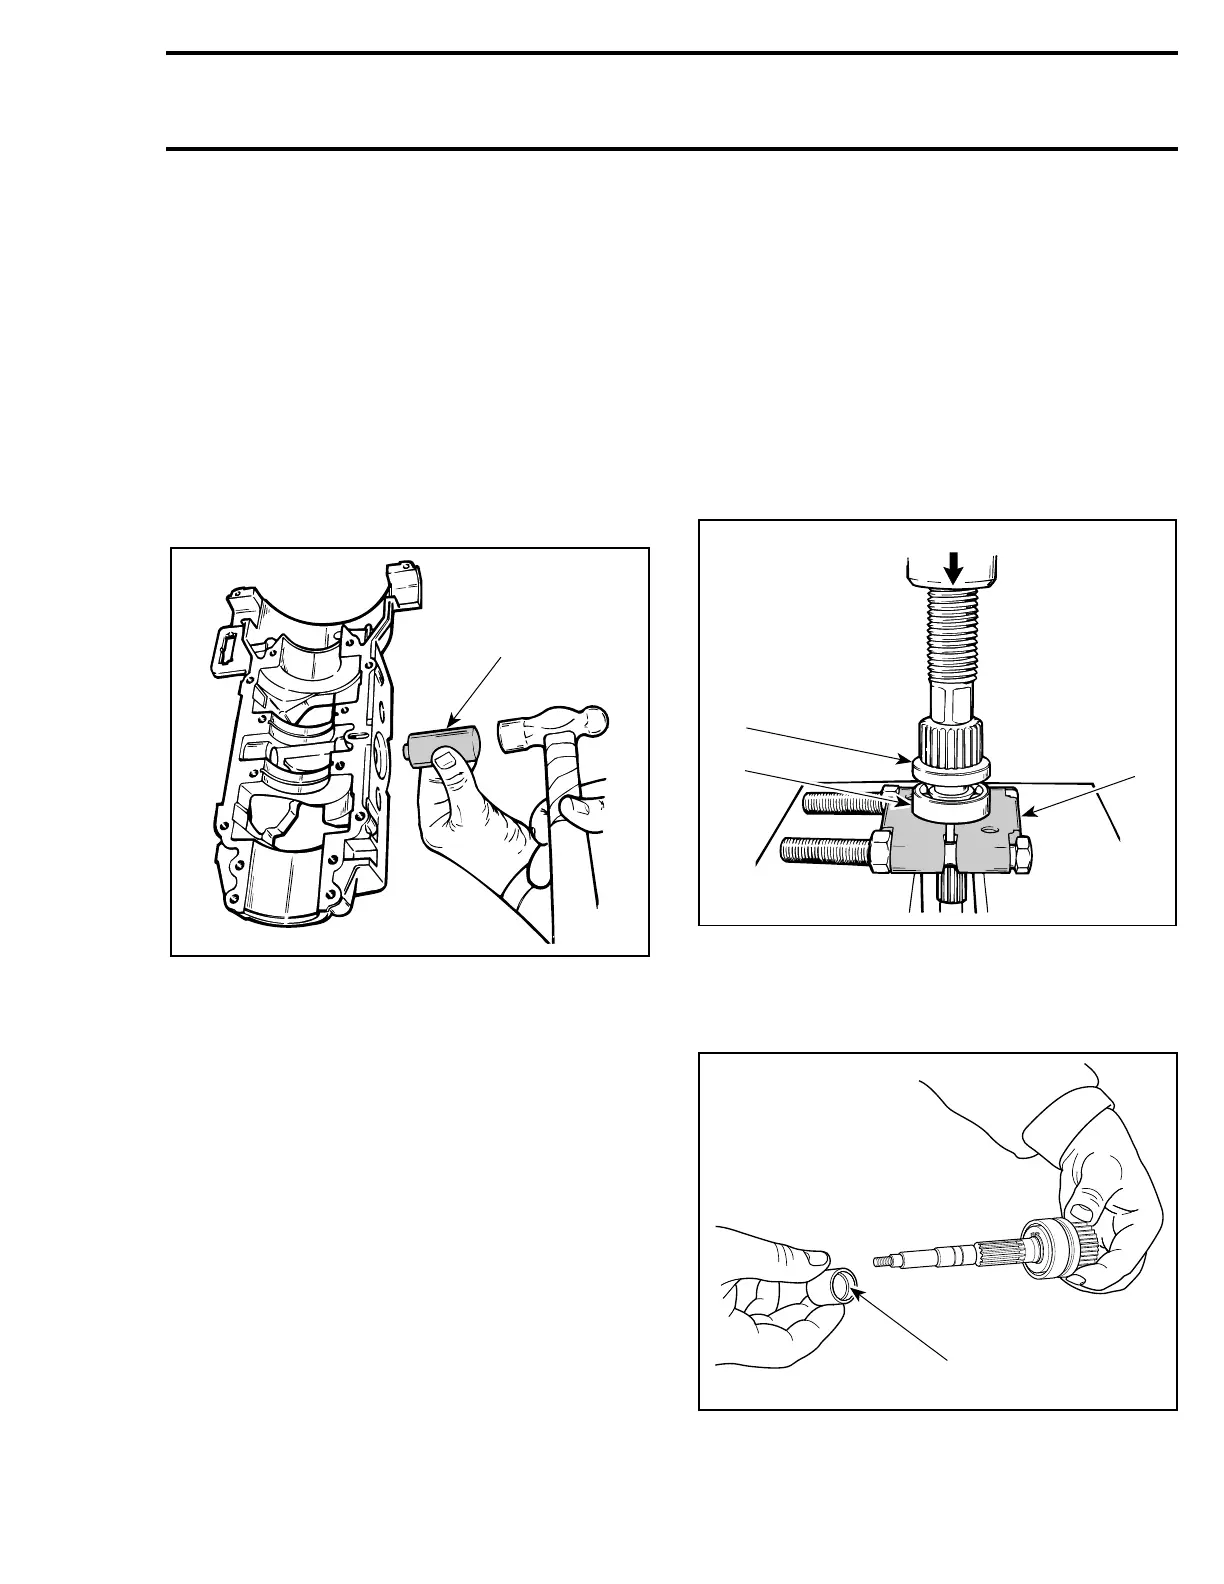
Install bearing as illustrated.
1. Bearing
2. Shielded portion of seal here
3. Press
4. Bearing puller. Ex. : Snap-on no. CJ 950
Install distance sleeve with its counterbore first.
1. Counterbore first
-
A16C0OA
420 8765 12
 Loading...