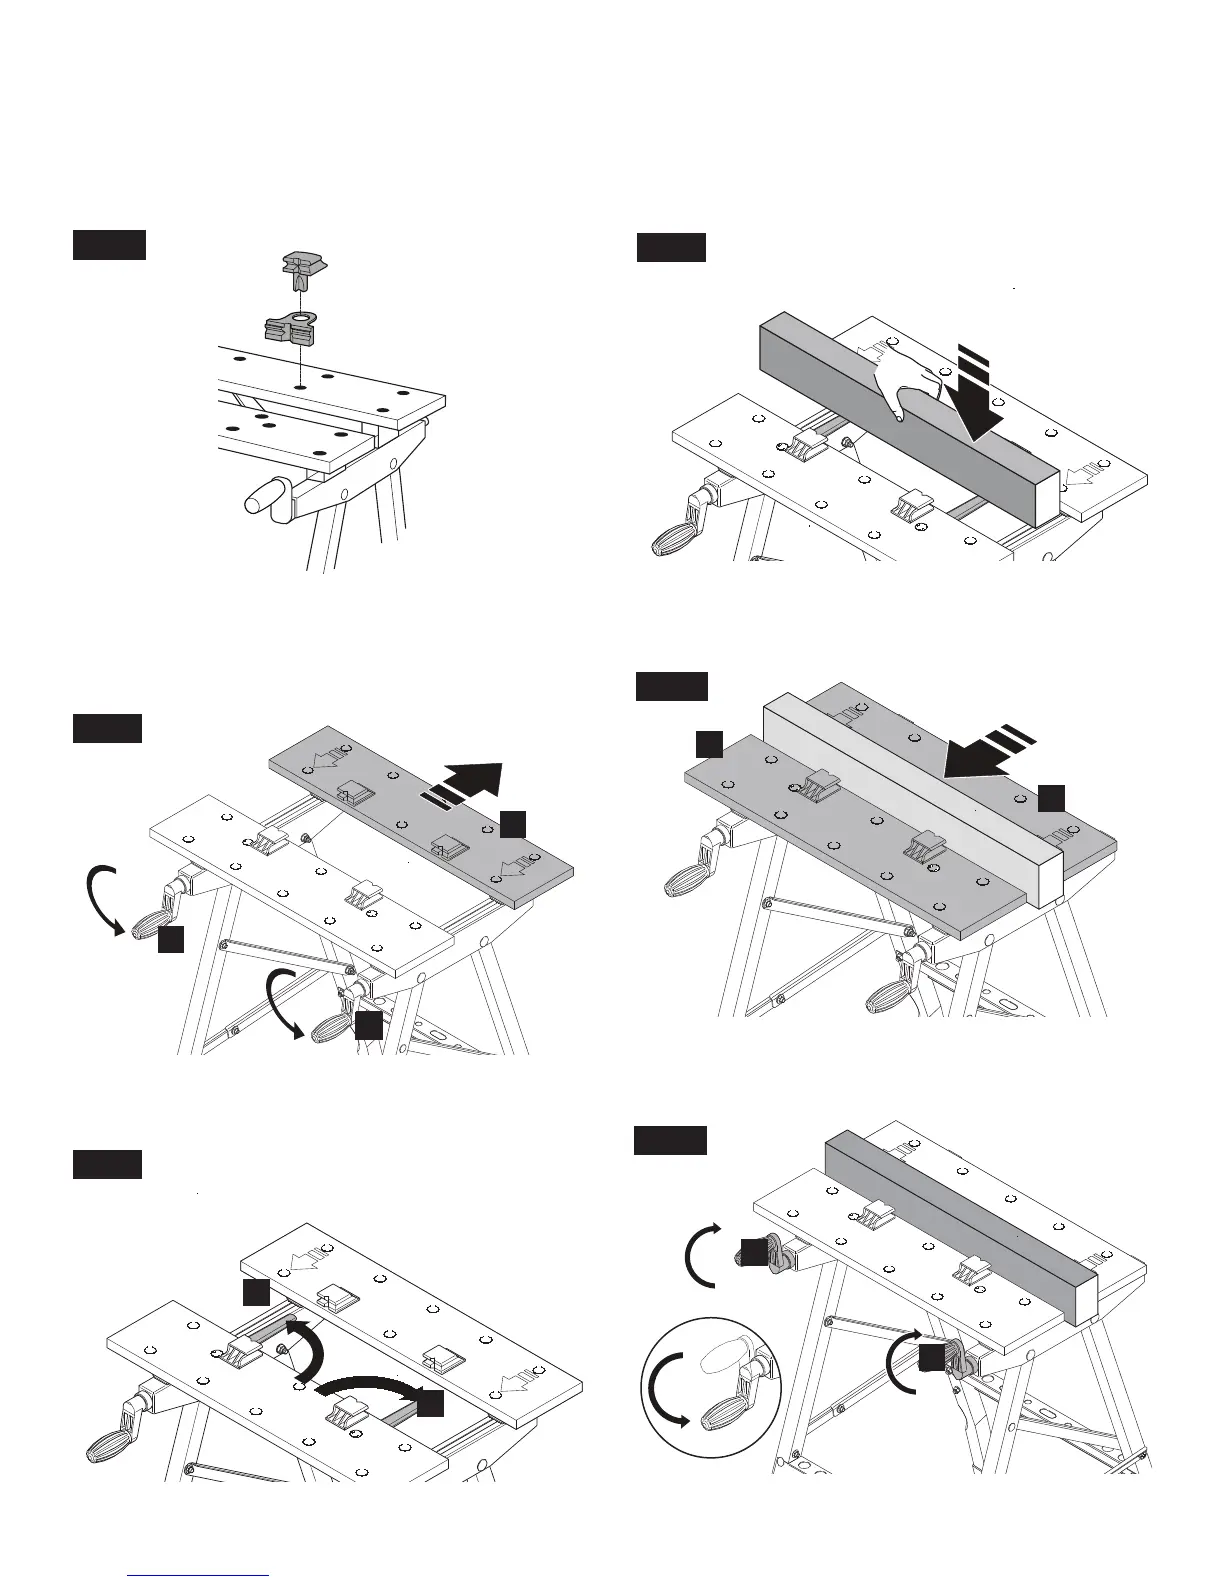
"<.8Install clamping blocks into the holes in the workbench
(Fig. 6).
"<.8 Turn both clamping handles counter-clockwise until they stop,
then push clamping jaw back as far as it will go (Fig. 7).
"<.8 For additional workpiece support, fold out the clamping
arms (Fig. 8).
"<.8Hold the workpiece with one hand between the jaws and
lay it down on the clamping arms (Fig. 9).
"<.8Pull adjustable clamping jaw with the other hand toward
the workpiece and fixed clamping jaw (Fig. 10).
"<.8 Tighten both clamping handles 1/2 turn clockwise to lock
into place. To release, turn handles 1/2 turn counter-clockwise
(Fig. 11).
9.
8.:*<2606;<:=,<276;
20
20
20
20
20
20