Do you have a question about the Skil PWRCORE 20 LT4820E-00 and is the answer not in the manual?
Rules for users, children, and knowledge of the tool.
Precautions for user's hands, feet, and overall well-being during operation.
Checks and preparations required before operating the trimmer.
Operational guidelines and precautions while using the trimmer.
Instructions for storage and battery handling post-operation.
Steps for mounting the cutting guard and guide handle.
Instructions and safety warnings related to battery charging.
Guidance on removing and installing the battery pack.
How to start and stop the trimmer, including safety switch use.
Steps to adjust guide handle, tube length, and handle orientation.
Adjusting the trimmer head angle for different cutting tasks.
Automatic and manual line feeding procedures and precautions.
Instructions for rewinding and replacing the trimmer spool.
Two methods for storing the trimmer, including wall mounting.
Diagnosing issues when the tool fails to start.
Addressing issues with inconsistent tool operation.
Causes and solutions for excessive tool vibration.
Troubleshooting steps when the trimmer fails to cut.
Resolving problems with line feed and cutting length.
Addressing frequent line breaking during operation.
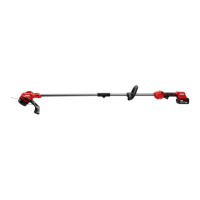
This document provides an owner's manual for the SKIL PWRCORE 20™ Cordless Line Trimmer, model LT4820E-00. It includes safety warnings, assembly instructions, operating procedures, maintenance guidelines, and warranty information.
The SKIL Cordless Line Trimmer is designed for cutting grass and weeds under bushes, on slopes, and along edges that cannot be reached by a lawnmower. It is intended for domestic use and not for professional applications.
The line trimmer operates on a 20V max d.c. battery system. It features a main handle, a guide handle for improved control, and a trigger switch with a safety switch to prevent accidental activation. The telescopic tube allows for length adjustment, and a locking sleeve secures the chosen length. The cutting head includes a spool with a trimmer line, a cutting guard for user protection, and a line cutting blade to maintain the correct line length. An edging wheel and an edging button facilitate edging tasks. A flower guard is also included to protect delicate plants during trimming. The device has ventilation slots to prevent overheating and a battery level indicator to show the remaining charge.
Before use, users must read and understand the owner's manual, paying special attention to safety instructions. Assembly involves mounting the cutting guard with two screws, attaching the flower guard, and securing the guide handle. The tool should never be used without the cutting guard.
To operate, first, ensure the battery is charged. The battery level indicator will show the charge status. To switch on the tool, first press the safety switch (knob) and then pull the trigger switch. To switch off, release the trigger switch. It's important to note that the cutting line continues to rotate for a few seconds after the tool is switched off, so allow it to stop completely before handling. Avoid rapidly switching the tool on and off.
The guide handle position can be adjusted by releasing, adjusting, and then fastening the handle adjustment knob. The telescopic tube length can be set using the locking sleeve. The main handle orientation can be adjusted for different tasks: downwards for trimming or sidewards for edging. The pivot function allows for five different positions: free-standing storage, trimming in narrow spaces, regular trimming, trimming under low objects, and edging function.
The flower guard can be folded downwards to protect plants or folded upwards for edging or trimming near hard obstacles. For trimming, set the tube length, main handle orientation to trimming position, use pivot position 2, 3, or 4, and engage the flower guard. For edging, set the tube length, main handle orientation to edging position, use pivot position 5, disengage the flower guard, and support the tool by the edging wheel.
When trimming, ensure the area is free of stones, debris, and other foreign objects. Start trimming only when the tool runs at full speed. Cut long grass in layers, starting from the top, and only trim with the tip of the cutting line. Avoid cutting damp or wet grass and prevent cut grass from clogging the spool. Do not overload the tool. Carefully trim around trees and bushes to avoid contact with the cutting line. Keep the tool away from solid objects to protect the cutting line from excessive wear and be aware of kickback forces.
Hold and guide the tool firmly with both hands, maintaining a stable working position. For long grass, swing the tool slowly from right to left. For shorter grass, tilt the tool as illustrated. For edging, support the tool with the edging wheel.
The line is automatically fed when the tool is switched on or off, and the cutting line is cut to the correct length by the line cutting blade. To manually feed the line, switch off the tool, remove the battery, pull the line, and then press and release the line feed button. Always return the tool to its normal operating position before switching on.
In case the cutting line fails to protrude, switch off the tool and remove the battery. Remove the spool cover, take out the spool, tightly rewind the cutting line evenly in layers in the arrow direction, insert the line into the spool slot, thread the line through the spool hole, and ensure the spool is securely in place before pulling the cutting line from the slot and mounting the spool cover. When replacing the spool, use only SKIL spool STS1200 to avoid damage and warranty voidance. After replacing, test-run the tool for at least one minute without load.
The tool is not intended for professional use. Always switch off the tool, remove the battery pack, and ensure all moving parts have come to a complete standstill before performing any maintenance. Keep the tool clean, especially the ventilation slots, using a damp cloth (without cleaning agents or solvents). Regularly clean the line cutting blade and cutting guard after each use. Check the condition of the cutting head and the tightness of nuts, bolts, and screws regularly. Inspect for worn or damaged components and have them repaired or replaced as necessary.
For storage, the storage rail can be securely mounted on a wall with two screws (not supplied) and horizontally leveled. Attach the storage adapter and move it against the mounting base of the storage rail. Store the tool with the storage hole in the handle over the tip of the storage adapter. Alternatively, use pivot position 1 to let the tool stand by itself on the ground.
Troubleshooting tips are provided for common issues such as the tool not operating (empty or hot battery, internal fault), intermittent operation (defective wiring or switch), abnormal vibration (grass too high), tool not cutting (short/broken line, cannot be fed), line not cut to correct length, and line breaking. In case of electrical or mechanical malfunction, immediately switch off the tool and remove the battery.
For environmental protection, do not dispose of electric tools, batteries, accessories, and packaging with household waste. These items should be sorted for environmental-friendly recycling. Before disposal, protect battery terminals with heavy tape to prevent short-circuit.
| Battery Voltage | 20V |
|---|---|
| Power Source | Battery |
| Battery Type | Lithium-ion |
| Battery Included | Yes |
| Charger Included | Yes |
| Cutting System | Line |