Lighting Solutions for Professionals
USER MANUAL
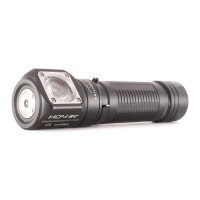
H04 RC
MAGNETIC CHARGING HEADLAMP
SKILHUNT
Rated range: 2.7-8.4V, (Recommended a high-performance 18650 battery)
Dimension: L101.5 mm / 4.00", Head diameter 23.5mm / 0.93 ".
Weight: 48 g / 1.69 oz (Excluded battery)
Accessories: Headband, Magnetic Charging Cable, Clip, Lanyard, Spare O-rings.
Note: The above parameters are only approximation, with high-quality lithium battery
in the laboratory environment testing. The product performance may change since
battery different or the different use of environment.
Magnetic
charging port
Specifications
2+210
mins
T1 H M1 L1
11
hrs
450
hrs
175
lumens
3
lumens
126 m
(H04R) /
106 m
(H04)
4000cd
(H04R) /
2800cd
(H04)
IPX-8
1m
lumens
5
hrs
200
hrs
400
lumens
175
lumens
3
lumens
18650
(3500mAh)
2*CR123A
(1700mAh)
T2 M2
45
lumens
55
hrs
45
lumens
25
hrs
L2
0.5
lumens
/
0.5
lumens
/
1100
550
2+90
mins
3.5
hrs
5
hrs
1.5
hrs
2.5
hrs
1. ON/OFF
Single click the side switch to turn the light on/off. When the light is turned off,
it will memorized current brightness level or mode.
2. CHANGE BRIGHTNESS LEVEL
When the flashlight was OFF:
Single click switch to memory level (H-M1-M2).
Quickly double clicks switch to Turbo(T1/T2) mode.
Quickly triple-click switch to Strobe(S1/S2/S3) mode.
Hold press switch 0.5 second to Low(L1/L2) mode.
When the flashlight was ON (T1/T2, H/M1/M2, L1/L2)
Press and hold the switch to automatically cycle, the level is selected when the side
switch has been released, turn off memorized.
When the flashlight was ON (T1/T2, H/M1/M2)
Quickly double clicks switch tranfer memory level(H/M1/M2) to Trubo(T1/T2), repeat
quickly double clicks switch back to memory level(H/M1/M2)
.
Quickly triple clicks switch
transfer Strobe mode, repeat quickly triple clicks switch back to previous mode.
When the flashlight was ON (S1/S2/S3)
Quickly double clicks switch tranfer S1-S2-S3, turn off memorized.
3.LOCK-OUT FUNCTION & LOCATION INDICATOR
When the flashlight is off , quickly click switch 4 times to access the button lockout
mode (location indicator activation at same time,the indicator light flash every second.
Double clicks can turn on/off the indicator). Quickly click switch 4 times,the button
unlock and activate memory Low mode.
4. LOW VOLTAGE INDICATOR
When the battery voltage drops below 3.0V,indicator flash twice every 2 sec,the light
fast flash every 2 Minute at same time.
When the battery voltage drops below 2.7V,the light will cut off.
3 Clicks (Strobe mode)
1 Click
1 Click
OFF
2 Clicks
2 Clicks
1 Click
3 Clicks
S1
S3
2 Clicks
1 Click
(
Memory level)
3 Clicks
H
M1
Hold press
M2
Hold press 0.5S
4 Clicks
T1 T2
Hold press
Turbo mode
4 Clicks
ON OFF
2 Clicks
Location indicator
1 Click
Charging indicator
Red (charging)
Blue (completed)
How to use
(EN) English
S2
L1 L2
Hold press
Low mode
UnlockLockout
Charging
Connect the magnetic charging cable to an external USB power source,
then attach the other end of the cable to the charging port of the light
(Recommeded USB power no less than 10W (5V 2A) )
The red indicator means charging, when the battery charging completed,
change to blue indicator.
Rechargeable function only for one 18650 (3.6V / 3.7V) rechargeable lithium battery!
When the battery is incorrectly insert the light,charging will damage the charging circuit.
Power indicator
100%~80%
Constant Blue Indicator
Every time turn on , the side indicator will be light 5 seconds to display the battery power.
50%~20%
Constant Red Indicator
80%~50%
Blinks Blue Indicator
20%-0
Blinks Red Indicator
Caution:
Please do not point the lighted flashlight to the eyes of people or animals.
Please do not cover the light head when the flashlight is on, or place the flashlight head
on the ground. The radiation energy of the flashlight may cause damage to the flashlight
itself, or even result in burning to other materials.
Please do not use the turbo mode continuously when the environmental temperature is
high in case the flashlight body is too hot to hold.
Please do not put the light with magnetic items such as bank cards and mobile phones.
Notice:
Before operating this product, please read the enclosed User Manual completely.
If the product is left unused or carried and transported, please lock the button or slightly
loosen the tail thread to avoid accidentally activating the flashlight.
When the product is used in a low-temperature environment, please try and keep it warm.
If the temperature is too cold, it may not affect the output and runtime.
Please make sure that the positive pole of the battery points to the head of the flashlight
when you replace the battery.
Battery installation
FL1
STANDARD
550
lumens
535
lumens
395
lumenslumens
1000
535
1、开关机
开机任意档位下,单击开关关机。
2、档位模式切换:
当电筒处于关机状态:
按住开关0.5秒直接进入到低亮档位(L1/L2);
单击开关直接进入到记忆常用亮度档位(M2/M1/H);
快速双击开关直接进入到极亮档位(T1/T2);
快速三击开关直接进入到闪烁模式(S1/S2/S3);
当电筒处于开机状态(T1/T2,M2/M1/H,L1/L2):
按住开关亮度档位自动循环切换,松手选定并记忆档位;
当电筒处于开机状态记忆亮度档位(M2/M1/H):
双击切到极亮档位(T1/T2),再次双击可返回记忆亮度档位;
三击切到闪烁模式(S1/S2/S3),再次三击返回之前亮度档位;
当电筒处于闪烁模式(S1/S2/S3):
快速双击切换闪烁档S1/S2/S3档位,关机记忆。
3、定位指示、按键锁定/解锁:
关机后快速按开关四次,按键被锁定同时进入定位模式,
定位指示灯开启每秒闪烁一次;双击开关可控制指示灯的
开启或关闭;单击或按住开关主灯可点亮低亮档,松手即灭。
快速按开关四次按键解锁退出定位模式,开启记忆的低亮档。
4、低压提示:
电压低于3.0V时,指示灯间隔2秒慢闪两次;同时主灯间隔
2分钟快闪提示。
电压低于2.7V时,电筒主动关闭,以免电池过放电而损坏。
( CN )
简体中文
操作说明
1. ALLUMER / ÉTEINDRE
Cliquez une fois sur l'interrupteur latéral pour allumer/éteindre la lumière. Lorsque la
lumière est éteinte, elle se souvient du niveau ou du mode de luminosité actuel.
2. MODIFIER LE NIVEAU DE LUMINOSITÉ
Lorsque la lampe de poche était éteinte:
Commutateur à simple clic au niveau de la mémoire (H-M1-M2).
Double-cliquez rapidement pour passer en mode Turbo (T1/T2).
Triple-cliquez rapidement pour entrer en mode Strobe (S1/S2/S3).
Maintenez le commutateur pendant 0,5 seconde en mode Bas (L1/L2).
Lorsque la lampe de poche était allumée (T1/T2, H/M1/M2, L1/L2)
Appuyez et maintenez l'interrupteur pour faire un cycle automatiquement, le niveau est
sélectionné lorsque l'interrupteur latéral a été relâché, éteignez-le mémorisé.
Lorsque la lampe de poche était allumée (T1/T2, H/M1/M2)
Double-cliquez rapidement pour basculer le niveau de mémoire de transfert (H/M1/M2)
vers Trubo (T1/T2), répétez rapidement les double-clics pour revenir au niveau de
mémoire (H/M1/M2). Les triples clics rapides changent le mode stroboscopique,
répétez rapidement les triples clics pour revenir au mode précédent.
Lorsque la lampe de poche était allumée (S1/S2/S3)
Double-cliquez rapidement sur le commutateur de transfert S1-S2-S3, éteignez
mémorisé.
3. FONCTION DE VERROUILLAGE ET INDICATEUR D'EMPLACEMENT
Lorsque la lampe de poche est éteinte, cliquez rapidement 4 fois sur l'interrupteur pour
entrer en mode de verrouillage des boutons (allumez l'indicateur d'emplacement en
même temps, la lumière clignote toutes les secondes. Des doubles clics peuvent
allumer/éteindre l'indicateur). Cliquez rapidement 4 fois sur le commutateur, le bouton
se déverrouille et active le mode mémoire faible.
4. INDICATEUR DE BASSE TENSION
Lorsque la tension de la batterie descend en dessous de 3,0 V, l'indicateur clignote
deux fois toutes les 2 secondes, le voyant clignote rapidement toutes les 2 minutes
en même temps.
Lorsque la tension de la batterie descend en dessous de 2,7 V, la lumière s'éteint.
( FR ) Français
Comment utiliser