Page3
2023.11
User Manual Ver 1.0.0
Connect two push switch to realize staircase light manual control:
● The UP push switch is installed at the bottom of the staircase,
short press the UP push switch to turn on or off the light,
the fourth line of the OLED main interface display "Upward switch on" / "Switch off".
● The DW push switch is installed at the top of the staircase,
short press the DW push switch to turn on or off the light,
the fourth line of the OLED main interface display "Upward switch on" / "Switch off".
● When the light is on, press the push switch to turn off the light immediately.
If it is in the delay light-off timing state, it will automatically cancel the delay light-off timing
and turn off the light immediately.
● Push switch and PIR sensing can be used at the same time, after the PIR sensing turns on the light,
the light can be turned off through the push switch.
● PIR sense detection is not active for 5 seconds before the push switch is operated.
● The push switch operation ignores the threshold setting of the daylight sensor.
Connect two PIR sensors to realize staircase light automatic sensing control:
The upward PIR sensor is installed at the bottom of the staircase, ●
when sensing a person, the light turns on automatically.
The downward PIR sensor is installed at the top of the staircase, ●
when sensing a person, the light turns on automatically.
After the sensing light control process is nished, ●
wait for the delay time, the light will automatically turn off.
Slotted
Packing List
LED Controller
1 pcs
User Manual
1 pcs
Daylight sensor
(30cm)
1 pcs
PIR sensor
(1.2m)
2 pcs
PIR sensor
extension line(5m)
2 pcs
screwdriver
1 pcs
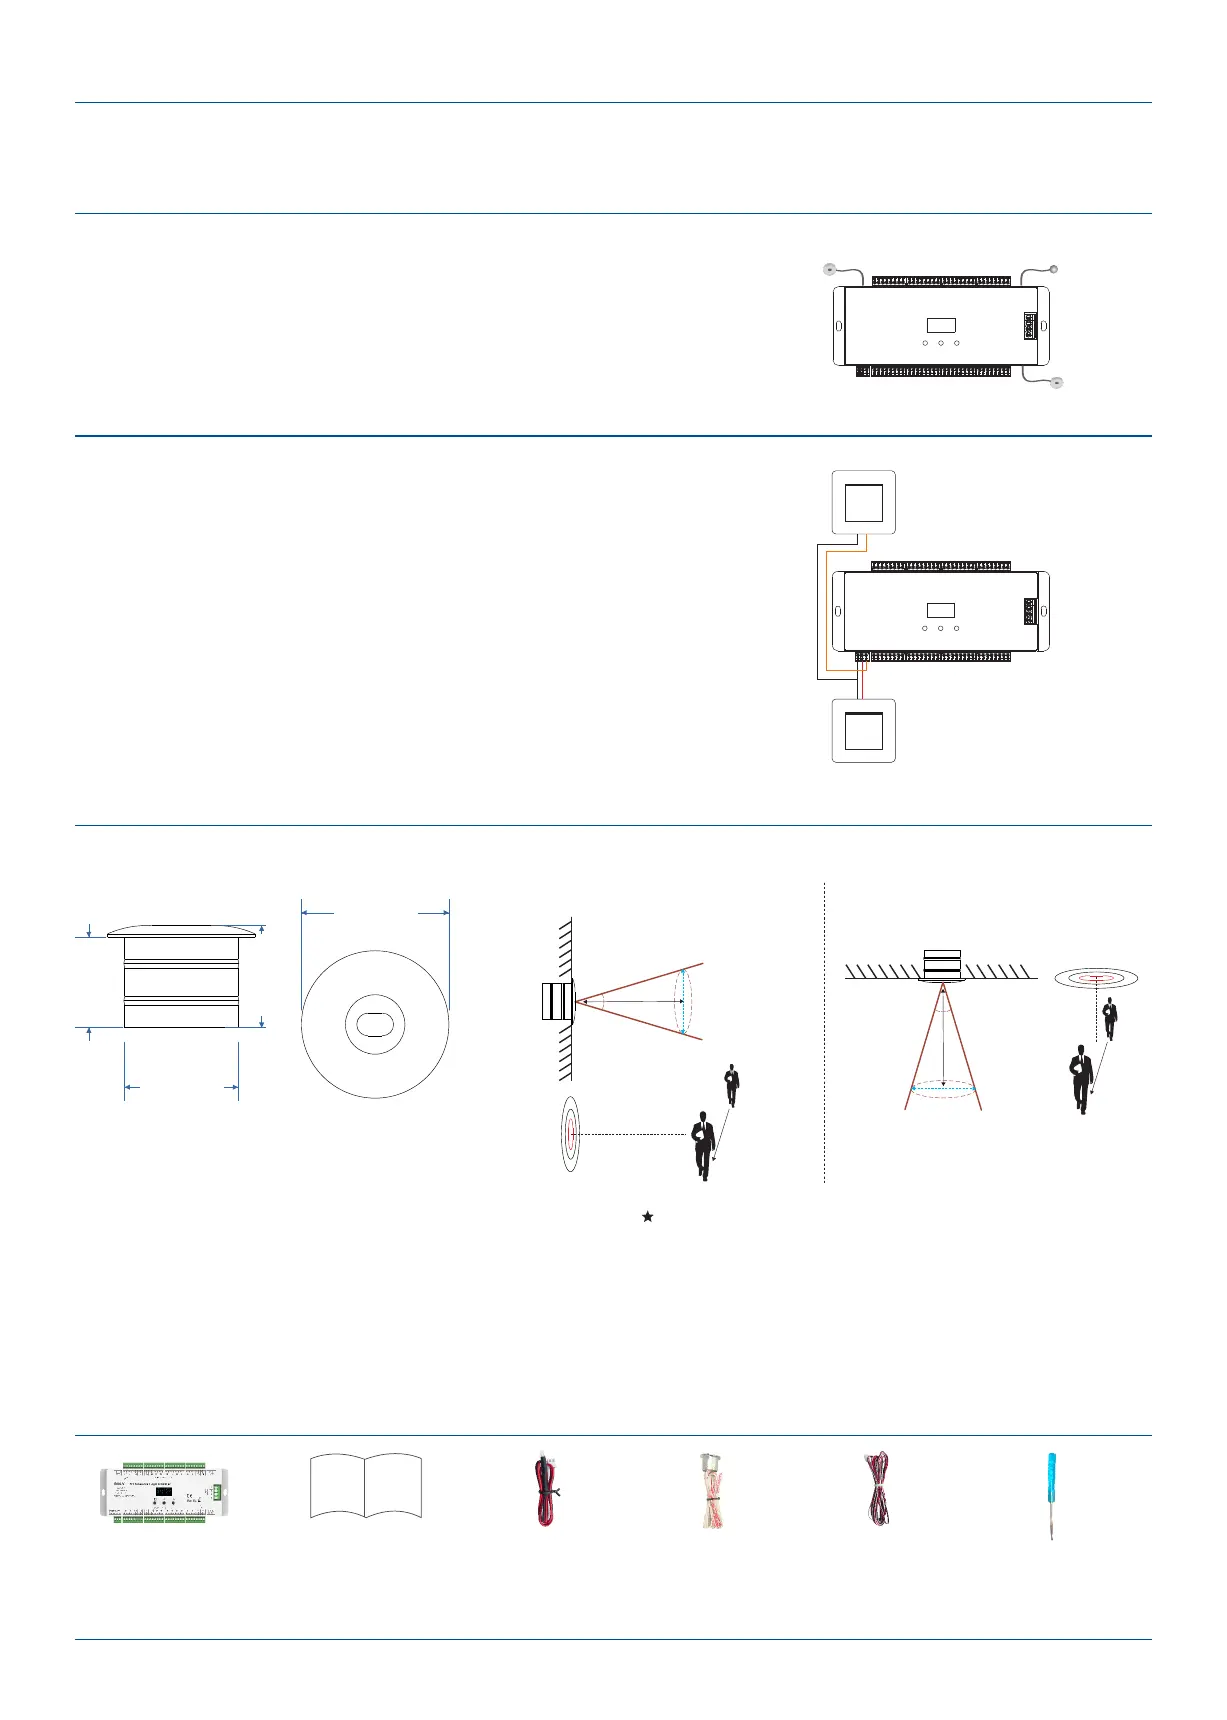
Installtion of PIR sensor
Under push switch
Up push switch
Daylight sensor
Down direction
PIR sensor
Up direction
PIR sensor
Induction switch control
Manual switch control
Number of steps is 32, sequential light on, sequential light off, speed level is 6, brightness level is 8, run mode is Flow, PWM freq is 2KHz,
on and off fade time is 0s, disable daylight sensor, sensor auto-off delay time is 10s, cancel push auto-off delay time, system language is English.
Factory set default parameters
Sizeofdetector:
1.Recommended for wall mounting.
2.If thesensorisexposedtodirectsunlight, interference signalwillbeintroduced.
3.The sensor should be installed in a dry environment and keep away from windows, air conditioner and fans.
4. Make sure that the sensor stays away from heat source, such as countertops, kitchen appliances which generate hot steam,
walls and windows in direct sunlight, air conditioner, heating, refrigerators, stoves and so on.
5. We recommended the wall-mounted installation height is1-1.5 meters and the ceilling mounting height is no more than 3 meters.
6.There should not be shelter(screen, furniture, large bonsai) within the range of detection.
Notice for installation of PIR sensor
Wall mounting
PIR sensor detection scope (±10° Error):
Ceilling mounting
Diameter:
1.2~1.5m
Height: 1~1.5m
3m
30°
3m
30°
For wall mounting and ceiling mounting,
note that the sensing holes are perpendicular to the direction of human movement.
26.00 mm
18.00 mm
16.00 mm
20.00 mm
Diameter:
1.2~1.5m
Height: 3m
 Loading...