Do you have a question about the SkyVac Industrial 85 and is the answer not in the manual?
Details the maximum height achievable with the 8-pole system, reaching up to 12m/40 feet.
Outlines the components included in the 8-pole package, featuring Elite Vac Release, poles, and carry bag.
Highlights the vacuum's power with three industrial strength motors totaling 3,300 Watts.
Explains the cyclonic side entry port for efficient debris collection and separation.
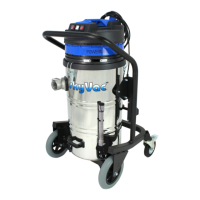
Details the balanced tipping chassis and all-terrain wheeled trolley for stability and movement.
Notes the removable vacuum unit and the Elite Drum with drain hose and sieve basket.
Highlights the 3,300 Watt motors and compact head/filter design for maximum drum capacity.
Details the protective metal deflector plate and steel base foot stand for durability.
Introduces the UK-designed Elite Hairpin Neck Tool Holder and lightweight carbon fibre poles.
Explains the POWERMIX system for optimized cleaning and the auto shut-off valve for safety.
Notes the removable pleated filter for easy maintenance and the secure lock mechanism for poles.
Explains the patented Power Mix system that reconfigures power for 150 Inch Water Lift and +50% higher performance.
Details the 'Fastest Cleaning' and 'Grass Tuft & Water Extraction' settings for different gutter challenges.
Instructs to insert the chosen Elite End Tool into the clamped end of the Elite Hairpin Neck Tool and close the clamp.
Details opening the pole clamp, inserting the Hairpin Neck Tool, and closing the clamp to secure.
Explains how to adjust clamp tension by turning clockwise if needed, then closing the clamp.
Guides on building poles to the required height by slotting them up to the positive stop, recommending resting against a building.
Emphasizes fitting the Vac Release Pole as the base pole for proper assembly.
Instructs to screw the Soft Cuff onto the Flexi Hose and then onto the Elite Suction Pole.
Details inserting the Hard Flexi Hose Cuff into the Vacuum Port until it clicks securely.
Explains the startup procedure: first the middle white button, then red buttons for required power.
Guides on using the Vac Release Pole to control suction and release debris by twisting the cuff.
Stresses the importance of ensuring released debris can drop safely to the ground.
Details steps for removing liquid from the drum using the drain hose, including uncorking and pouring.
Explains how to access the sieve basket by removing the vac head and unclipping side clamps.
Instructs to lock the front castors by pressing down on the steel lever with your foot for machine stability.
Guides on lifting the head and filter safely from the drum and placing it securely on the ground.
Details emptying the sieve basket of saturated debris into a recycling bin or compost heap.
Explains emptying fine silt and sediment from the drum base by lifting and tilting it forwards.
Provides steps to unlock, lift, and secure the drum from the chassis for emptying or maintenance.
Advises using the filter for dry/dusty debris and extracting it for sludge/liquids.
Explains how to remove the filter by rotating the black end filter to unlock the protective cap.
Details cleaning the filter using a stiff brush and hosing down with water to maintain suction.
Stresses ensuring the filter is clean and dry before each new project for optimal performance.
Warns that the filter must be in place to protect motors from dust and that failure could invalidate warranty.
Details cleaning the basket area behind the filter, including disconnecting and cleaning with liquid.
Provides guidance on correctly replacing the white float valve, ensuring the heat-proof bit faces forward.
Explains how to put the basket back by placing it in position and twisting slightly right until a click is heard.
Guides on re-attaching the vacuum head, ensuring motors align with the handle for proper debris deflection.
Recommends sucking up water to clean inside poles and flexi hoses, especially after dealing with wet debris.
Advises wiping down poles with a damp cloth after use to remove debris and prevent joint wear.
Start each project with a clean, DRY filter for optimal performance and to prevent motor damage.
Regularly inspect filters for wear and tear; replace every four months to prevent dust ingress.
Assemble poles against a building, not on the ground, to achieve the required height safely.
Addresses common issues like loss of suction, machine stoppage, and low power with potential causes and solutions.
| Brand | SkyVac |
|---|---|
| Model | Industrial 85 |
| Category | Cleaning Equipment |
| Language | English |