15
V-ring
Frame
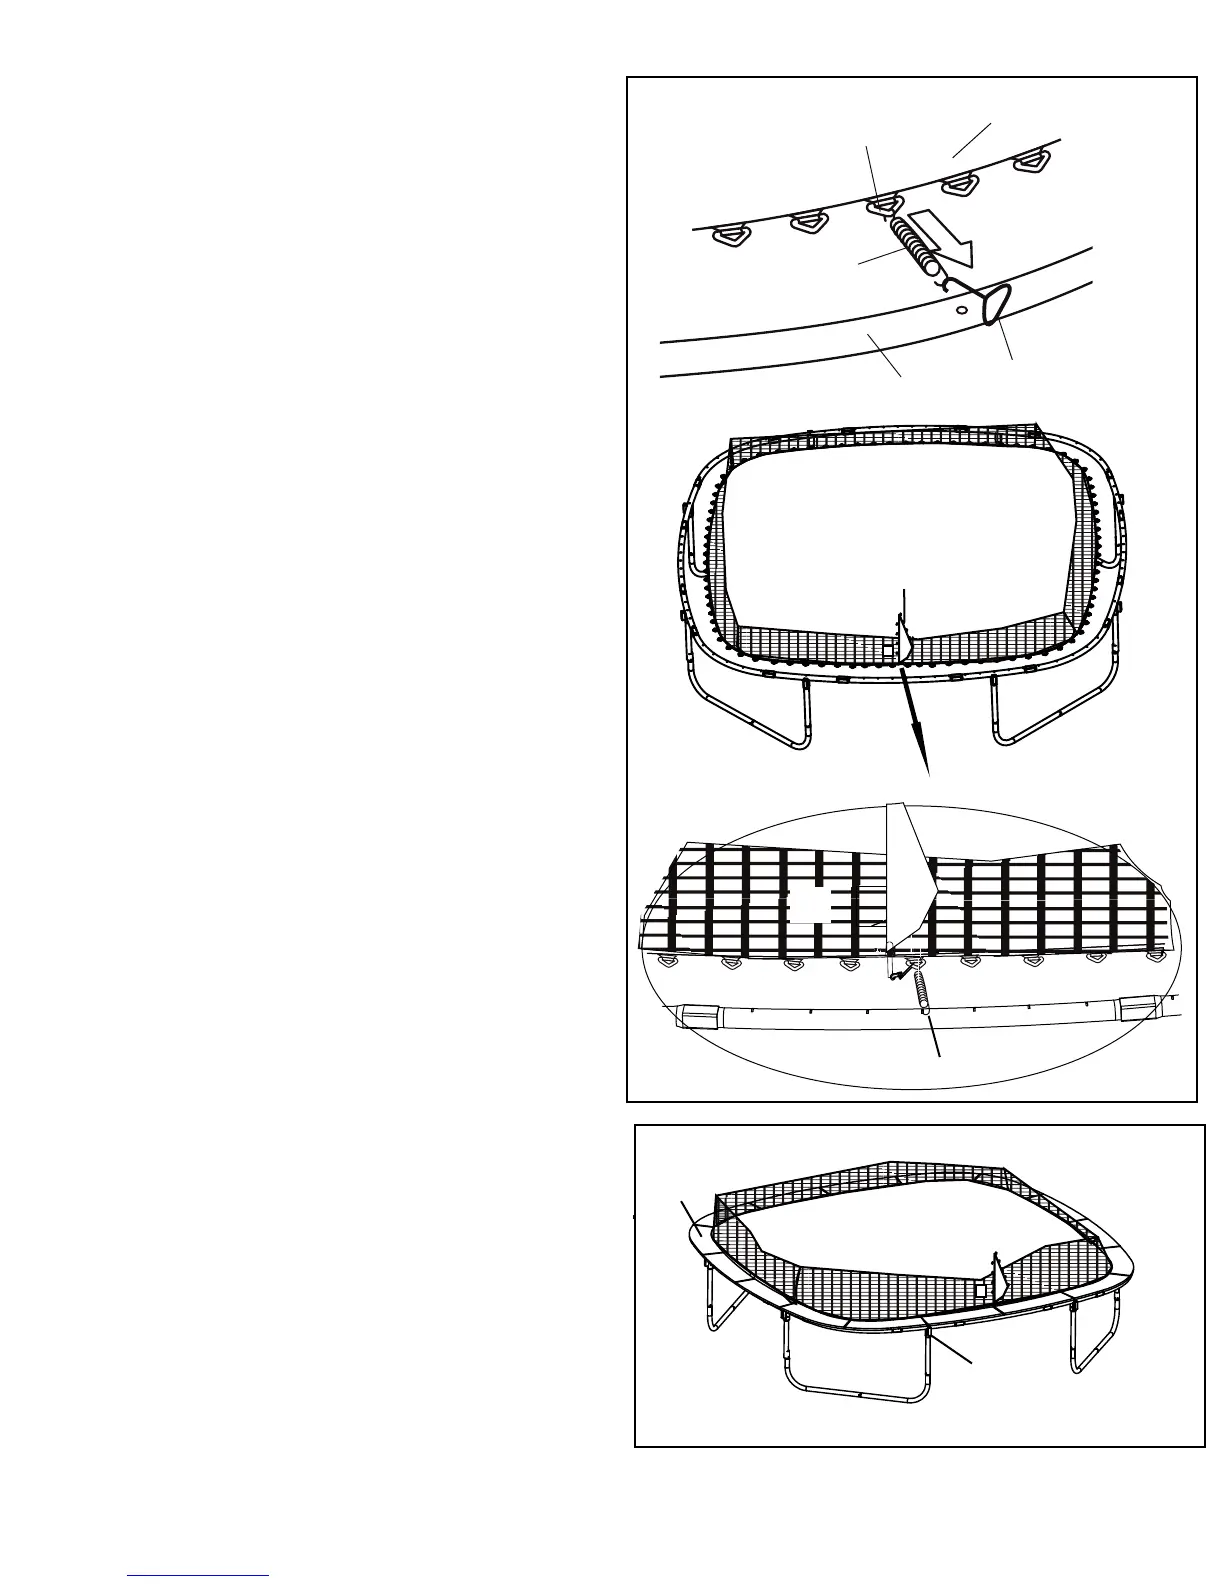
After attaching the first four Springs (10) in step 4, start
from the first spring you attached in step 4. Count exactly 11
V-rings and 11 frame holes in a clockwise direction. Attach
another Spring to the V-ring and frame at this point. Count
21 V-rings and 21 frame holes in a clockwise direction and
attach another Spring. Count 21 V-rings and 21 frame holes
in a clockwise direction two additional times and attach another
two Springs. You will now have 8 evenly spaced Spring
s (10)
attaching the jump mat (12) to the trampoline frame (not shown).
Attach eight Springs (not shown) evenly between the
eight attached Springs in the same manner as before.
Attach sixteen Springs (not shown) evenly between the
sixteen attached Springs.
Continue to attach the remaining Springs between the
previously attached Springs, until all Springs are attached.
Safety Note: For the j ump mat (12) to have the even tension
necessar y for safety in j umping, the Spr ings (10) must be
attached a
s described. As you attach Springs, carefully
count the V-rings and fr ame holes. I f a V-ring or hole is
skipped, r eattach the Spr ings in the proper position.
7
. Lay the Frame Pad (13) on the frame. Adjust the posi-
tion of the Frame Pad so that the slits of the pad are just
above the holes of the socket of frame, as shown.
Inset drawing
11
Caution: Do not use the tr ampoline without the Fr ame Pad
(13). The Frame Pad is designed to reduce the possibility of
inj ur ies due to j umpers coming in contact with the tr am-
poline fr ame. I f you do not have a Frame Pad, contact
your dealer to obtain one. Properly install the Frame Pad
before using the trampoline.
12
6
7
Pad
10
Socket
Align opening of enclosure
as shown here, near the left
of the middle of the two
legs of trampoline.
The first spring