7 Commissioning
SMA Solar Technology AG
Operating manualSTP50-4x-BE-en-2356
Procedure See
2. Establish a connection to the user interface of the product.
There are various connection options to choose from for
this:
• Direct connection via WLAN
• Connection via WLAN in the local network
• Connection via Ethernet in the local network
Section8.2, page61
3. Log into the user interface. Section8.3, page65
4. Select the inverter configuration option. Please note that
the SMAGridGuard code for changing the grid-relevant
parameters must be available after completion of the first
ten feed-in hours or installation assistant. You can request
the SMA Grid Guard code via the Online Service Center.
Section7.3, page58
5. Configure the product and set country data set. Then the
product will begin operation.
Section8.15, page78
6. Make further inverter settings as needed. Section8, page61
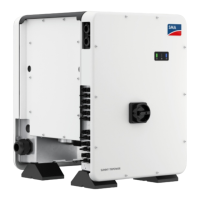
7.2 Commissioning the Inverter
Requirements:
☐ The AC circuit breaker must be correctly rated and mounted.
☐ The product must be correctly mounted.
☐ All cables must be correctly connected.
☐ Unused enclosure openings must be sealed tightly with sealing plugs.
Procedure:
1. To avoid invalid serial numbers from being sent to the data logger, commission the inverter
without being connected to the local network first. To do this, ensure that the RJ45 connection
to the network is not established.
2. Position the enclosure lid of the AC-Connection Unit
on the AC-Connection Unit and first tighten the
upper-left and lower-right screws, and then the
remaining screws crosswise (TX25, torque: 6Nm).
3. Position the enclosure lid of the DC-Connection Unit on the DC-Connection Unit and first
tighten the upper-left and lower-right screws, and then the remaining screws crosswise (TX25,
torque: 6Nm).
 Loading...